
Introduction
Are your contacts receiving iMessages from your email address rather than your phone number? Use these easy procedures to quickly resolve the issue on your iPhone or MacBook.
One of the fantastic and exclusive services available to Apple device customers is iMessage. However, if your Apple ID account is linked to numerous addresses, you may have a situation where an iMessage is received from your email address rather than your phone number.
Fortunately, the problem is minor, and it will just take a minute of your time to resolve and begin sending iMessages from your phone number instead of email. Furthermore, you can fix this problem on both your iPhone and your Mac.
So, without further ado, let’s look at the procedure on the iPhone first, and then go on to fixing the problem on your MacBook.
Change your iPhone’s iMessage Address in the Settings app.
From your iOS device’s Settings app, you may alter your iMessage send and receive address. It’s quick, simple, and won’t take up too much of your time.
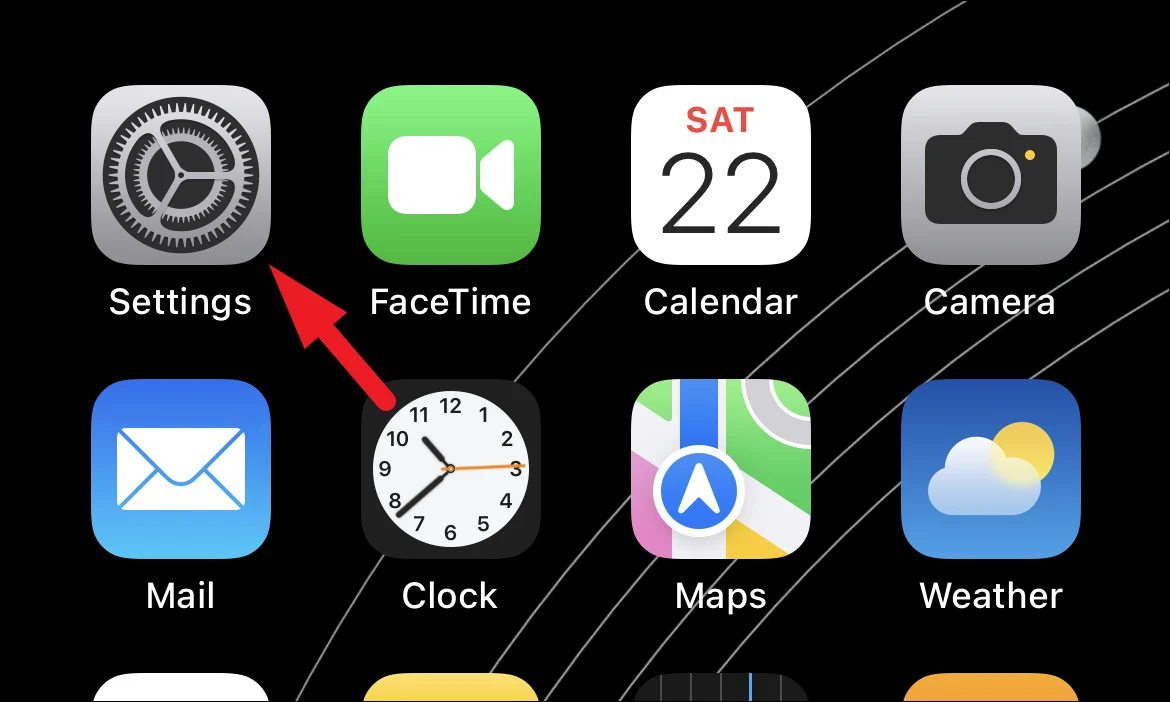
To begin, go to the ‘Settings’ app, which may be found on your phone’s home screen or in the app library.
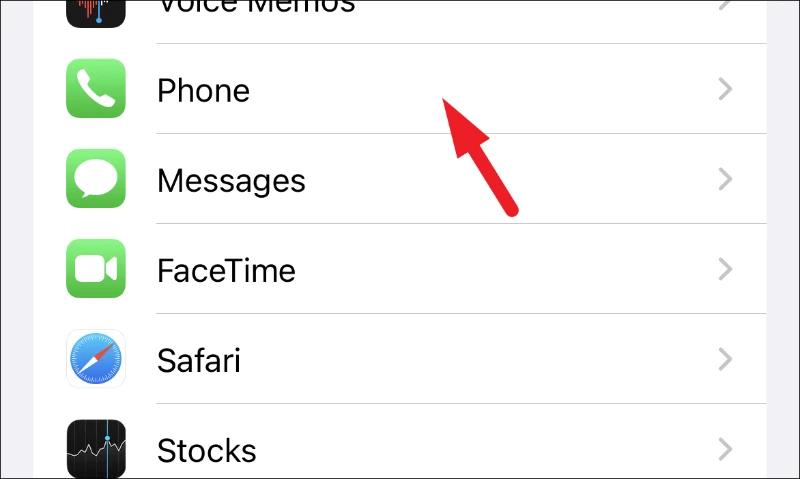
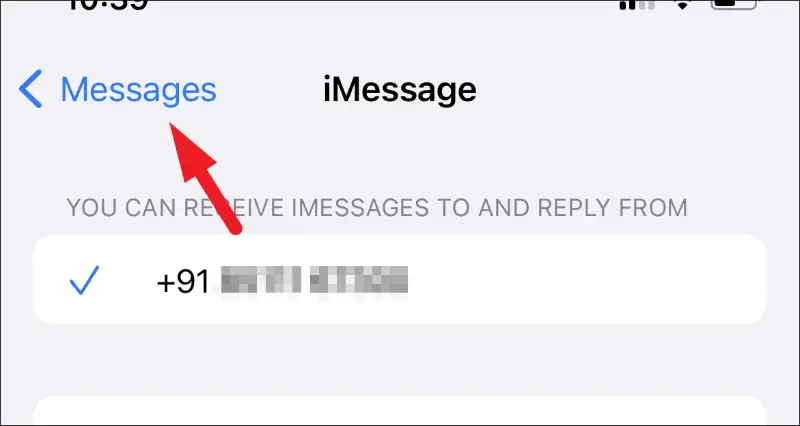
Then, from the Settings screen, find the ‘Messages’ tile and press it to continue.
Then, on the ‘Messages’ settings page, locate and press the ‘Send & Receive’ tile.

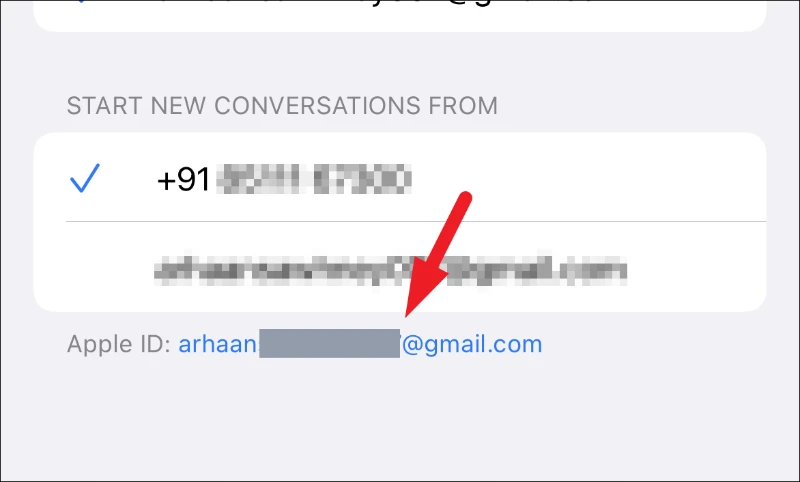
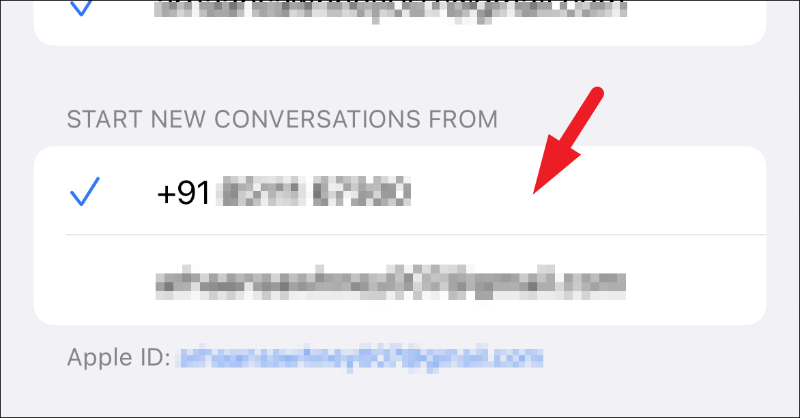
Now go to the ‘Start New Conversation From’ box and enter your phone number. When you pick it, a blue tick appears to indicate that the chats will be begun from your phone number.

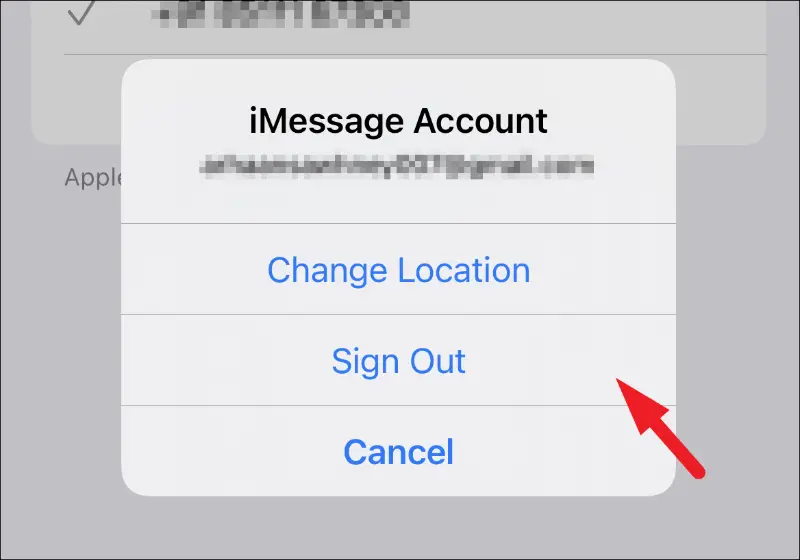
If your phone number is greyed out and you can’t pick it, go to the ‘iMessage’ settings page and press on your Apple ID. A prompt will appear on your screen as a result of this.
Then, to continue, hit the ‘Sign Out’ option.
To return to the previous menu, hit the ‘Messages’ button.
After that, select the ‘iMessage’ option and change it to the ‘Off’ position using the following toggle switch.
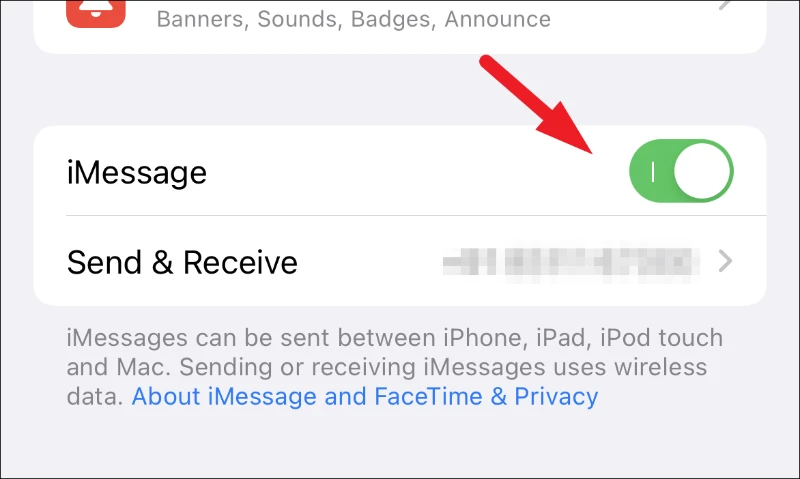
Wait a few seconds before turning it back on. It will activate in a few seconds and populate the list with the addresses that are available in your Apple ID.
Tap the ‘Send & receive’ tile one again after it has been activated.
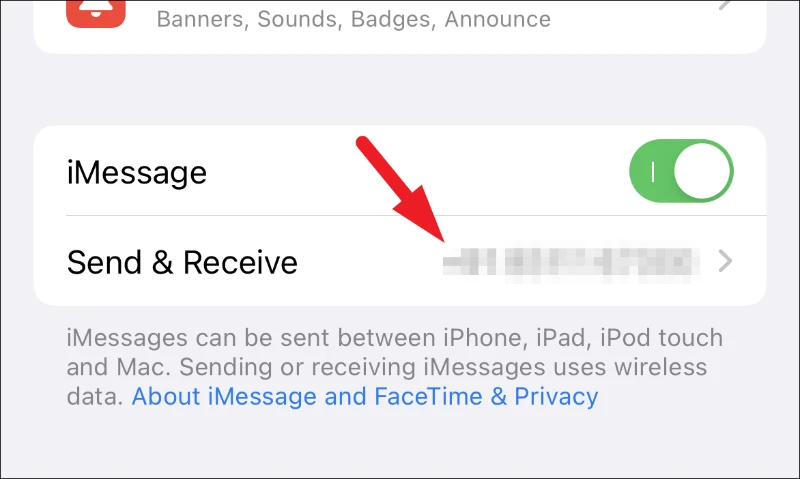
Then touch the ‘Start New Conversations From’ option to choose your phone number.
If your iPhone doesn’t instantly recognize your Apple ID, touch the ‘Use your Apple ID for iMessage’ button on the ‘iMessage’ screen. A prompt will appear on your screen as a result of this.
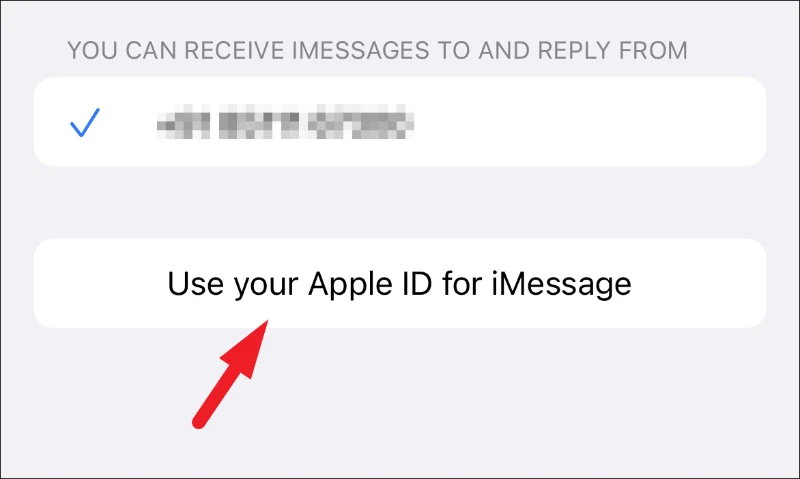
Tap the ‘Sign-in’ button if you want to use the same Apple ID you used on your iPhone. Otherwise, hit the ‘Utilize Other Apple ID’ option to use a different Apple ID for iMessage.

Your phone number will appear under the ‘Start New Conversation From’ area once you’ve checked in. To choose your phone number, tap it.
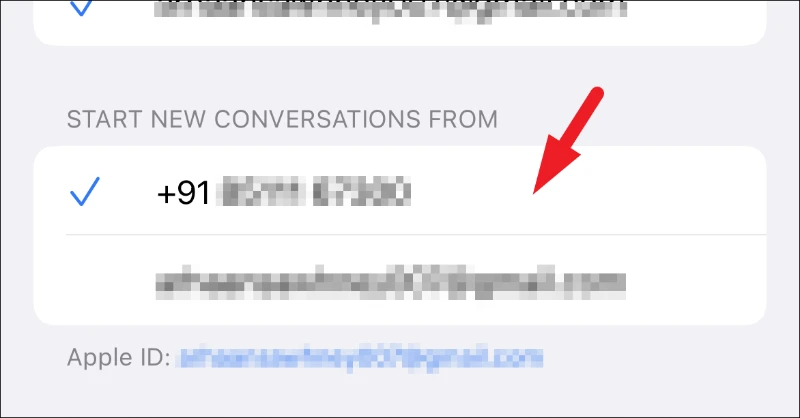
Instead of using your email address, you should now be able to send iMessages using your phone number.
Using the Messages app on your MacBook, change your iMessage address
Changing your MacBook’s iMessage address is as simple as changing it on your iPhone. Some may even find this technique more handy because you have a larger screen and more sophisticated navigation options than simply a finger.
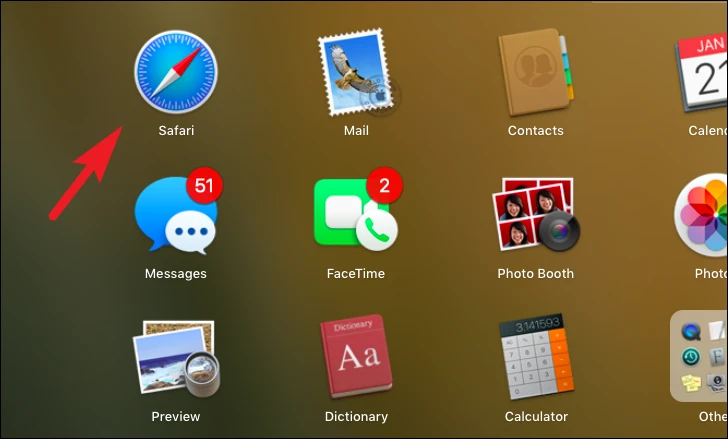
To modify the address in this manner, open the ‘Messages’ program from your macOS device’s dock or launchpad.
Then, in the menu bar, pick the ‘Messages’ tab and then the ‘Preferences’ option to proceed. This will open a new window on your computer screen.

Then choose the ‘iMessage’ tab from the newly opened window. Then, towards the bottom of the page, locate the ‘Start new conversations from’ option and choose it from the drop-down menu. Select your phone number from the drop-down menu.

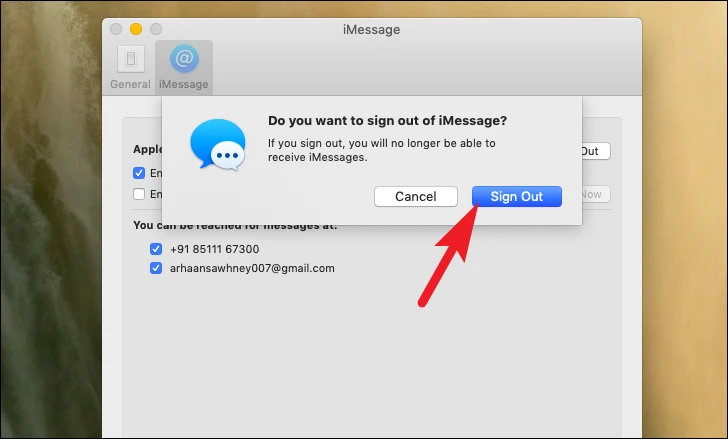
If your phone number is greyed out and you can’t pick it, go to the ‘Settings’ tab and find the ‘Apple ID’ option, then click the ‘Sign Out’ button next to it. A prompt will appear on your screen as a result of this.
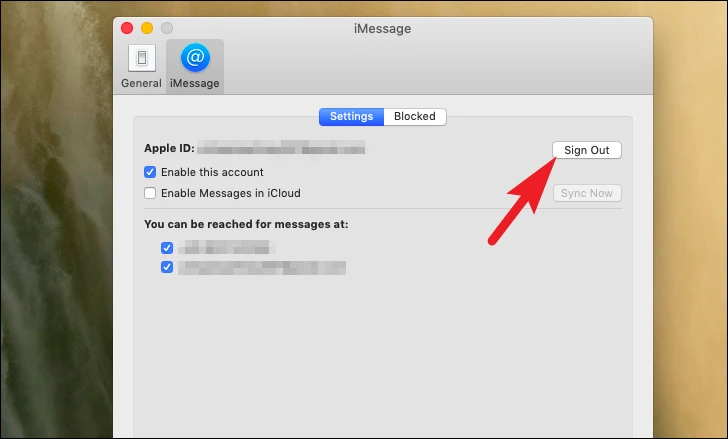
Confirm that you want to sign out by clicking the ‘Sign Out’ button on the prompt.
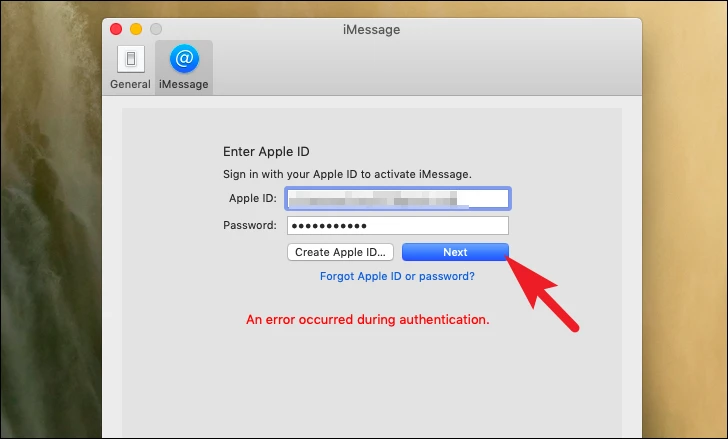
Sign in by providing your Apple ID and password and clicking the ‘Next’ button once you’ve signed out.
Once you’ve logged in, look for the ‘Start new discussions from:’ option and select the dropdown menu directly beneath it, as demonstrated in the previous section of this article. You should be able to choose your phone number immediately.
That’s all there is to it; now you know how to repair the problem where your iMessages are being sent from your email address rather than your phone number.