
Introduction
By default, Windows 10 utilizes your ISP’s DNS server, although this may be changed. Other DNS servers provide extra capabilities such as increased security and privacy, page blocking, and may even enhance your performance.
When you type a domain name into your browser, such as facebook.com, your computer does not know how to connect to the website. It must first get an IP address. It requests a DNS server for the domain name you specified to get the IP address, and the DNS server returns the IP address that corresponds to the domain name. With your IP address in hand, your computer navigates to the website you requested.
However, not all DNS servers are the same; some are quicker than others, and others provide extra protection. Before you update your DNS server, you should choose the appropriate DNS server for your purposes. Google Public DNS and Cloudflare’s Public DNS are two popular solutions.
The Network Connections window is the most convenient place to modify your DNS server. To access Network Connections, go to Start and type “network connections” into the search box, then press “Open” or enter.

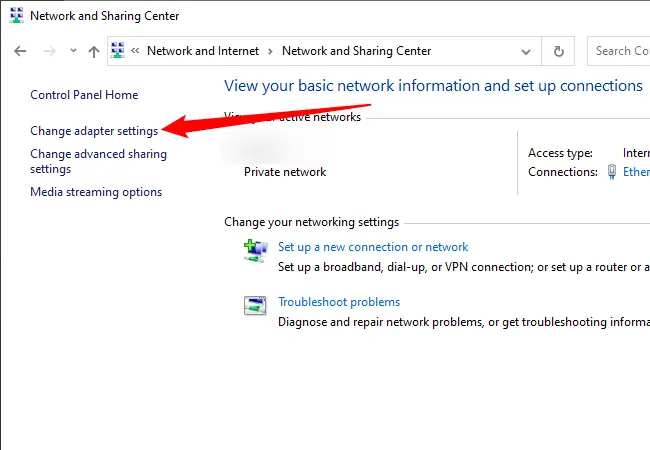
Alternatively, you may access it through the Control Panel. Go to Network and Internet > Network and Sharing Center, then click “Change Adapter Settings” in the top left-hand side of the window.
Because each network adapter in your PC might have its own DNS server settings, you’ll need to alter the settings for each one separately.
Examine the symbols carefully if you’re unsure which adapter you’re using. When you’re connected to Wi-Fi, the active Wi-Fi Adapter will have green bars next to it and will display the network name. If you’re utilizing a wired Ethernet connection, the network name will be shown by the Ethernet adapter. Disconnected network adapters will have a large red “X” next to them, as seen above on a disconnected Wi-Fi adapter:
![]()
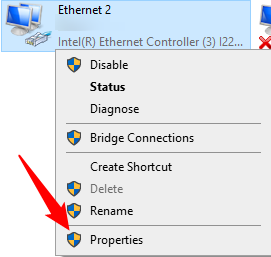
Once you’ve determined which network adapter you’re using, right-click it and choose “Properties.”
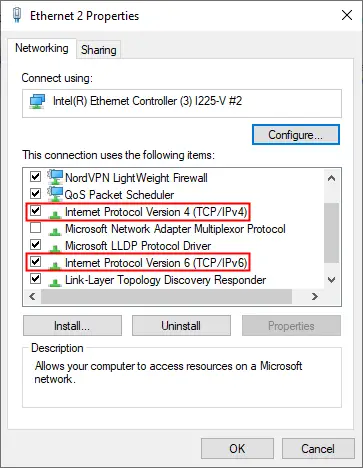
First, in the Properties box, look for “Internet Protocol Version 4 (TCP/IPv4)” and “Internet Protocol Version 6 (TCP/IPv6).”
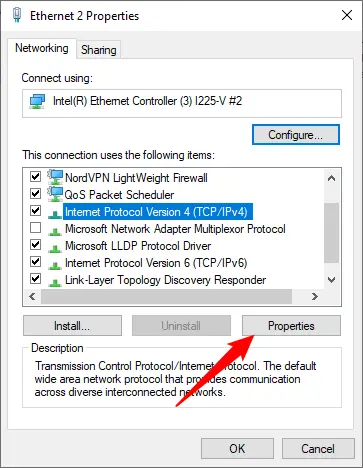
By selecting it, choose “Internet Protocol Version 4” and then click “Properties.”
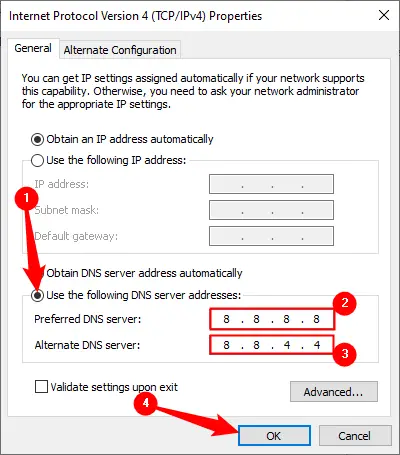
Click “Use the Following DNS Server Addresses,” then fill in the fields with the DNS servers you wish to use. When you’re finished, press the “OK” button.
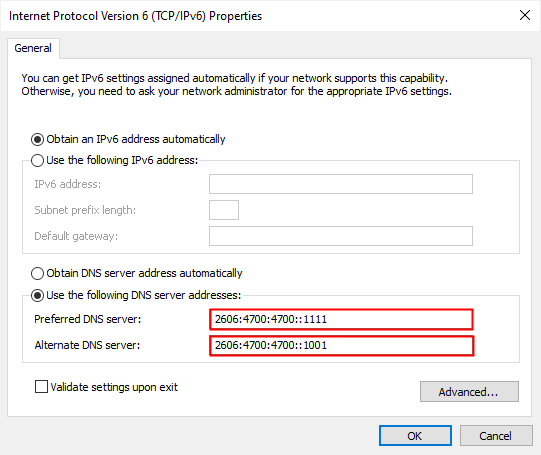
Rep those procedures for “Internet Protocol Version 6,” but this time use the IPv6 address of the DNS server. All major DNS servers, such as Google’s and Cloudflare’s, will provide you with both IPv4 and IPv6 addresses.
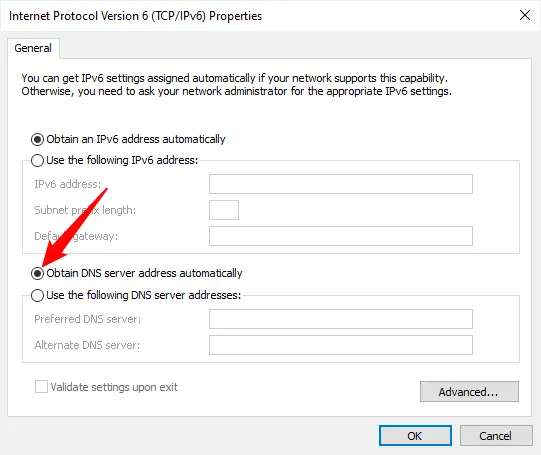
If you changed your DNS server and your internet suddenly stopped functioning, the first thing you should do is reset everything to automatic mode. A mistake in the new DNS address may cause the DNS server to become unavailable, in which case your computer will be unable to determine which domain name belongs to which IP address.
Return to the box where you specified your custom DNS server IP address and choose “Obtain DNS server address automatically” to resolve the issue.
If setting it back to automatic doesn’t work right away, rebooting your computer should do the trick.