Introduction
The revamped Task Manager in Windows 11 offers an always-on-top mode. When you enable it, the Task Manager will always launch in the top-most position going forward. Even in circumstances when the default Task Manager won’t show up, the always-on-top Task Manager ought to function.
You may open the Task Manager by pressing Ctrl+Shift+Esc, right-clicking an empty space on the taskbar, typing “Task Manager” into the Start menu, or hitting Ctrl+Alt+Delete and choosing “Task Manager” to activate Always on Top Mode.

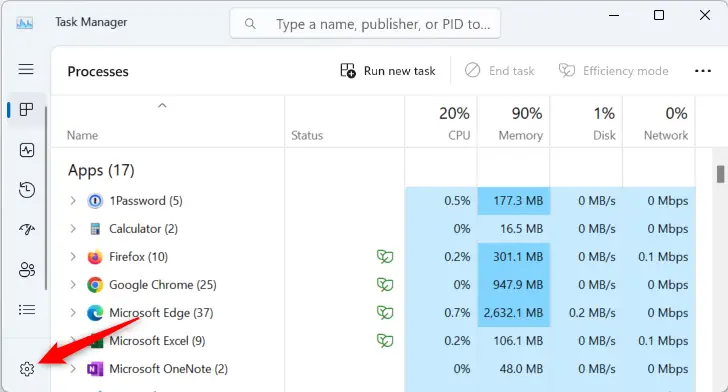
In the Task Manager window’s lower-left corner, select the gear-shaped “Settings” option. Click the menu button in the top-left corner of the window if you can’t see it.

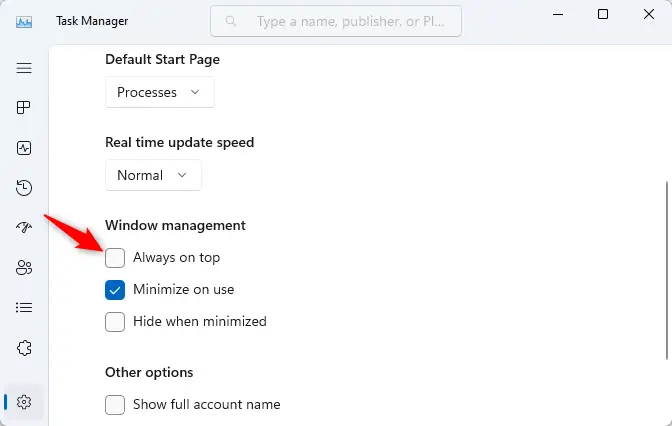
Set the “Always on top” checkbox to “On” in the Window management section. That’s all; the Task Manager will always be displayed first. Every time you launch it, it will stay at the top until you choose to turn off this feature.

The always-on-top setting will let the Task Manager show in more circumstances, according to Microsoft’s Jen Gentleman. In Windows 11, you may always open a Task Manager window by pressing Ctrl+Shift+Esc. It will open in always-on-top mode if you have it set to “Always on Top,” and it should display above other program windows that could otherwise fill your whole screen. In typical circumstances, it’s conceivable for a program to take up your full screen and the Task Manager to launch behind it, such as a stalled PC game.
Although the procedure is slightly different because the Task Manager was revamped for Windows 11, you can also set the Task Manager to always be on top on Windows 10. On Windows 10 or Windows 11, you may also use Microsoft’s Always on Top PowerToy to make a window always the top window.

