
Introduction
Would you like to utilize your Windows 11 desktop in a different part of your house? Instead of walking there, you may use your phone or tablet to get there. But first, make sure Remote Desktop is turned on on your machine.
How to Use a Remote Desktop Connection
You may connect to your computer using a remote access tool by using the Remote Desktop feature in Windows 11. Following that, you may perform simple actions such as checking downloads, installing apps, or copying files from your PC.
We recommend utilizing Remote Desktop solely on your home network with Network Level Authentication, which operates as a secure network login layer. So, before you can access the distant machine, you’ll need to verify yourself on the network using your Windows user account password.
- We do not recommend exposing the Remote Desktop service to the internet directly. If you wish to use Remote Desktop from outside your local network, Microsoft suggests setting up your own VPN. You might also want to look at other third-party remote desktop programs.
On Windows 11, enable Remote Desktop
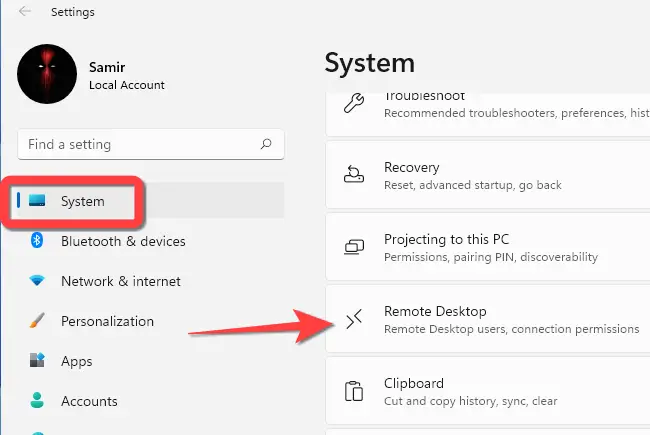
To begin, pick “Settings” from the pinned applications by clicking the “Start” button. Alternatively, you may quickly access the Settings app by pressing Windows+i on your keyboard.
![]()
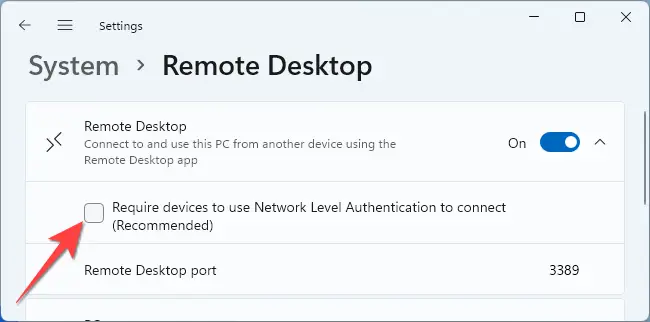
From the sidebar, pick “System” and then “Remote Desktop” from the right-hand side.
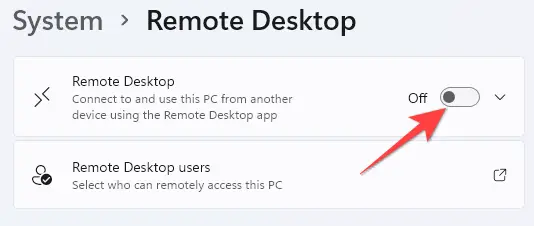
On the “Remote Desktop” switch, turn it on.
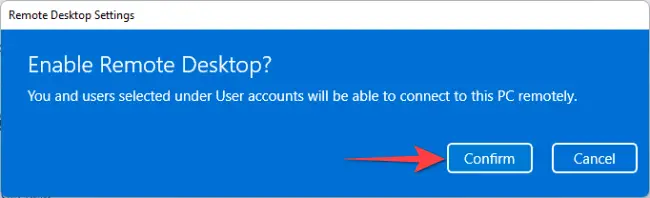
On the User Account Control (UAC) prompt, select “Yes” and then click the “Confirm” button on the window that appears.
Then, next to the switch, pick the drop-down button.
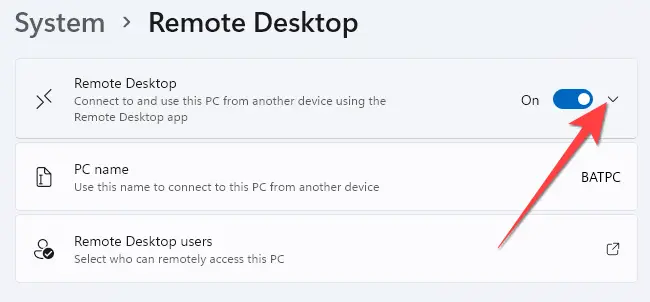
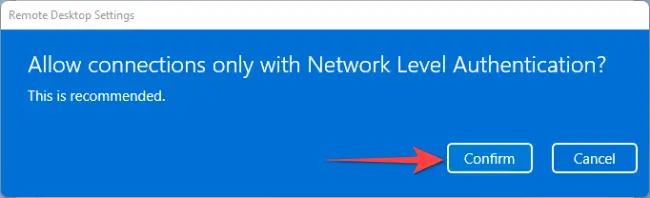
“Require devices to use Network Level Authentication Connect (Recommended)” should be checked. To authenticate yourself on the local network after enabling this option, you’ll need to add the Windows user account password of the remote PC. The Windows login screen will appear only after successful authentication.
To enable that extra layer of security for using Remote Desktop, select “Yes” on the UAC prompt and then click the “Confirm” button.
To gain access to your computer, use the Remote Desktop App
To use your PC remotely, you can use any free remote access tool, but only a few have a mobile app. We’ll show you how to use Microsoft’s Remote Desktop program, which is available for Windows, macOS, Android, iPhone, and iPad.
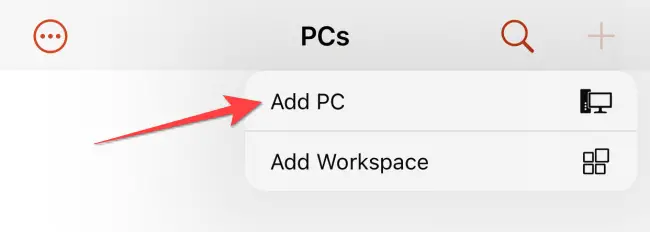
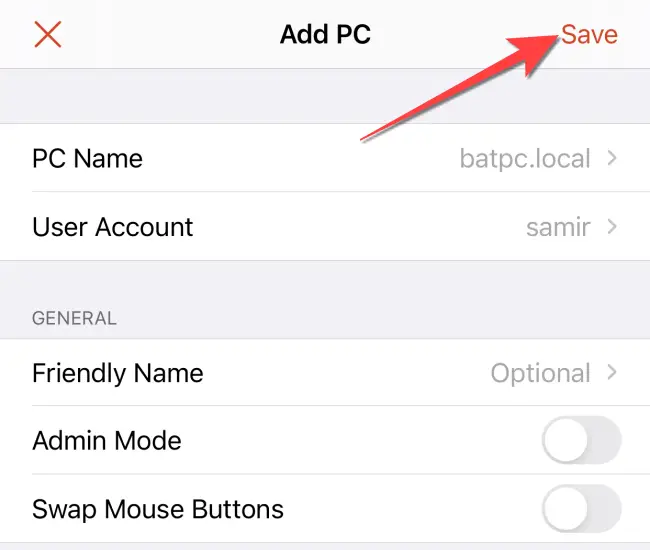
Tap the addition (+) symbol in the top-right corner of the Remote Desktop program.
Then, enter your PC’s name as well as your Windows user account information. Other choices such as “Clipboard,” “Microphone,” “Storage,” and others can then be toggled on.
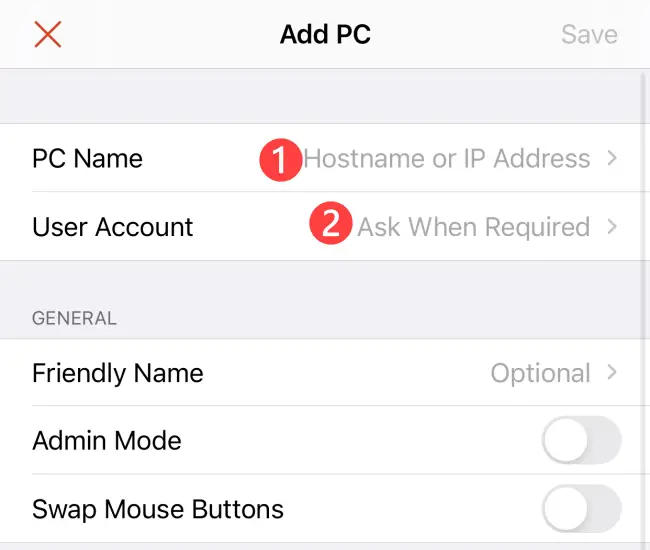
To save all of your changes, click “Save” in the top-right corner.
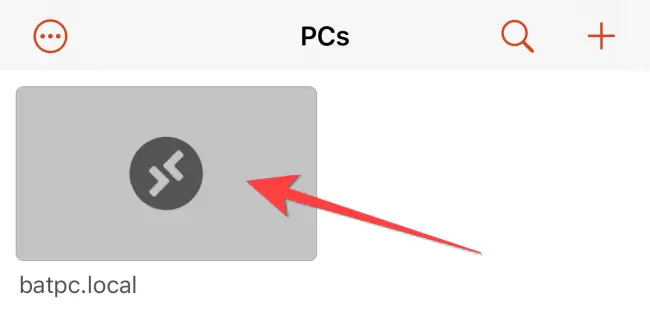
Then, to initiate a remote desktop session, touch on the card with your PC’s name.
That concludes the discussion. Keep in mind that if you aren’t going to use Remote Desktop for a while, you should turn it off.
