
Introduction
You may keep particular images or photo albums private on your Facebook account if you don’t want others to view them. We’ll teach you how to accomplish it from both your PC and your mobile phone.
What You Should Know Before Changing the Privacy Settings on Your Photos
When you adjust the privacy settings for your images, keep in mind that your cover photo and profile photo will always be available to the public. If your picture was submitted by another person, you may untag yourself from it, but you can’t modify the visibility of the photo.
Only the person who uploaded the album has the ability to alter the album’s privacy settings. In addition, if your picture was posted as part of an album, you’ll need to adjust the album’s privacy settings to conceal it.
If you like, you may later unhide your images and albums so that everyone can view them.
Hide a Facebook Photo
Follow these parts if you want to make a certain picture in your profile private.
Make a Desktop Photo Private
Launch a web browser on your desktop computer and go to the Facebook website. If you haven’t already, sign in to your account.
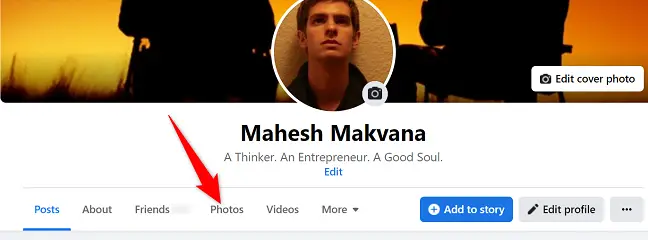
To access your profile, click your profile name in the top-right corner of Facebook.

Click “Photos” in the tab list under your name on the profile page.
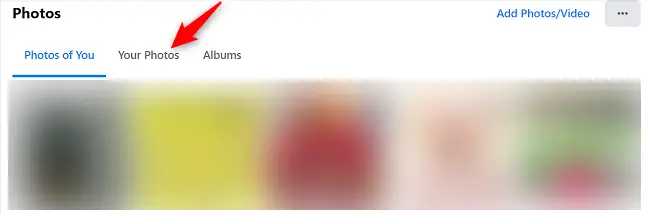
Select “Your Photos” from the “Photos” tab.
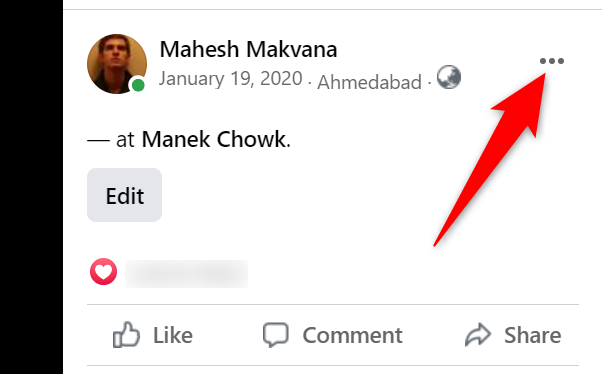
Choose the picture you want to make private. When your picture opens in full screen mode, click the three dots in the top-right corner.
Select “Edit Post Audience” from the menu that appears.
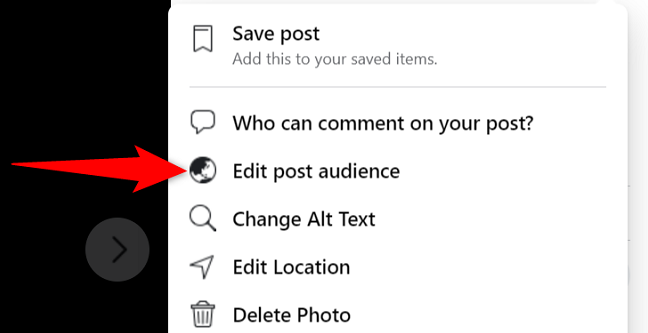
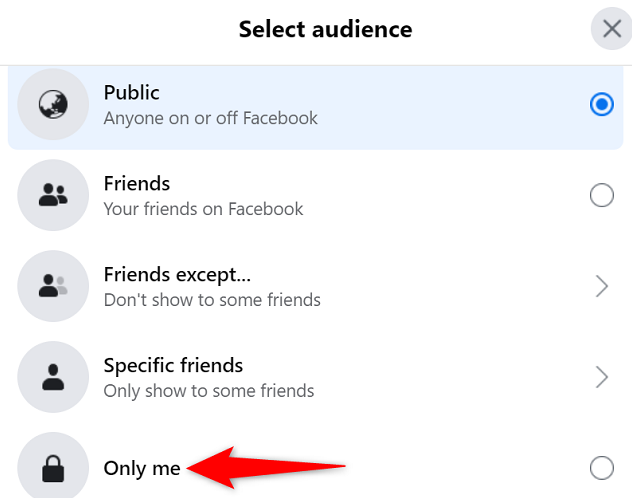
You may pick who can view your picture in the “Select Audience” section. Choose “Only Me” if you want to conceal your picture from everyone.
Your picture will be instantly made private by Facebook, and you’re done.
There are other methods to preserve your privacy on Facebook, such as this.
How to Make a Picture Private on a Mobile Device
To conceal photographs from your phone, first open the Facebook app on your device.
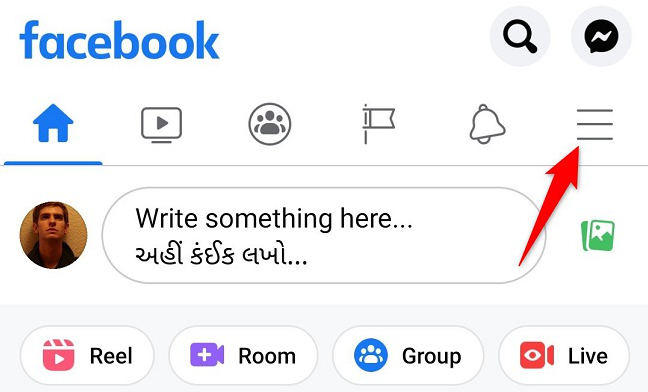
Tap the three horizontal lines in the Facebook app. These lines may be seen in the bottom-right corner of an iPhone or iPad. These lines appear in the top-right corner of Android.
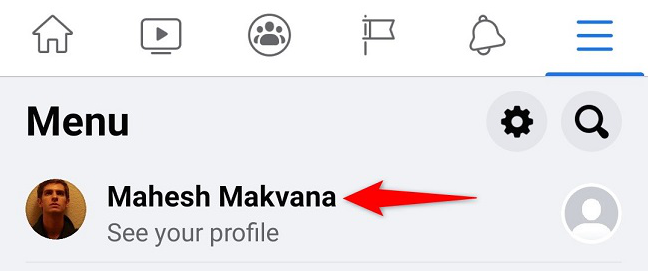
Tap your profile on the “Menu” page.
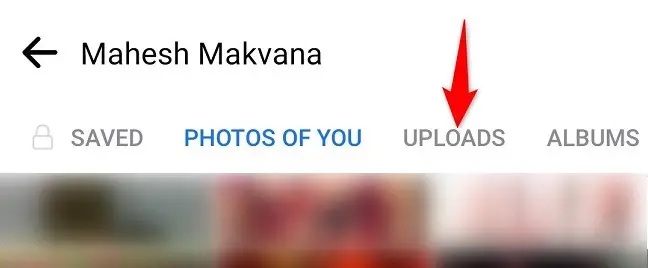
Scroll down and tap “Photos” on your profile page.
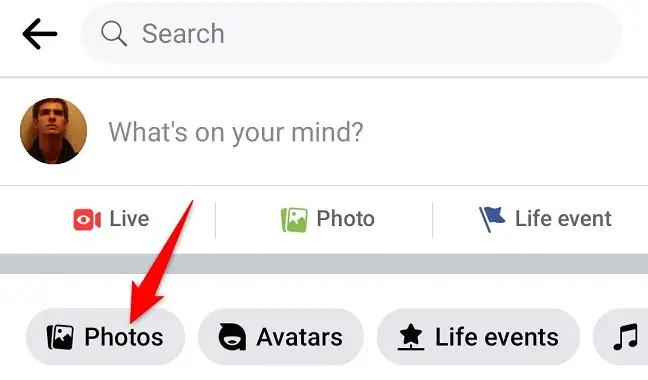
Tap “Uploads” at the top of the photographs page.
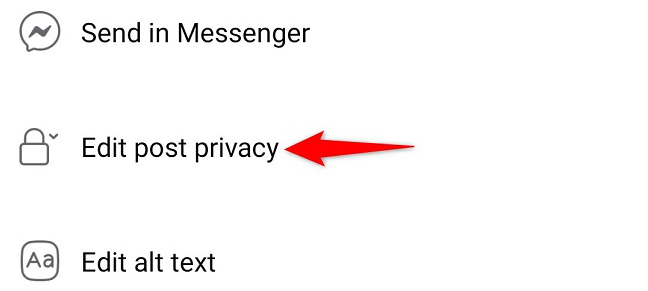
Choose the picture you want to hide. Then, in the top-right corner of the image, press the three dots.

Select “Edit Post Privacy” from the menu that appears.
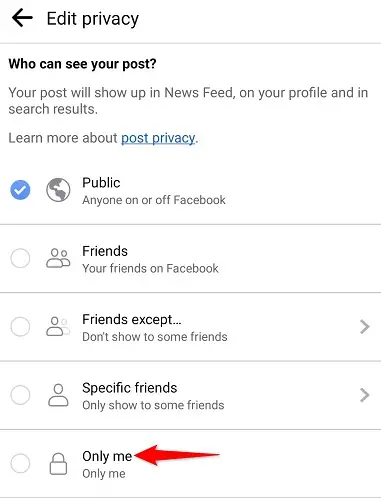
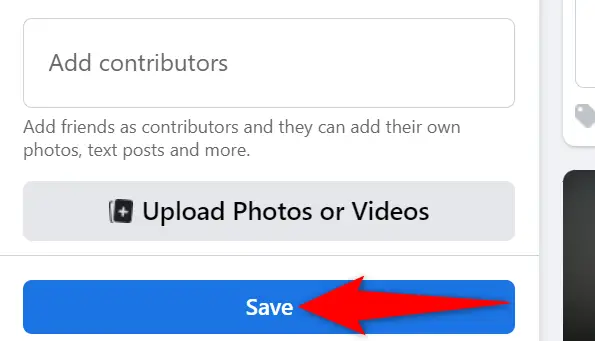
Tap “See More” to see all possible settings on the “Edit Privacy” page. Then, decide who will be able to view your picture. Select “Only Me” to conceal your picture from everyone.
Facebook saves your changes immediately, so you don’t have to do anything.
If you don’t want a picture on your profile, you may easily erase it on Facebook.
Invisibility of a Photo Album
Facebook also allows you to make whole picture albums on your account private. Here’s how to accomplish it on a desktop and a mobile device.
How to Make an Album Invisible on the Desktop
If you’re on a desktop, open a web browser and go to the Facebook website. If you haven’t already, sign in to your account.
Click your profile name in the top-right area of Facebook.
Click “Photos” in the tab list at the top of your profile page.
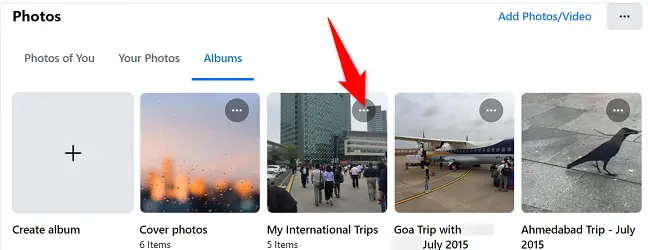
Select “Albums” from the “Photos” screen.
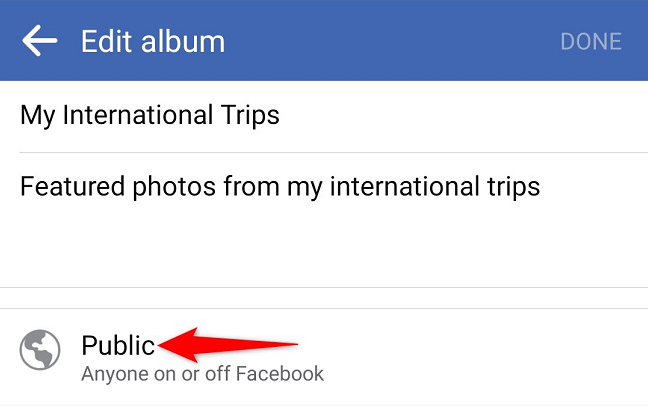
Locate the picture album you want to hide under the “Albums” tab. Then, in the top-right corner of that album, click the three dots.
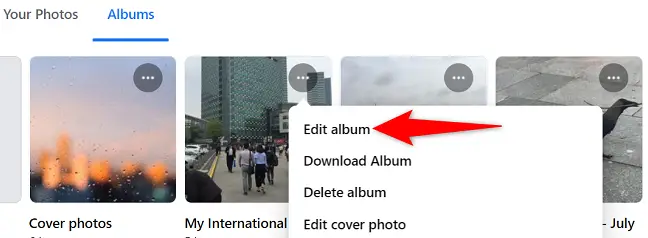
Select “Edit Album” from the three-dot menu.
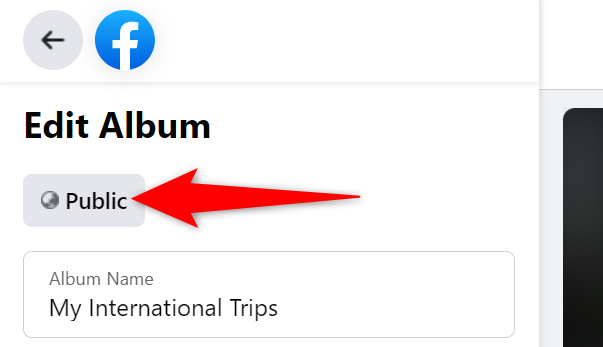
Click the current audience on the left sidebar, just below “Edit Album.”
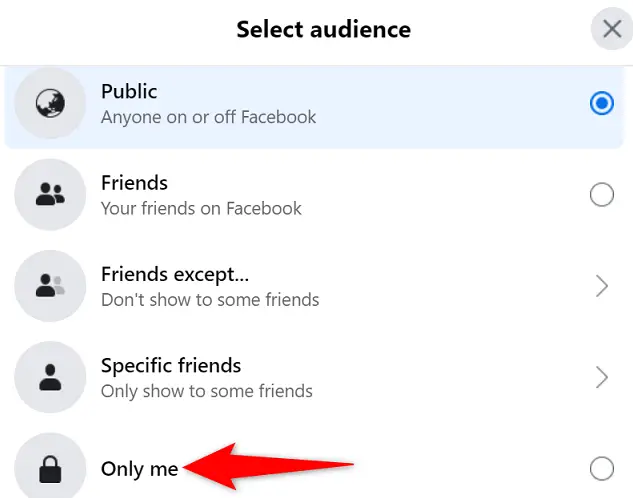
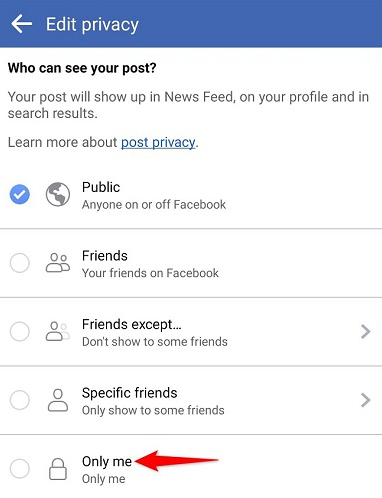
On the “Select Audience” window, choose who can see your photo album. Select “Only Me” to make the album invisible to everyone else.
Back on the “Edit Album” screen, click “Save” at the bottom of the left sidebar.
And your chosen picture album is now hidden from public view on Facebook. You may also choose to conceal your Facebook postings.
Make an Album Invisible on a Mobile Device
To make a picture album private from your phone, first open the Facebook app.
Select the three horizontal lines in the Facebook app. These lines may be seen in the bottom-right corner of an iPhone or iPad. These lines show in the top-right corner of Android.
Select your profile from the “Menu” tab.
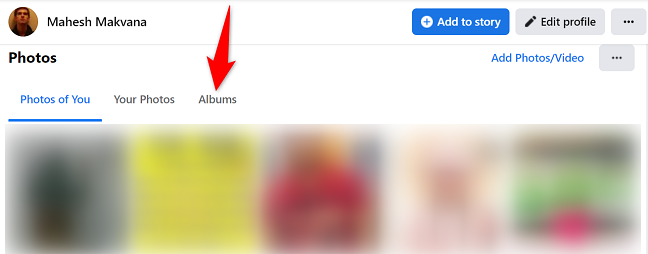
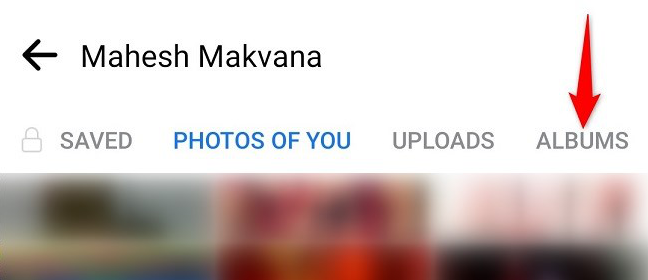
Scroll down to “Photos” on your profile page.
Tap “Albums” at the top of the photographs page.
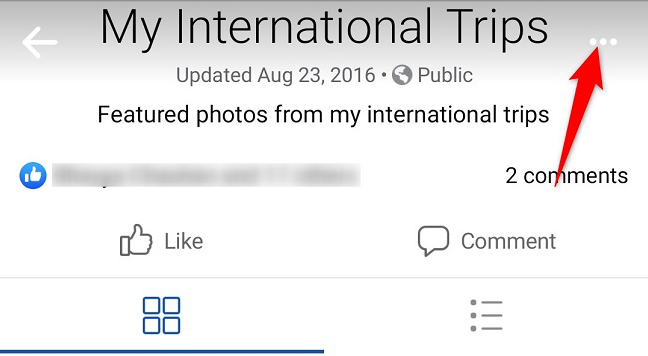
To conceal a picture album, choose it. Then, in the upper-right corner of the album page, hit the three dots.
Choose “Edit.”
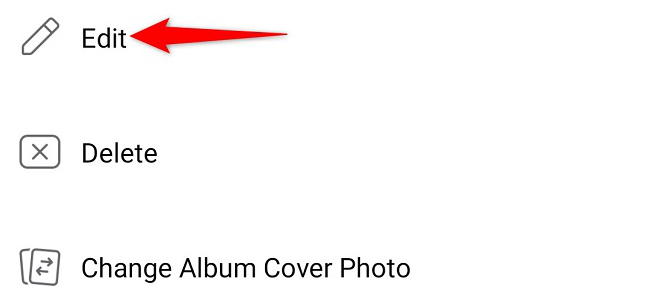
Make use of your album’s present audience.
Select who may access your picture album on the “Edit Privacy” tab. Tap “Only Me” to conceal the album from everyone else. Then return to the previous page and hit “Done.”
Everyone except you now has access to your chosen picture album. You’re ready to go.
