Introduction
By default the search box is displayed in the bottom left corner of the Windows desktop, if you don’t want the search box to appear here, you can hide it with a simple setting, this tutorial will introduce you to how to hide the search box on the desktop in Windows 10 and Windows 11 respectively.
Methods
Hide the Search Box on the Desktop in Windows 10
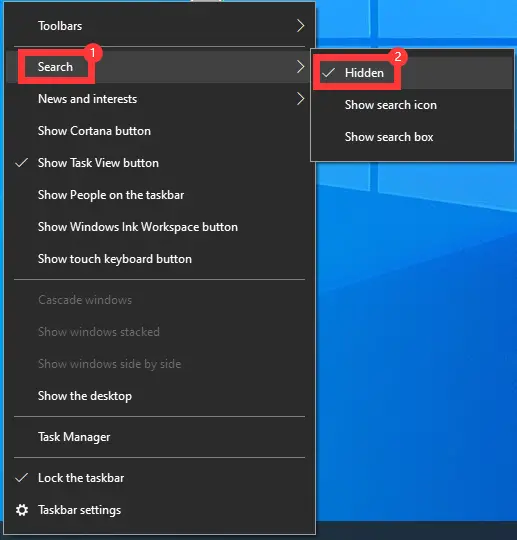
It is very easy to close the search bar in Windows 10, just right-click on the taskbar at the bottom of the desktop, select “Search” in the pop-up menu, and select the “Hide” button in the sub-menu.

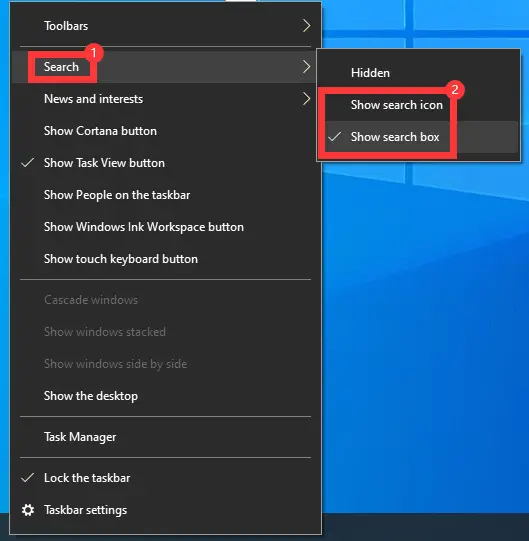
Right-click on the taskbar at the bottom of the desktop, click the “Search” button in the pop-up menu, select “Show search icon” or “Show search box” in the submenu to Show the desktop search box.

Hide the Search Box on the Desktop in Windows 11
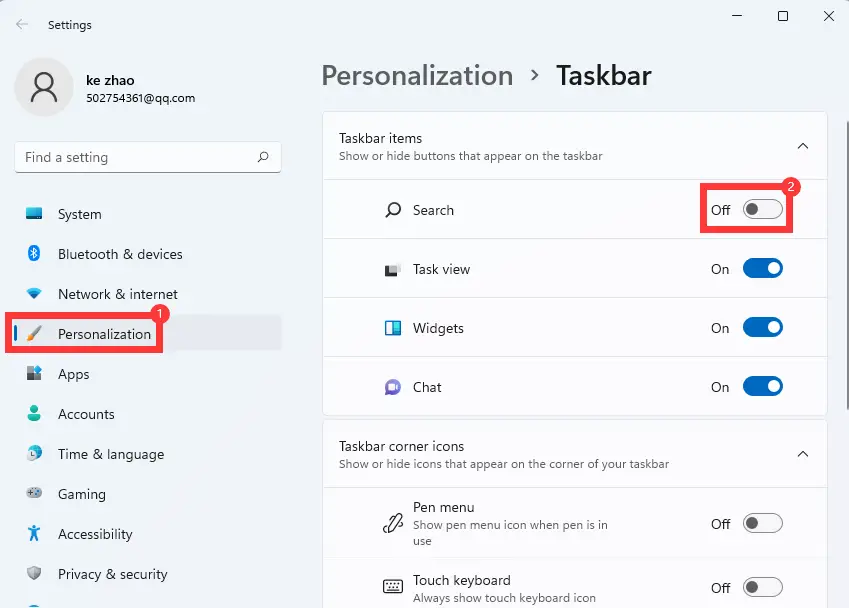
The menu’s layout of Windows 11 is very different from that of Windows 10, and you cannot set the search box to close directly from the right-click menu in the taskbar. You need to set it in Windows 11 system settings, apply the shortcut key “Windows+i” or select “Settings” from the right-click menu of the desktop “Start” button to enter the system settings, select the “Personalization” icon in the left list of the system settings window, in the right “Taskbar Items” area you can set the buttons to show or hide on the taskbar, in the icon list, The first “search” icon, after turning off the switch to complete the settings, if you want to show search icon again turn on the switch bar.

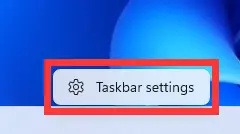
Right-click on the Windows 11 desktop taskbar to bring up the “Taskbar Settings” icon, and then click on it to quickly access the taskbar icon settings.

Conclusion
In a nutshell, Windows 10 can be set up by right-clicking the taskbar at the bottom and then finding the search button directly in the pop-up window, Windows 11 requires access to the System Settings panel to set which icons need to be displayed on the taskbar.

