
Introduction
If you have an old shirt that you really like and don’t want to throw it away, you might create a pillowcase out of it. If you have a sewing machine, the technique is simple and can be completed in about an hour. In this essay, I’ll teach you how to transform an old shirt into a memory pillow.
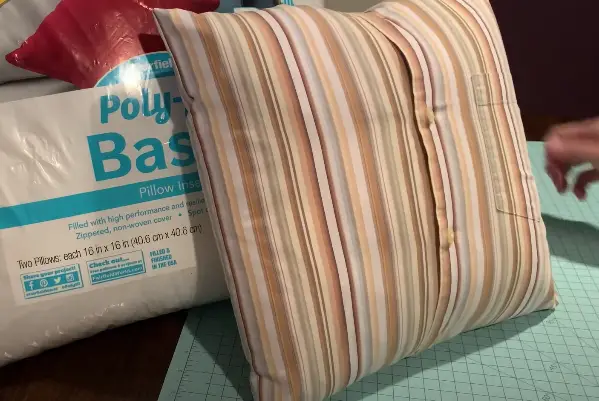
Pillow Insert Size Measuring
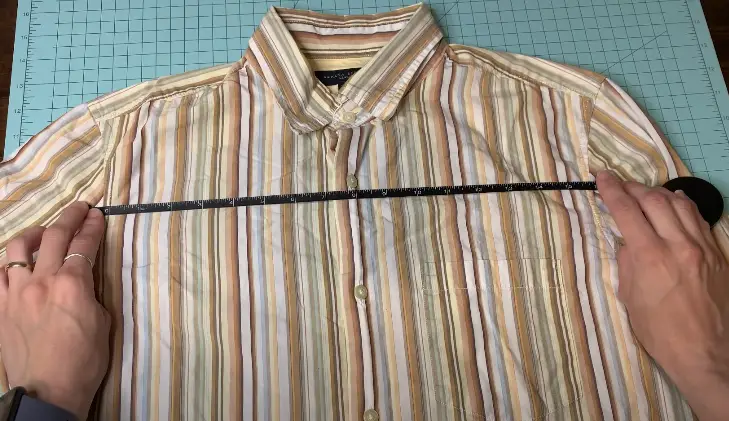
To begin, measure your shirt between the sleeve scenes to determine the size pillow insert fill you will require. The length of this shirt is somewhat more than 15 inches. As a result, I’ll require a 14-inch pillow fill.
Pillow Fill Measuring
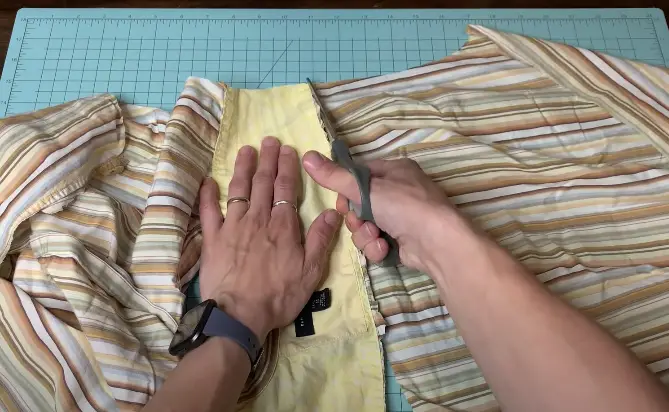
The idea is to round down the shirt measurements between the sleeve scenes to the nearest odd inch. Because of this. Pillow fills are available in 14-inch increments and continue all the way up to 24-inch increments. Now that we’ve determined how wide our pillow should be, we can begin cutting up the side seams and along the sleeve seams. This doesn’t have to be precise, so use the scissors and hack it up quickly because we’ll be using a Rotary cutter later to acquire the exact square measurements we require. Make sure you reach as close to the sleeve seam as possible, especially at the front, as this is typically quite tight, especially if the shirt has a pocket on the front. Cut the collar or any other appears off the backside. As a result, the backside of your cushion will be entirely made of fabric. There are no seams. After that, cut the collar off the front as well. When all of the scenes have been cut and divided, begin ironing the shirts to create lovely flat panels. Before moving on to anything else, I start with the rear of the front panel, making sure that all of the fabric by the buttons is nice and smooth. After you’ve ironed everything, it’s time to start cutting the fabric.
Fabric Measuring and Cutting
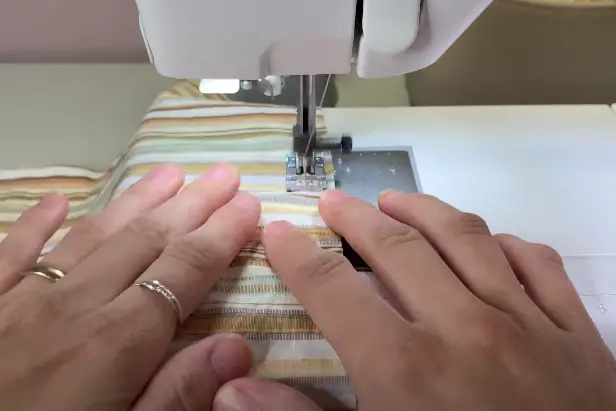
I begin with the rear panel, align it, and cut straight across. That way, I have one lovely straight edge to work with that is also in line with the rest of my mat. Then I trimmed everything down to 15 inches, leaving me with a 15 by 15 inch square that would fit in my 14 inch pillow form with half inch seams. I do the same thing with the front panel, attempting to get as near to the very top edge as possible while still leaving enough room between the seam edge and the button. Then I position my buttons at 7 1/2 inches, which is midway between 0 and 15, and cut everything else at 15 inches.
Now that we’ve cut two 15-inch blacks, we can start sewing them together. Because this blouse contains buttons, I prefer to triple stitch just where the buttons are for a little more durability. Also, because it’s a button-down shirt, I don’t need to leave a gap for my pillow form; I can just unbutton the shirt when I’m through stitching all the way around the borders. If you’re stitching a polo or a T-shirt, you should leave one side open. This allows you to insert your pillow shape.
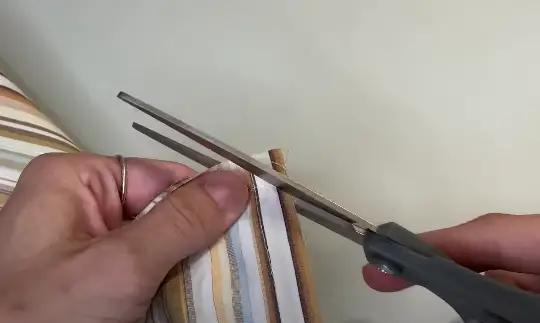
Trimming the Corners and Inserting the Pillow Form
The following stage is to shave some fat from your waistline. When we flip it right side out, we’ll be able to push those out, and they’ll be nice and square.
Last but not least, stuff your fresh pillowcase with your pillow fill.We created a really simple cushion today. You can do a lot of different things with these. Because this cushion is so simple, you can do a lot of different things with it. You can use some of the sleeve material and other scraps to make bias tape to wrap around it and add a little more of a decorative touch.
Embroidery
Following the ironing phase, I embroidered the first cushion I produced. If you don’t have an embroidery machine, you may buy patches online or hooped up one side of your shirt and embroider that. You can iron a saying onto your shirt if you still want one. I’ve also seen a charming variant where folks put suspenders on their Plaid shirts and stuff them into the pillow. So now that you know how to construct this cushion and how to correctly measure it, as well as what size pillow insert to use for whatever shirt, you can actually take this design and use it anyplace.
I hope you found this article useful, If you have any queries, please post them in the comments area below.Thank you for taking the time to read this.
References
- How To Sew a Memory Pillow. (2020, May 26). YouTube.
