
Introduction
Windows 10 and 11 PCs search for updates automatically and install any updates that are found. You can exert some control over this by scheduling Windows updates, but these choices are concealed. Windows Update really want to update Windows 10 automatically.
Professional, Enterprise, and Education versions of Windows 10 and Windows 11 have access to group policy and registry settings for this, but even Home editions of Windows 10 and Windows 11 allow you to disable automatic updates.
Prevent Automatic Update Downloading on a Specific Connection
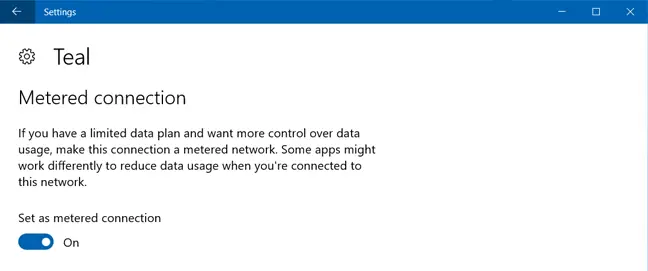
When you mark a connection as “metered,” Windows will not automatically download updates for that connection. Certain kinds of connections, such as cellular data connections, are automatically metered by Windows. You may, however, make any connection a metered connection.
If you don’t want Windows 10 or Windows 11 to automatically download updates over your home network connection, just configure it as a metered connection. When you connect your device to an unmetered network or re-enable the network to which it is connected, Windows will automatically download updates. And, yes, Windows will retain this configuration for each unique network, allowing you to detach and rejoin as needed.
Do you have a data-limited Internet connection? Simply label it as metered, and Windows 10 will no longer automatically download updates for it. If your connection provides unlimited downloads at a certain period, such as in the middle of the night, you might set the connection as unmetered during these times to download updates and then label it as metered once the updates are downloaded.
To alter this choice for a Wi-Fi network, open the Settings app, go to Network & Internet > Wi-Fi, and then select the name of the Wi-Fi network to which you are now connected. If you’re using Windows 10, choose the “Set as metered connection” option on the properties screen. Click the switch next to “Metered Connection” in Windows 11. This choice only applies to the Wi-Fi network you are now updating, but Windows remembers this configuration for each separate Wi-Fi network.
To update this setting for a wired Ethernet network, launch the Settings app, go to Network & Internet > Ethernet, and then click the name of your Ethernet connection. On the properties page, enable the “Set as metered connection” option.
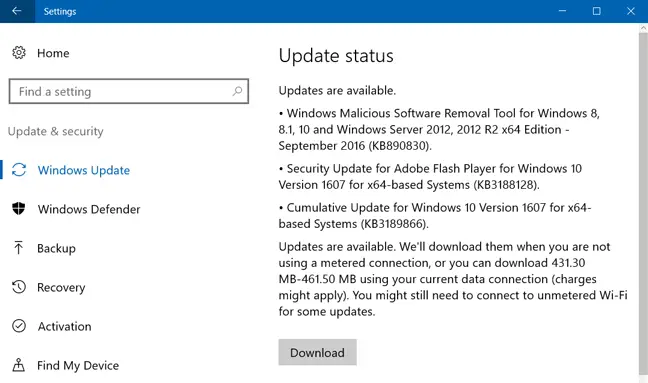
When you choose this option, Windows Update will notify you that “updates are available.” We’ll download the updates as soon as you connect to Wi-Fi, or you may use your data connection (charges may apply.)” By labeling a connection as metered, you’ve deceived Windows into believing it’s a mobile data connection–for example, if you’re tethering your PC to your smartphone. You may download and install updates at your leisure by clicking the Download button.
Stop Windows Update from rebooting your computer automatically
Maybe you don’t mind the automated downloads, but you don’t want Windows to restart while you’re working on anything. Windows 10 and 11 may assist by allowing you to specify a window of time each day known as “Active Hours” during which it will not automatically reboot.
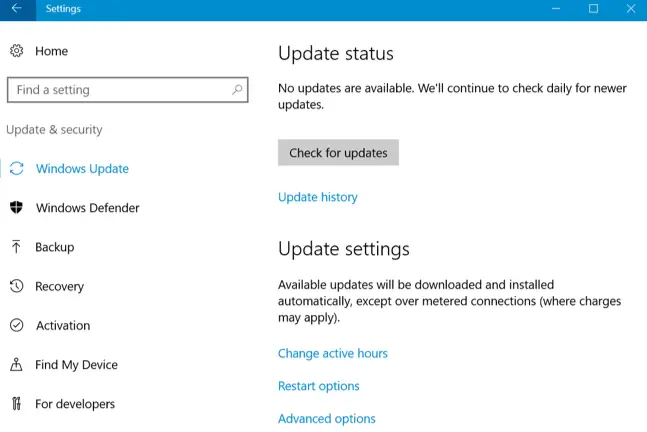
On Windows 10, go to Settings > Update & Security > Windows Update to configure Active Hours.
Under Update Settings, click or touch “Change Active Hours.” Then, you’ll specify the periods when you don’t want Windows to restart automatically.
On Windows 11, go to Settings > Update & Security > Advanced Options and choose one of the “Active Hours” options. By default, Windows 11 will determine your PC’s active hours based on your actual use, but you may adjust it if you choose.
You may also override those active hours in order to plan certain reboots when an update is available. More information on how to do so may be found here.
You may postpone updates in Windows 11 for up to five weeks at a time.
Block certain updates and drivers from being installed by Windows Update.
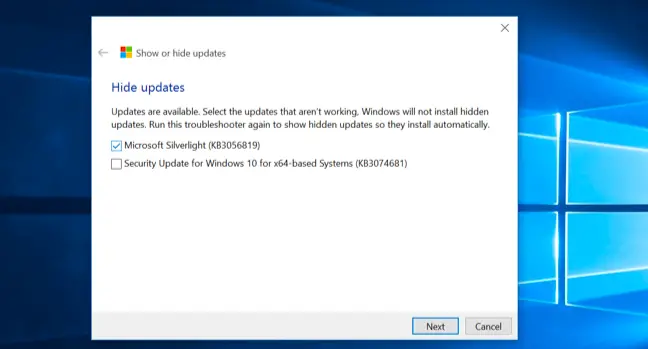
If Windows 10 or 11 insists on installing a certain update or driver that is creating issues, you may prohibit Windows Update from applying that update. Microsoft does not give a built-in solution to prevent updates and drivers from being downloaded automatically, but it does supply a downloadable application that can block updates and drivers so Windows does not download them. This allows you to opt out of certain updates by uninstalling them and “hiding” them from installation until you unhide them.
Disable Automatic Updates Using Group Policy (Professional Editions Only)
Update: While this option still exists, it seems to no longer function as of the Windows 10 Anniversary Update, but we’ve kept it here in case anybody wants to test it. Proceed alone at your own risk.
For security reasons, you should seriously consider leaving automatic updates enabled. However, there is an option under Group Policy that allows you to determine how updates are deployed on your own timetable. The Group Policy editor is available only in Windows 10 Professional, Enterprise, and Education versions. To open the group policy editor, hit Windows Key + R, then enter the following line into the Run dialog and press Enter:
gpedit.msc
Select Computer Configuration > Administrative Templates > Windows Components > Windows Update.
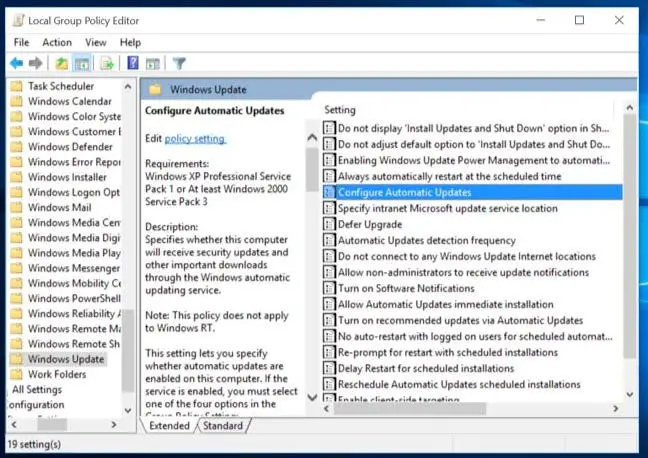
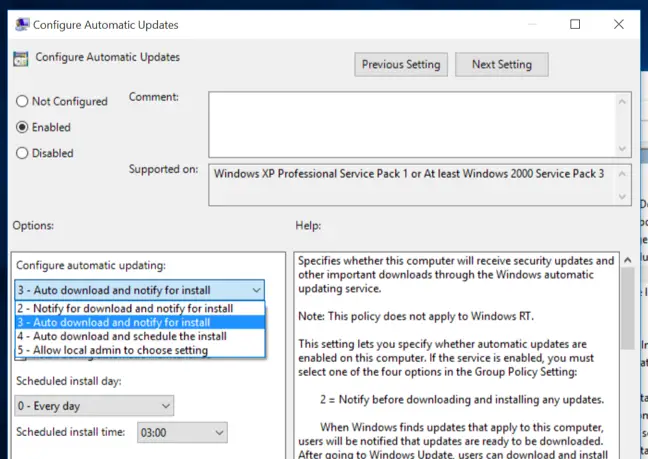
Locate and double-click the “Configure Automatic Updates” option in the right pane. Set it to “Enabled,” then choose your desired option. You may, for example, choose “Auto download and notify for installation” or “Notify for download and notify for installation.” Save the modification.
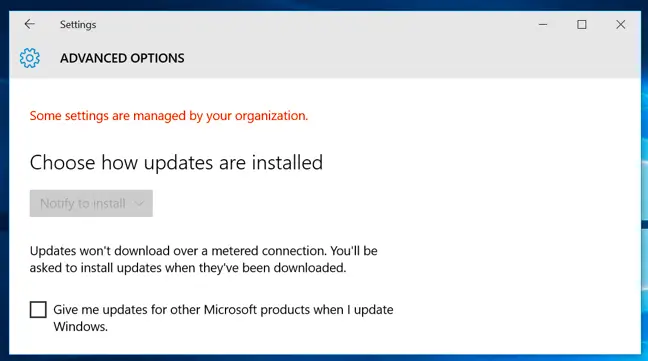
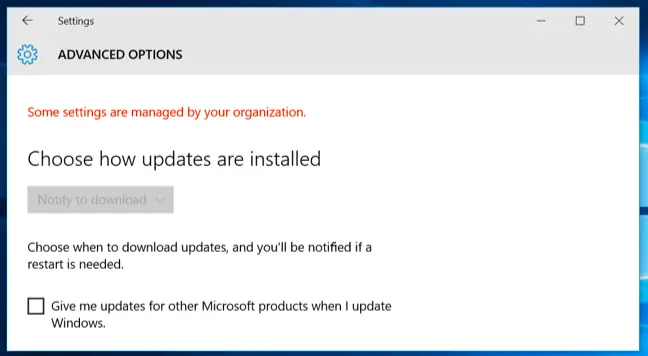
Navigate to the Windows Update window, then choose “Check for updates,” and then “Advanced options.” Your updated setting should be enforced here. There will also be a message that says “Some settings are maintained by your organization,” reminding you that some choices can only be altered via Group Policy.
Return to the Group Policy editor, double-click the “Configure Automatic Updates” option, and then change it from “Enabled” to “Not configured.” Save your changes, then return to the Windows Update window, click “Check for updates,” and then choose “Advanced settings.” Everything will be restored to its original state. (It seems that Windows Update only notices the option change after you click “Check for updates.”)
Disable Automatic Updates in the Registry (Professional Editions Only)
Update: While this option still exists, it seems to no longer function as of the Windows 10 Anniversary Update, but we’ve kept it here in case anybody wants to test it. Proceed alone at your own risk.
This parameter may also be changed in the registry. This registry hack does the same effect as the preceding Group Policy setting. However, it seems to only operate on Windows 10 Professional versions.
Download and double-click one of the included.reg files to make Windows Update notice for download and notify for install, auto download and notify for install, or auto download and schedule the install. There is also a.reg file that will erase the registry value created by the other files, enabling you to return to the original settings. This works just on Windows 10 Pro, not on Windows 10 Home.
After you’ve changed this setting, go to the Windows Update pane in the Settings app and choose “Check for updates.” Then, select “Advanced settings,” and your new setting will appear here. (Before Windows Update sees your updated setting, you must run an update check.)
If you want to do it yourself, the specific option to alter is in HKEY LOCAL MACHINESOFTWAREPoliciesMicrosoftWindowsWindowsUpdateAU — you’ll need to construct the last few keys there. Under the AU key, create a DWORD value called “AUOptions” and assign it one of the following values:
00000002 (Notify for download and notify for install)
00000003 (Auto download and notify for install)
00000004 (Auto download and schedule the install)
Another “trick” is making the rounds for this. It entails using the Windows Services administrative tool to disable the Windows Update system service. This is a terrible idea, as it will prevent your machine from obtaining even the most basic security upgrades. While it would be wonderful if Microsoft provided more options for when to install updates, you should not avoid security updates totally. Simply configure any PC’s connection as metered to prevent Windows from automatically downloading updates.