Introduction
We demonstrated how to improve your Google Slides presentation by using animated transitions between slides. However, you may choose to animate text, pictures, or objects in addition to or instead of this. Here’s how to include animations into Google Slides.
You may use animations in Microsoft PowerPoint to control when an image appears or to display one line at a time. The good news is that you can create similar animations with Google Slides. Whether you want to freshen up your slideshow or highlight material, it’s simple to accomplish, and we’ll show you how.
In Google Slides, add an animation
In Google Slides, you can animate text and other components with a variety of effects. You may also choose when the animation begins.
Open your presentation in Google Slides and choose a slide with an object to animate.
Animate Your Objects
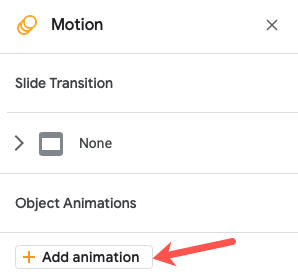
Select a picture, object, or form to animate it. To access the Motion sidebar on the right, go to View > Motion in the menu.

Click “Add Animation” at the bottom of the sidebar, just below Object Animations.
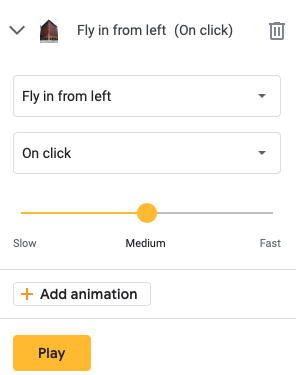
To choose the animation effect, use the first drop-down box that appears. You may choose between fade in and fade out, fly in and fly out, and spin.
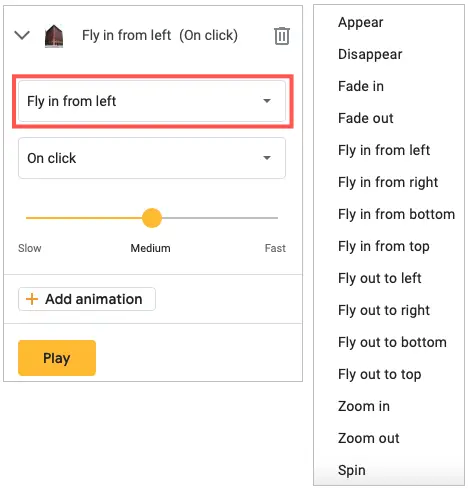
It’s vital to notice that when you employ an effect like fly in, the picture appears on the slide. This is referred to as an entrance effect. Fly out, on the other hand, removes the picture from the slide as an exit effect.
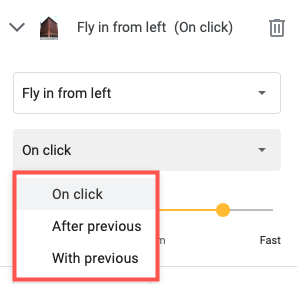
Select how you wish to control the animation using the second drop-down box. You may start the effect by clicking on it, or you can have it start automatically after or with a prior animation.
Finally, adjust the pace of your animation using the slider.
To get a preview, click “Play,” and then “Stop” after the animations are finished.
Text Animation
With one minor exception, animating text in Google Slides is almost identical to animating objects. If you like, you may animate a single line or paragraph at a time.
To access the Motion sidebar, choose your text box and follow the same instructions as before. When you go to the Object Animations section, there’s a checkbox for By Paragraph. To animate the lines or paragraphs in the text field, just tick this option.
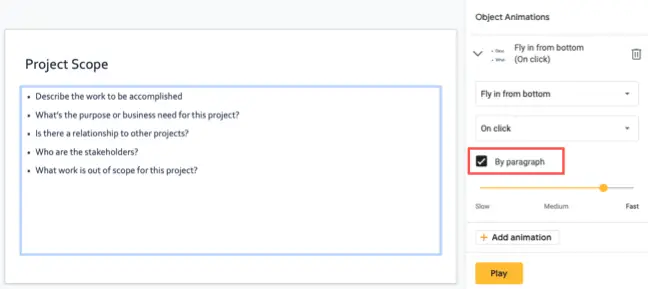
Leave the option unchecked if you wish to animate the full text box rather than only the lines or paragraphs inside it.
When you add one or more animations to a slide, an icon will appear next to it in both Filmstrip and Grid View.

Animations may be rearranged, edited, or removed.
When you animate components on a slide, the effects are applied in the order that you add them. If you animate an image followed by a text box, the animations will play in that sequence. This may be changed if necessary.
Select View > Motion from the menu to see the Motion sidebar.
To view all of the effects on the slide, go to the Object Animations section. To move one, click the grid of dots on the right side and a four-sided arrow will appear. Then, move the animation up or down to the desired position.

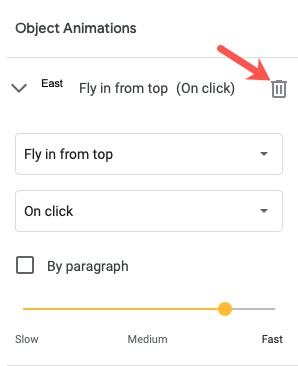
You may always alter an animation you’ve added by expanding it in the sidebar and making your modifications.
If you decide you no longer desire animation, expand it in the sidebar and remove it by clicking the trash can button.