
Introduction
Do you want to be visible on the screen when you display your slideshow? If you have a camera, you may use the Cameo function to place yourself on every slide in your Microsoft PowerPoint presentation.
You may position the camera feed wherever on your slide, resize it, apply a style, add an effect, and organize it with other things.
As the president of your firm, the head of a nonprofit organization, or the creator of a new product, this is an excellent approach to personalize your presentation. Your viewers may see your face as well as hear your voice via narration.
Note: As of July 2022, the PowerPoint Cameo feature is available to Office Insiders and will soon be accessible to Microsoft 365 users on Windows and Mac.
The Cameo Feature Requirements
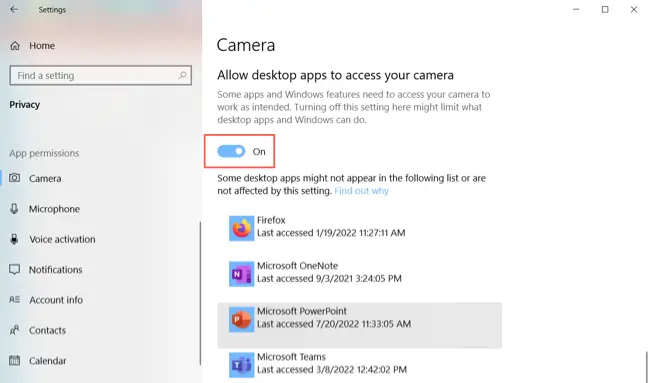
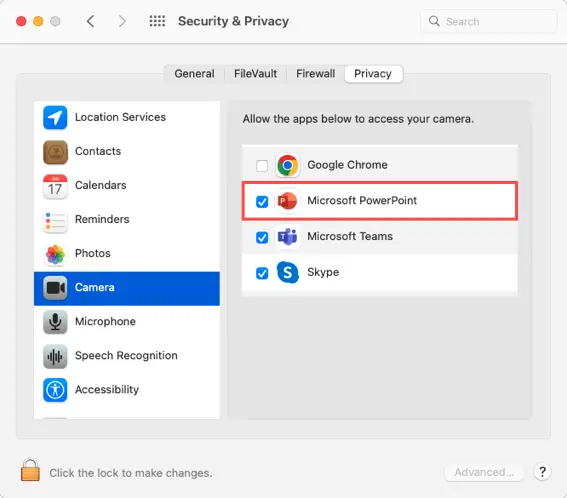
To utilize this function, you must allow PowerPoint access to use your device’s camera.
Open the Settings app from the Start menu and choose “Privacy.” Select “Camera” from the menu on the left. Turn on the Allow Apps to Access Your Camera and Allow Desktop Apps to Access Your Camera toggles on the right.
Open System Preferences from your Dock or the Apple symbol on your menu bar on a Mac, and then pick “Security & Privacy.” Open the Privacy tab and choose “Camera” on the left. Check the option for Microsoft PowerPoint on the right.
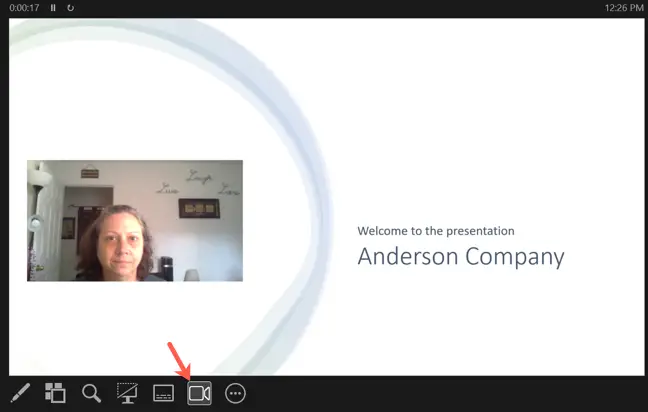
Place the Cameo Object on a Slide.
You may use the Cameo element on one or any of the slides. When you utilize it on numerous slides, the feed flows flawlessly across the presentation.
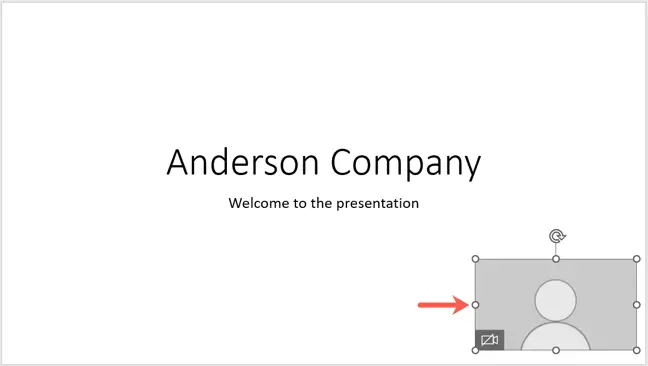
Select a slide, then go to the Insert tab and choose “Cameo” from the Camera area of the ribbon.

The Cameo item will appear on your slide.
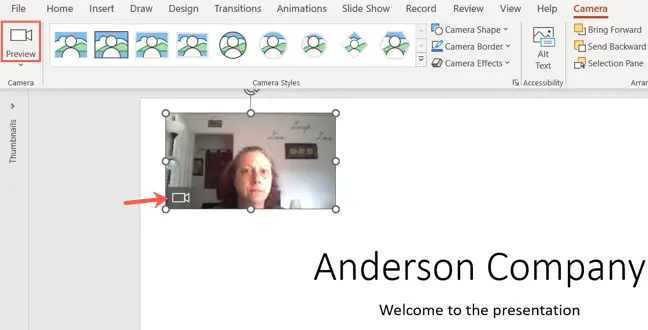
To pick the camera you wish to use, select the item and go to the Camera tab that opens. Select the camera you wish to use by clicking the Preview (Camera Preview on Mac) drop-down arrow on the left side of the ribbon.

Virtual cameras are not yet supported by the functionality.
You may then drag it to move it and resize it by dragging a corner or edge.
Click the camera icon within the item or the Preview (Camera Preview on Mac) button on the Camera tab to see a preview of the Cameo.
Personalize the Cameo Object
You may change the Cameo item in the same way that you can edit photographs and movies. Change the style, add a border, or use an effect.
Select the Cameo item and go to the Camera tab. Use the Camera Styles box on the left to choose a shape with an effect such as a shadow or a frame.
You may also utilize the Camera Shape, Camera Border, and Camera Effects drop-down boxes to the right of the Camera Styles to pick alternative possibilities.

Tip: Use the Design Ideas link on the Home page to get ideas for how to set up the slides in Cameo.
Use the Arrange section’s tools to arrange the Cameo with other slide components. You may move the Cameo forward or backward, align it to the left, right, or center, or rotate it. Crop and size choices are available on the far right.

While Presenting, Control the Camera
You may start your presentation as usual by selecting an option from the Start Slide Show section of the ribbon on the Slide Show tab.

Toggle the camera off and on throughout the slideshow by clicking the Toggle Camera icon.
PowerPoint’s Cameo function allows you to integrate a live camera feed for a truly customised presentation. Are you willing to give it a shot?