Introduction
Running applications as administrator may be handy at times, but what if you want to run everything as administrator? The administrator account is included in Windows 10 and Windows 11, but it is deactivated by default – for good reason. Find out how to use it here.
What Exactly Is an Administrator Account
Windows 10 and 11 need administrator capabilities to access specific files and operations. These files are critical to the operating system, and the commands are often of the sort that, if abused, might create issues.
Windows generally asks you every time you try to perform anything that needs administrative rights, but you may avoid those questions by activating and signing into the administrator account.
- Warning: Activating and utilizing the administrator account might save you time if you have a lot to accomplish, but it also means that nothing stands between you and a catastrophic mistake. It’s simple to remove something you didn’t want to erase.
- If you are not using the administrator account, you should never leave it active. The administrator account does not have a password by default, which means that if someone obtains physical access to your PC, they will have full control over your system and access to all of your information.
- In general, using administrator rights on a case-by-case basis is significantly safer.
However, if you want to utilize the administrator account, you may activate it using Command Prompt or PowerShell and sign in from the standard Windows login screen.
How to Use Command Prompt to Enable the Administrator Account
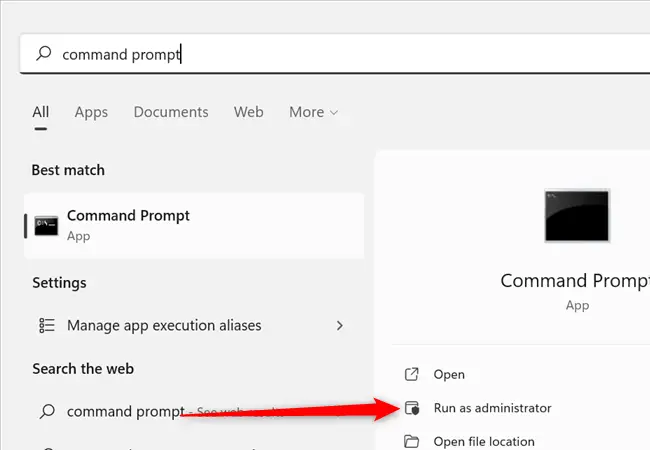
Select Start, enter “command prompt” in the search field, and then click “Run as administrator” to activate the administrator account with Command Prompt.
In the window, type net user administrator /active:yes. If everything works, you should see “The command completed successfully.”
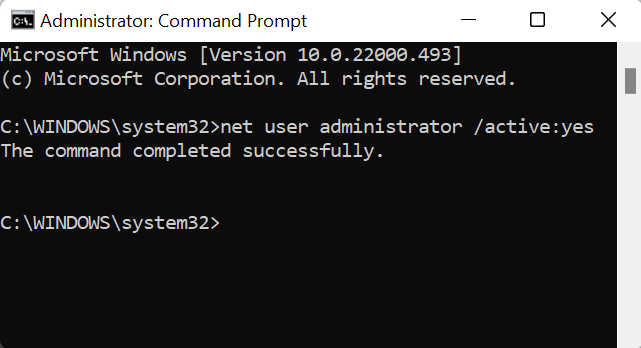
After you’ve activated the account, all you have to do is switch users to get access to it. It will also be accessible whenever you restart your computer.
How to Use PowerShell to Enable the Administrator Account
The procedure for activating the administrator account in PowerShell is the same as it is in Command Prompt.
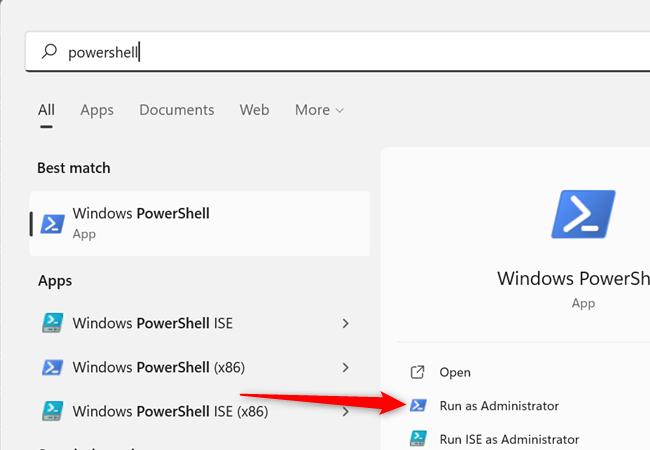
Select Start, enter “powershell” in the search field, and then click “Run as administrator” to activate the administrator account with PowerShell.
In PowerShell, type net user administrator /active:yes and press Enter. If the account was activated, you’ll notice “The command was successfully executed.”
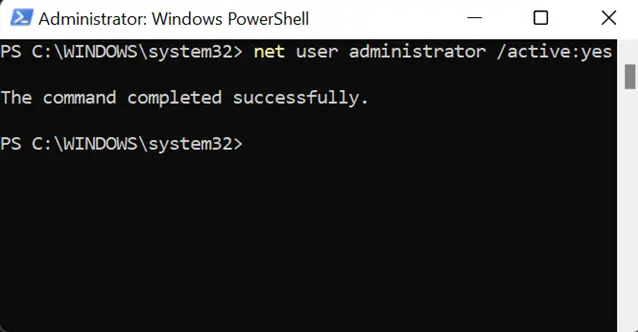
If everything went well, you may log out or switch users to log in to the administrator account.
How to Create a Password for an Administrator Account
If you want to use the administrator account on a frequent basis, you should create a password, particularly if you do not intend to deactivate the account.
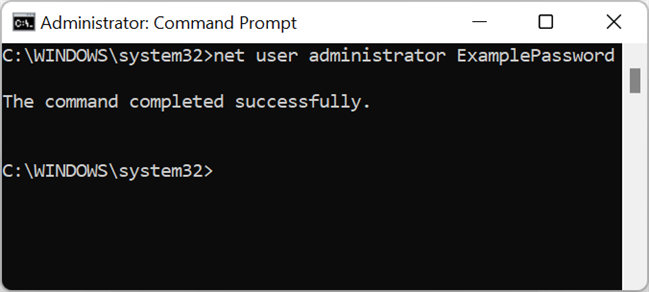
To create a password, run Command Prompt or PowerShell as administrator, as shown in the preceding stages. Then, in either Command Prompt or PowerShell, enter net user administrator ExamplePassword, but replace ExamplePassword with any password you choose.
Disabling the Administrator Account
The command for disabling the administrator account is the same as for activating it, with one minor difference.
Launch Command Prompt or PowerShell as administrator, as previously.
Enter net user administrator /active:no into the command line.
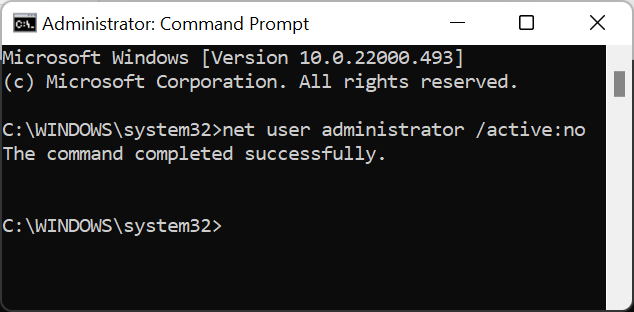
You should see “The command was successfully performed” again. To ensure that the account has been deactivated, log out or swap users.
The administrator account is useful, but it is not something you should use on a regular basis. Double-check any instructions you perform, as well as any files you transfer, change, or delete. Also, keep in mind that keeping the administrator account activated is a severe security risk.

