
Introduction
There are various probable explanations for a “Disk Write Error” when downloading or upgrading a game via Steam. Fortunately, the most majority of these do not indicate a severe issue with your computer. In most circumstances, a disk write error is caused by a permissions issue or file corruption and is readily remedied.
Restart Steam and your computer.
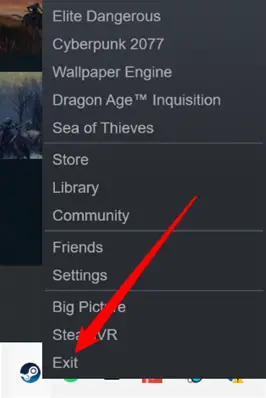
It’s a cliche for a reason: turning it off and back on works. If you get a disk write error out of nowhere, try restarting Steam. Right-click the Steam icon in your taskbar’s system tray (notification area) and choose “Exit.” In the Steam program window, you may alternatively click Steam > Exit.
If restarting Steam does not solve the problem, restart your computer. Restarting your computer reinitializes hardware drivers, terminates any current processes, and clears memory. If the disk write issue was caused by a Windows (or other operating system) fault, rebooting your computer should resolve it.
Verify Write Permissions
A permissions problem might also cause a team disk write error. If a Steam library folder is set to read-only, or if the user account from which you run Steam lacks write rights for the library folder, Steam may encounter a disk write error. Let’s look into that and see whether that’s the issue.
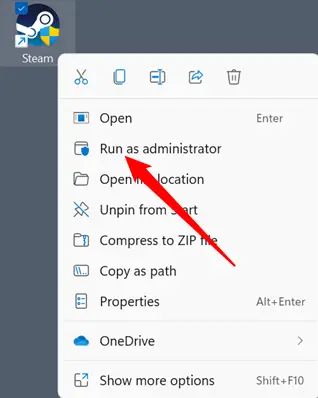
First, if Steam is open, shut it. Then, right-click the Steam launcher icon and choose “Run as Administrator.”
Retry the download. If it works, you’ve got a permissions issue. If it doesn’t work, you may go on to the next section – the instructions in this one aren’t applicable to you.
Run Steam as Administrator at all times.
The simplest — and most straightforward — approach to resolve a permissions issue is to always run Steam as administrator.
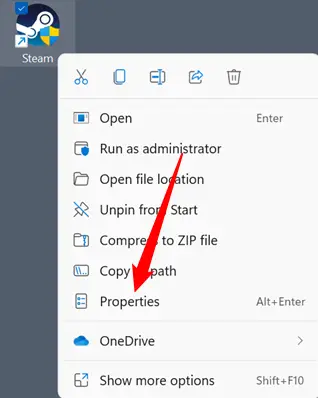
Select “Properties” from the context menu when you right-click your Steam icon.
Navigate to the “Compatibility” tab, choose “Run as Administrator,” and then click “Apply” and “Ok.”
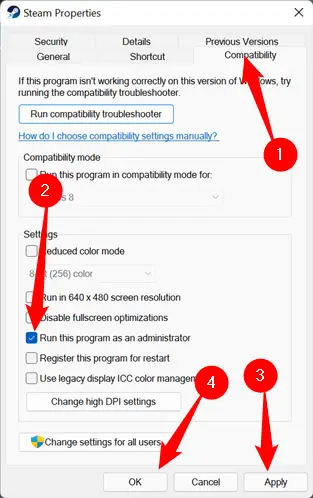
- Note that running Steam as administrator will force Steam to remind you that it is in compatibility mode. You may safely disregard the notification if you just change it to “Run as Administrator.”
Change Your User’s Permissions
It’s not a good idea to execute apps as administrator if you can avoid it for security reasons. The second option, on the other hand, is more complicated. In Windows, every file and folder has user-specific rights. If anything went wrong between your user and the Steam folder (or any sub-folders), you may manually repair it.
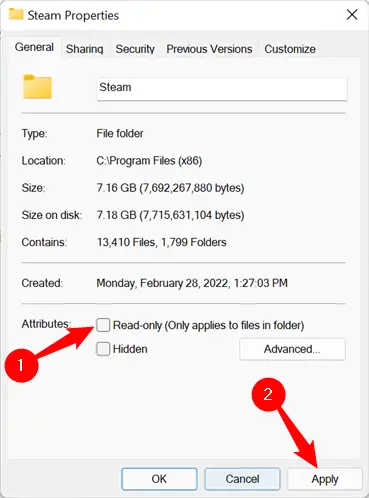
To begin, browse to your Steam folder. By default, it is saved in “C:Program Files (x86).” Select “Properties” from the context menu when you right-click the Steam folder.
Check that the “Read-Only” option is not checked. Untick “Read-Only” and click “Apply” if it is activated.
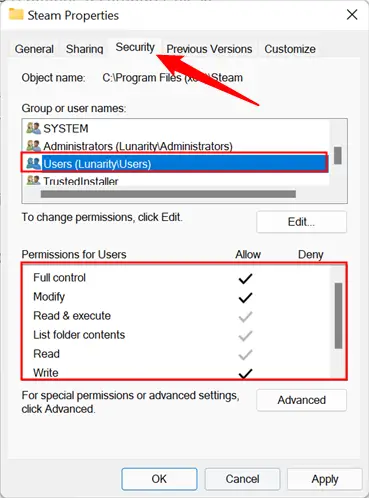
While you’re in the Properties box, double-check the write permissions. Select the “Security” tab at the top of the page. Select your user from the “Groups or User names” section by scrolling through the list. Examine the “Permissions for Users” section of the window. This is what manages the permissions for the folder, subfolders, and files. Except for “Special Permissions,” all of the items should be checked. Don’t be concerned about it.
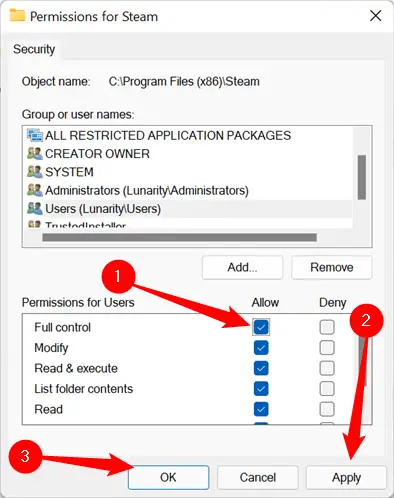
If none of these are checked, you must force Windows to modify the permissions for that folder, its subfolders, and all of its contents. Normally, sub-folders and files inherit the rights of the parent folder, so you only need to update the permissions of the parent folder, Steam.
Click “Edit,” check the box next to “Full Control,” then click “Apply” and “Ok.”
Delete the Download Cache
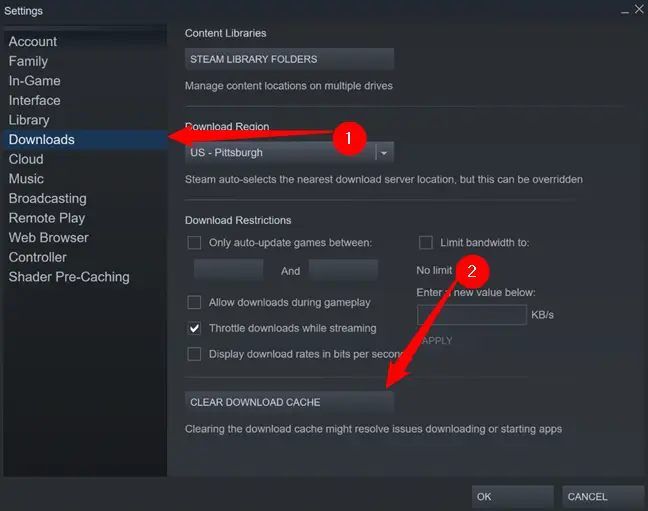
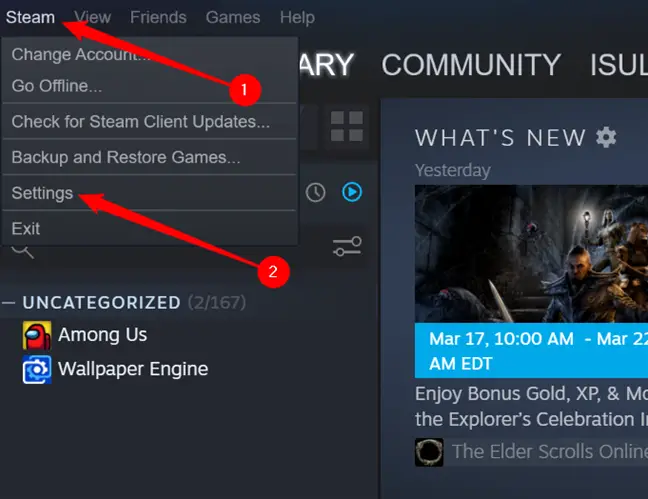
Steam keeps temporary files in the download cache while a game or update is downloading or installing. In the upper left, go to Steam > Settings.

Click the “Downloads” tab, then click “Clear Download Cache” at the bottom.
You will be asked to restart Steam. Retry your download after the restart.
- Please keep in mind that after removing the cache, Steam will require you to log in again.
Restore the Library Folder
If adjusting your permissions and emptying your download cache does not resolve the problem, you might try repairing your library folder.
Select “Settings” from the drop-down menu after clicking “Steam” in the upper left corner of the Steam window.
Then, under “Downloads,” choose “Steam Library Folders.”

This window displays all of the games you’ve downloaded. If you have numerous hard drives or steam folders, they will be listed here. Select the one that’s causing you problems by clicking on it – it’ll be at the top. Then, on the right, click the three dots to display a drop down menu, and choose “Repair folder.”

The longer this takes, the more games you have installed, so be prepared to wait a few minutes. When it’s finished, try downloading again.
Modify Your Download Server
Though it is rare, the Steam download servers sometimes face issues or outages. If this is the case, a number of error messages may be generated. If you’ve done everything else, changing your download server isn’t a bad idea.
In the upper left-hand corner of the screen, choose “Settings,” then “Steam Library Folder.”
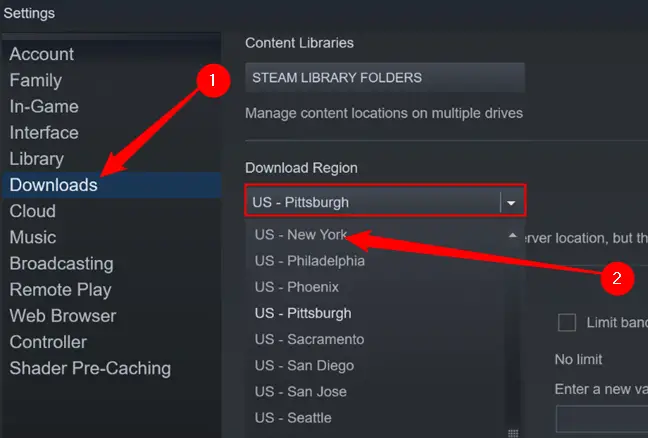
Navigate to the “Downloads” page, then click the drop-down menu in the “Download Region” area. Normally, Steam will choose the closest download server to you. We need to alter it to something more appropriate – try to choose something near to you.
If none of it helps, you may have a hard disk issue. You should back up any irreplaceable or essential information you have saved on the hard disk as a precaution. Then you may use chkdsk to attempt to resolve the issue.
