Introduction
A sluggish mouse takes longer for the pointer to reach its objective, but a fast mouse may speed past it, quickly upsetting your efficiency. Here’s how to change the speed of your computer on Windows 10 or 11.
Mouse Speed Can Be Changed Using Settings
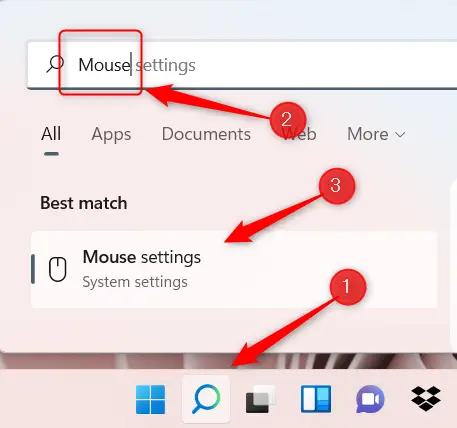
In the Settings menu, you may change the speed of your mouse. Instead of beginning at the top level of Settings and working your way down, launch Windows Search by clicking the Magnifying Glass icon in the Taskbar (or the search bar in Windows 10). Then, in the Search box, enter “Mouse,” and then pick “Mouse Settings” from the search results.

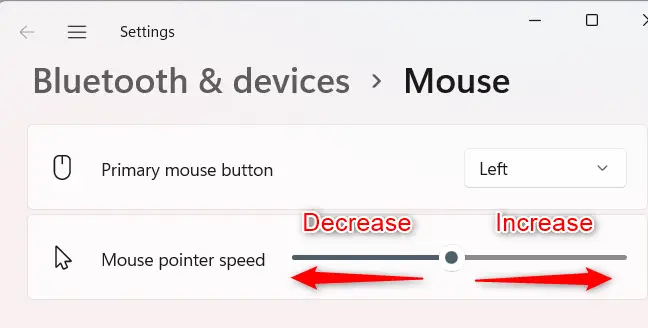
This takes you directly to the Mouse settings in the Settings app. The second option from the top is “Mouse Pointer Speed” (with Windows 10, it may be renamed “Cursor Speed”). This is how you change the mouse’s speed.
Click and drag the slider to the right to increase the speed of your mouse. Click and drag the slider to the left to slow down your mouse.

Continue to modify the speed till it’s to your taste.
Using the Control Panel, you may adjust the speed of your mouse
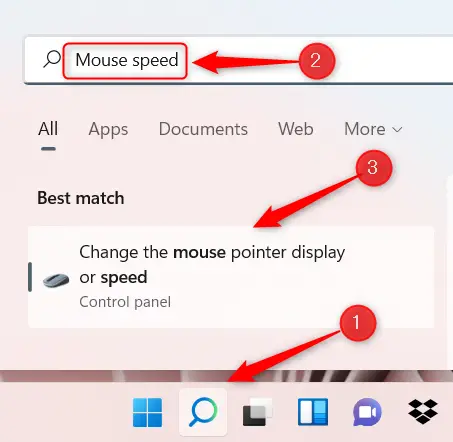
The Control Panel also allows you to adjust the speed of your mouse. Click the Magnifying Glass icon on the Taskbar to launch Windows Search, enter “Mouse Speed” in the search bar, and then pick the “Change the Mouse Pointer Display or Speed” option from the search results.

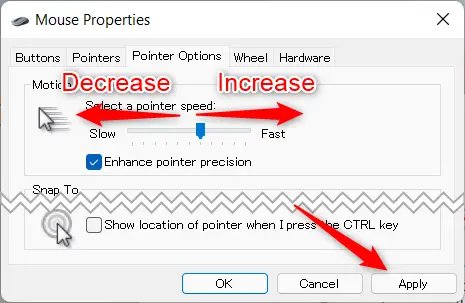
You’ll now be in the “Pointer Options” tab of the Mouse Properties window in the Control Panel. Click and drag the slider in the “Motion” category to the right to increase mouse speed or to the left to reduce mouse speed.
To apply the changes, click “Apply.”

Your mouse speed has now been configured.
If you’re still missing your target with your mouse, another option you may wish to disable is Mouse Acceleration, which increases the acceleration of your mouse as you move it.

