Introduction
You should generally avoid updating your BIOS, however it is occasionally necessary. Here’s how to determine what BIOS version your computer is running and quickly and securely flash a fresh BIOS version onto your motherboard.
When changing the BIOS on your motherboard, use extreme caution! The BIOS or UEFI firmware on your computer may be corrupted if it stalls, crashes, or loses power during the procedure. This will make your machine unbootable, or “bricked.”
How to Determine the Current BIOS Version in Windows
The BIOS version of your computer is shown in the BIOS setup menu, but you do not need to reboot to verify it. There are various methods for seeing your BIOS version from inside Windows, and they all work on PCs with either a standard BIOS or a newer UEFI firmware.
Check the Command Prompt for Your BIOS Version
To verify your BIOS version via the Command Prompt, press the Start button, enter “cmd” in the search box, and then select the “Command Prompt” result – no need to run it as an administrator.
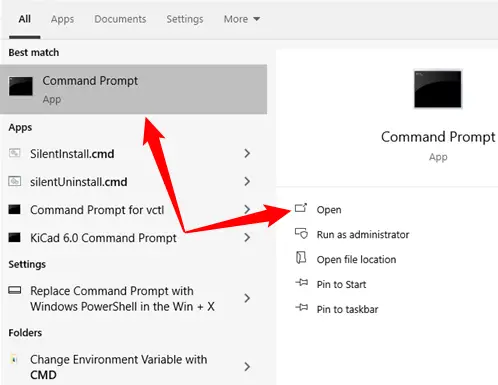
Type (or copy and paste) the following command at the prompt, then press Enter:
wmic bios get smbiosbiosversion
You’ll notice the BIOS or UEFI firmware version number on your current PC.
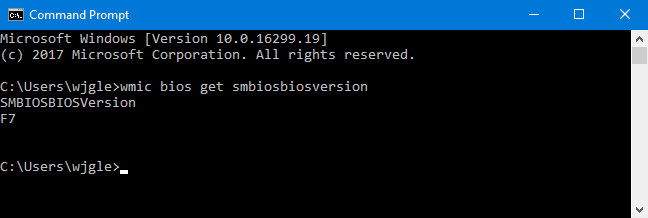
Using the System Information Panel, you may determine the version of your BIOS.
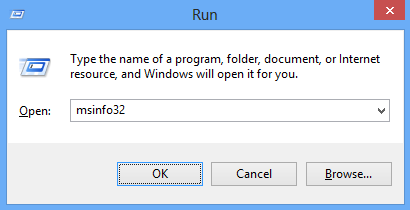
The version number of your BIOS may also be found in the System Information box. On Windows 7, 8, or 10, press Windows+R, then enter “msinfo32” in the Run box.
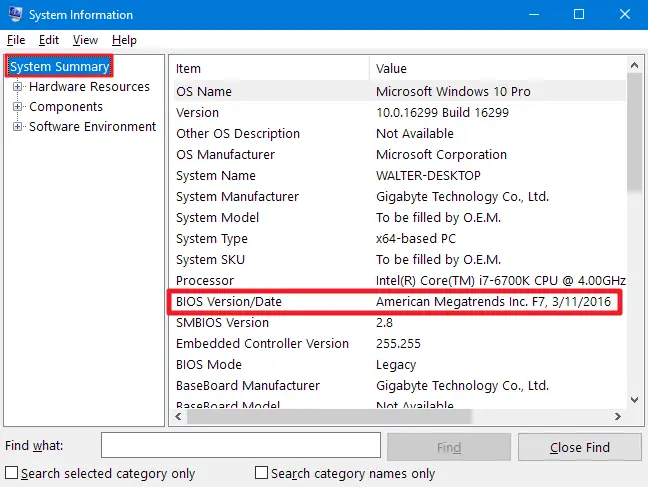
The System Summary window displays the BIOS version number. Examine the field “BIOS Version/Date.”
How to Install a BIOS Update
Because different motherboards use various utilities and methods, there is no one-size-fits-all set of instructions here. However, the essential procedure will be the same on all motherboards.
To begin, go to the motherboard manufacturer’s website and look for the Downloads or Support page for your particular model of motherboard. You should see a list of BIOS versions available, along with any changes/bug patches and the dates they were published. Download the version you wish to upgrade to. Unless you have a unique need for an earlier version, you should definitely get the most recent BIOS version.
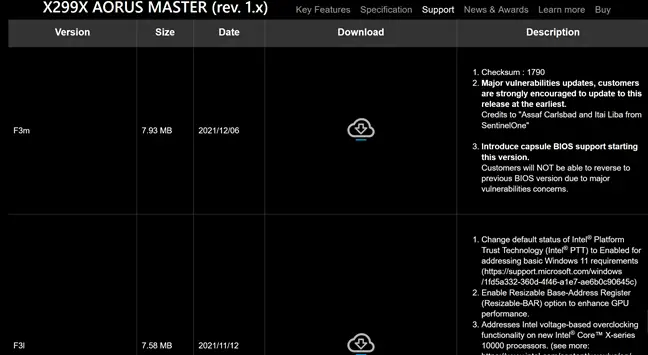
If you bought a pre-built computer rather than constructing one yourself, go to the computer manufacturer’s website, search for the computer model, and visit the downloads page. Any accessible BIOS updates will be found there.
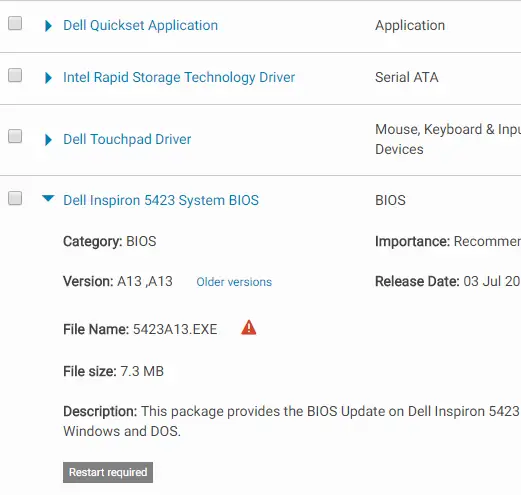
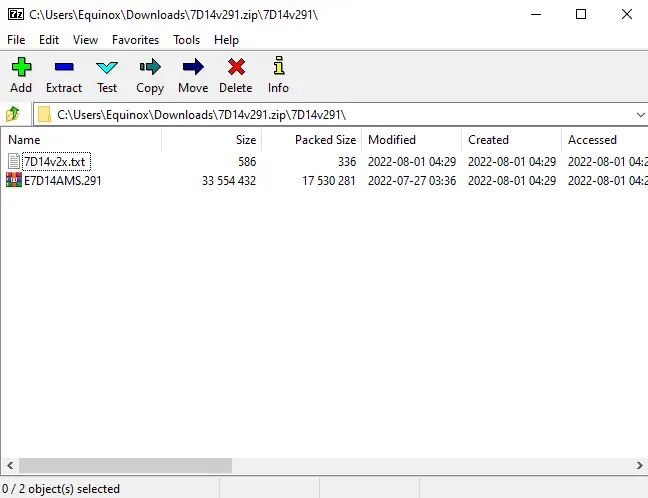
Your BIOS download is most likely in the form of an archive, such as a ZIP file. Extract the file’s contents. You’ll discover a BIOS file within — in the example below, it’s the E7D14AMS.291 file.
The bundle may include include a README or other text file that will guide you through the process of upgrading to the latest BIOS. You should refer to this file for instructions unique to your hardware, but we’ll attempt to cover the essentials that apply to all systems here.
Depending on your motherboard and what it supports, you’ll need to choose one of many different sorts of BIOS-flashing tools. The README file supplied with the BIOS upgrade should propose the best solution for your hardware.
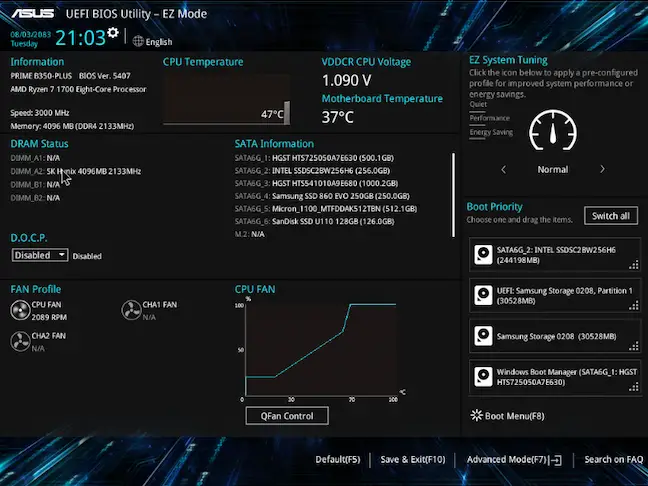
Some manufacturers provide a BIOS-flashing option directly in their BIOS, while others include it as a separate key-press option when you start the machine. You save the BIOS file to a USB device, restart your computer, and then go to the BIOS or UEFI interface. Then, pick the BIOS-updating option, go to the BIOS file you saved to the USB device, and the BIOS upgrades to the new version.
The BIOS screen is often accessed by hitting the relevant key when your computer is booting—frequently it’s shown on the screen throughout the startup process and will be indicated in your motherboard or PC’s handbook. Delete and F2 are common BIOS keys. The procedure for accessing a UEFI configuration screen may vary.
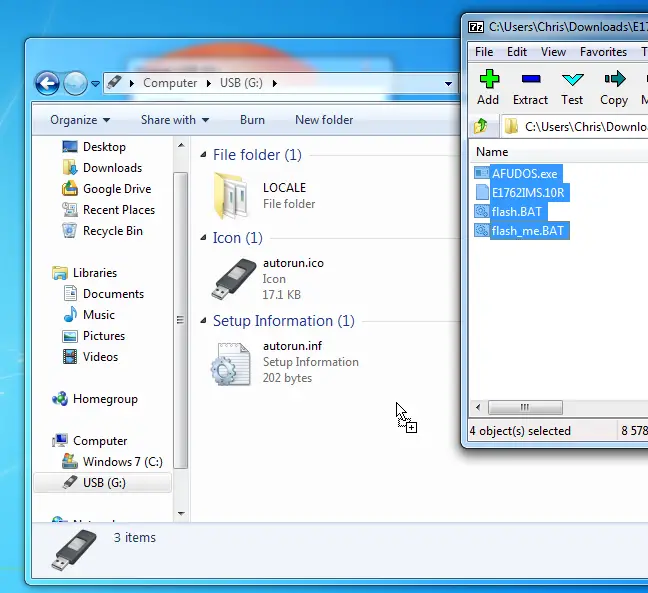
There are other more classic DOS-based BIOS-flashing utilities available. Using those tools, you make a DOS live USB device and then transfer the BIOS-flashing application and BIOS file to it. The computer is then restarted and the USB disk is booted. You enter the proper command — usually something like flash.bat BIOS3245.bin — in the basic DOS environment that emerges after the reboot, and the utility flashes the new version of the BIOS onto the firmware.
The DOS-based flashing program is often included in the BIOS files downloaded from the manufacturer’s website, however it may be necessary to download it separately. Look for a file with the extension.bat or.exe.
Previously, this procedure was carried out via bootable floppy disks and CDs. We propose a USB drive since it is the simplest option on contemporary hardware – many new computers no longer have CD or DVD drives.
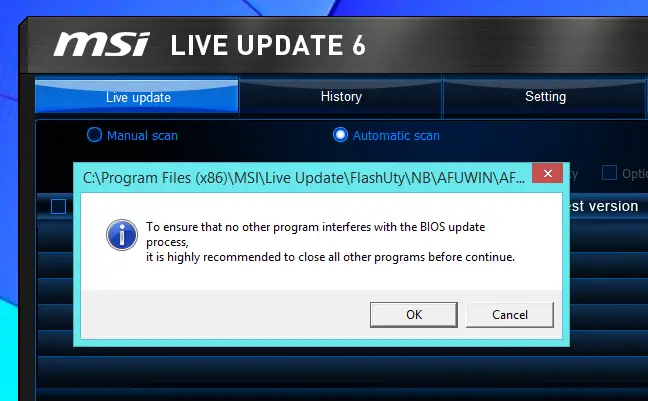
Some manufacturers offer Windows-based flashing tools that you may use to flash your BIOS and then reboot. We do not encourage utilizing these tools, and many of the companies who sell them do as well. In the README file of the sample BIOS update we downloaded, MSI, for example, “highly advises” utilizing their BIOS-based menu option rather than their Windows-based application.
Flashing your BIOS from inside Windows may cause further issues. All of that background software, including security applications that may interfere with writing to the computer’s BIOS, might cause the procedure to fail and damage your BIOS. Any system crashes or freezes might lead to a corrupted BIOS. It’s better to be safe than sorry, therefore we suggest flashing your BIOS using a BIOS-based flashing tool or booting into a basic DOS environment.
That’s all there is to it; after running the BIOS-flashing tool, reboot your computer, and the new BIOS or UEFI firmware version will be loaded. If the new BIOS version causes problems, you may be able to downgrade it by downloading an earlier version from the manufacturer’s website and flashing it again.

