
Introduction
Do you need help removing a folder from your Windows 10 or Windows 11 computer? If so, it might be a system folder or a folder utilized by another software. We’ll teach you how to remove “undeletable” folders from your PC.
Why Can’t You Delete a Folder in Windows?
The most frequent cause for being unable to remove a folder is that it is a Windows system folder. In this scenario, the system blocks you from eliminating the folder since doing so may cause your PC to become unstable.
If you are certain that yours is not a system folder, your “undeletable” folder may be in use by your installed programs. When a program is using a folder, Windows blocks you from making modifications to that folder. In this instance, you may use your folder to end the program and then attempt to remove the folder.
If your situation does not fit any of the above circumstances, you may want to use one of the ways listed below to forcibly delete your folder.
Method 1: Make use of Command Prompt
Using Command Prompt is a simple approach to remove a folder. You may use this tool to execute a command that deletes the folder you’ve chosen.
To begin, enter your “Start” menu and look for “Command Prompt.” Then, on the right, choose “Run as Administrator.”
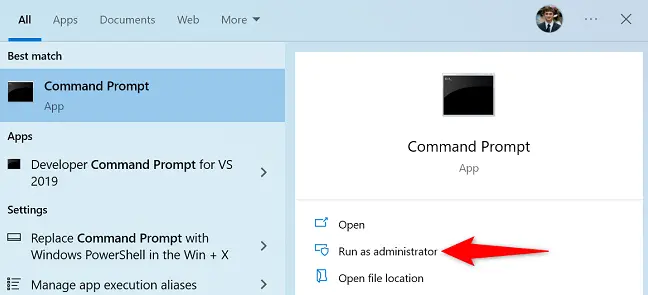
A “User Account Control” popup will appear. Choose “Yes.”
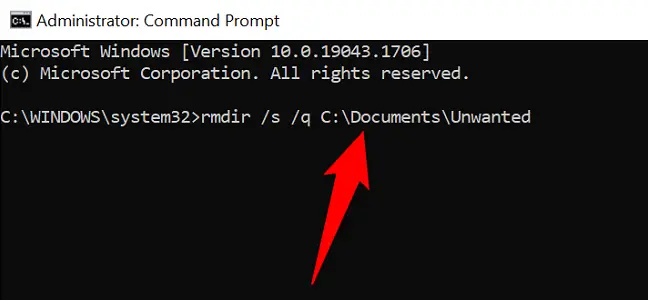
When the Command Prompt window appears, enter the following command and hit Enter. Replace PATH with the path of the folder you wish to remove in this command.
If your route contains spaces, encapsulate it with double quotations.
rmdir /s /q PATH
To remove a folder called Unwanted in the Documents folder on your C drive, for example, execute the following command.
Warning: This command deletes your folder permanently, so be sure you truly want to do it.
rmdir /s /q C:\Documents\Unwanted
The requested folder has now been deleted from your Windows PC, and you are ready to go.
Method 2: Start Windows in Safe Mode
If you are unsure which software has stolen your folder and prevented you from deleting it, restart your PC in safe mode and then attempt to remove the folder. In safe mode, your PC only loads the necessary Windows files, preventing any third-party software from running automatically.
To begin, utilize this tutorial to boot your Windows 10 or Windows 11 PC into safe mode.
Once in safe mode, open File Explorer and go to the folder you want to remove. Then, right-click on the folder and choose “Delete.”
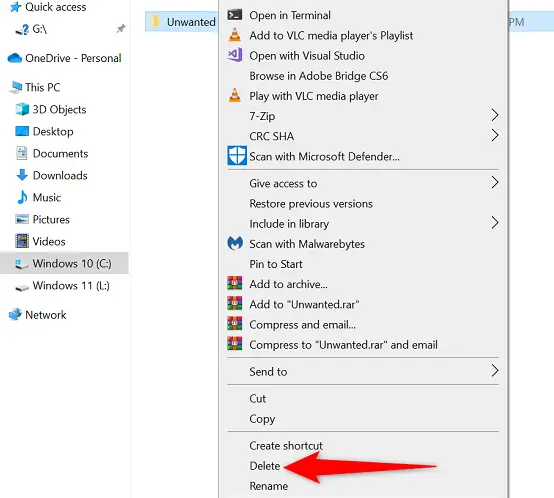
Your folder has been removed.
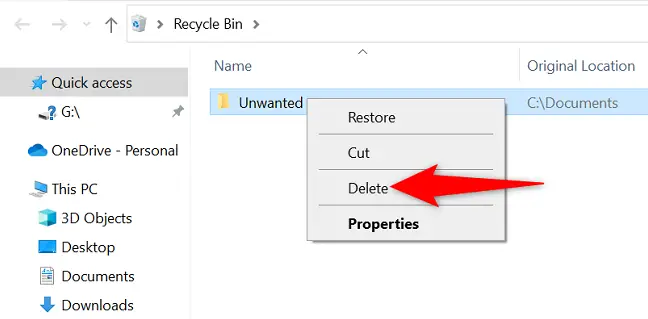
You may also wish to delete the folder from the Recycle Bin, which you can do by entering it, right-clicking your folder, and selecting “Delete.”
That’s all there is to removing obstinate folders from your computer. Enjoy!
Method 3: Make use of third-party software.
If your folder still won’t erase, a free third-party tool called Unlocker may assist you in removing it. This tool effectively unlocks your folder from any locks that prevent it from being erased and then enables you to ultimately delete the folder.
To begin using this approach, download and install the free Unlocker program on your PC. The newly installed app will then be launched.
Select the folder to remove from the main Unlocker window. Then, at the bottom, press the “OK” button.

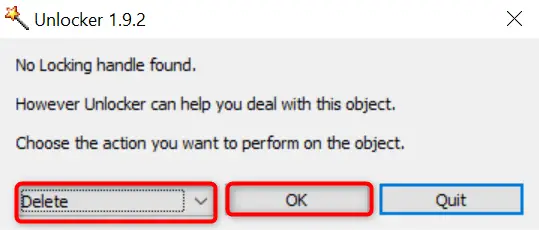
On the next screen, pick “Delete” from the drop-down option. Then press the “OK” button.
Unlocker will open your folder and eliminate it from your computer. You’re finished.
Method 4: Force Folders to Be Removed Using WinRAR
This may seem unusual, but you can erase resistant folders using WinRAR (a file compression program). This works by creating an archive from your “undeletable” folder and then asking the software to remove the original folder once the archive is created.
When WinRAR creates an archive from your folder, it automatically deletes the original folder. The newly formed archive may then be deleted as well.
To begin, download and install the free version of WinRAR on your computer. Then restart your Windows 10 or Windows 11 computer so that WinRAR is integrated into your context menu.
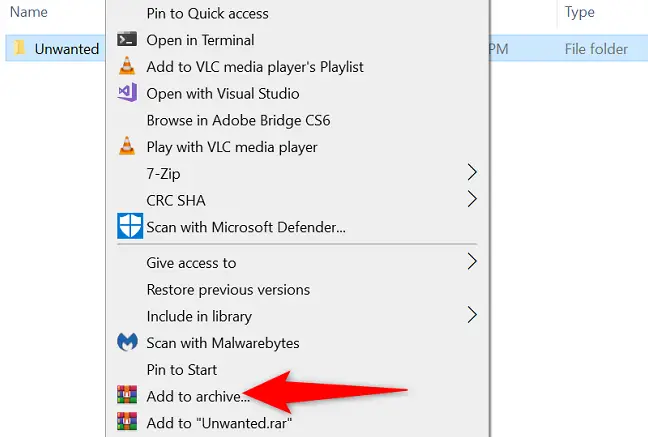
When your computer restarts, use File Explorer and go to the folder you want to remove. Then, from the context menu, choose “Add to Archive.”
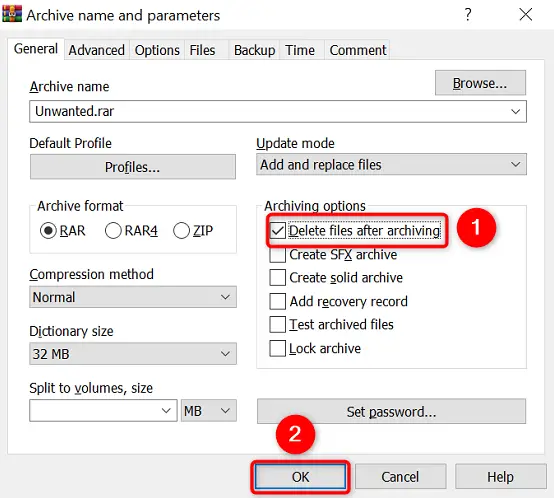
Enable the “Delete Files After Archiving” option in the “Archiving Options” section of the “Archive Name and Parameters” box. Then click “OK” at the bottom of the window.
Allow WinRAR to create an archive from the folder you’ve chosen. After that, WinRAR will delete the original folder. You may now delete your recently generated archive.
That’s how you get rid of any undesirable or difficult folders on your Windows PC. Very helpful!