
Introduction
You define a maximum disk size when you build a virtual hard drive in VirtualBox or VMware. If you need extra capacity on the hard drive of your virtual machine later, you must extend the virtual hard disk and partition.
Remember to back up your virtual hard drive file before conducting these activities – there’s always the possibility that something will go wrong, so having backups is always a good idea. However, the procedure worked well for us.
Use the Virtual Media Manager in VirtualBox as an update.
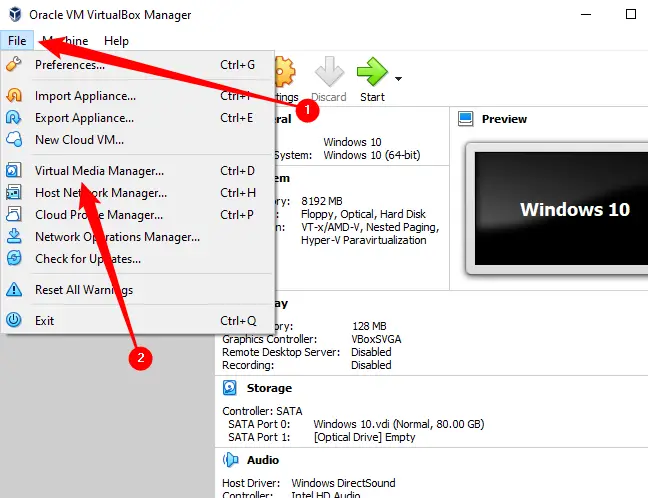
VirtualBox 6 now has a graphical interface for growing and resizing virtual drives. In the main VirtualBox window, go to File > Virtual Media Manager.
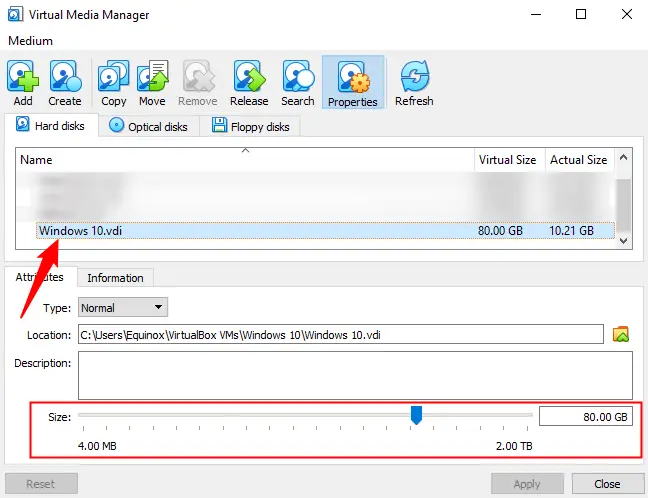
Select a virtual hard drive from the list and adjust its size using the “Size” slider at the bottom of the window. When you’re finished, click “Apply.”
To take use of the extra space, you will still need to extend the partition on the drive. Even as the disk size grows, the partition retains the same size. More information about extending the partition may be found in the steps below.
Using the Command Line, you may enlarge a Virtual Disk in VirtualBox
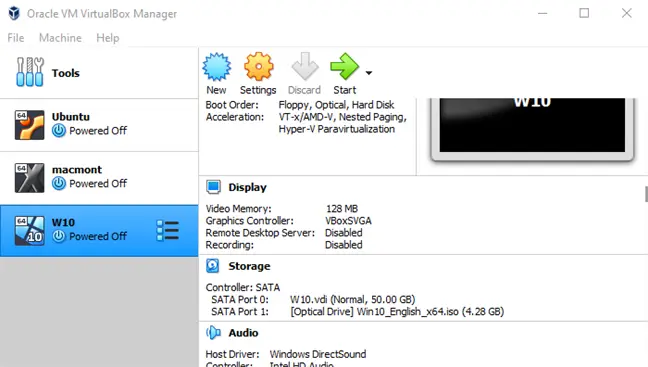
To increase the size of a virtual drive in VirtualBox, use the VBoxManage command from a Command Prompt window. First, shut down the virtual computer by setting its status to Powered Off rather than Saved.
Note: If you utilize the snapshots function in VirtualBox, you should also remove any snapshots linked with the virtual machine before proceeding. This ensures that you alter the right virtual disk file and that everything works correctly thereafter.
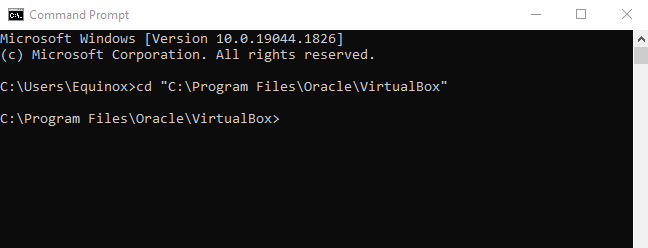
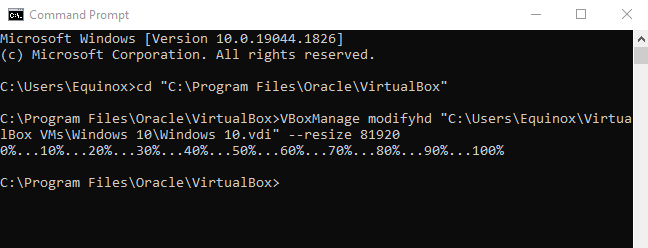
Second, launch a Command Prompt window from the Start Menu and go to the VirtualBox program files folder. Execute the following command:
cd "C:\Program Files\Oracle\VirtualBox"
The program below will work on the VirtualBox virtual disk “C:\Users\Equinox\VirtualBox VMs\Windows 10\Windows 10.vdi” It will increase the virtual disk size to 81920 MB (80 GB).
VBoxManage modifyhd "C:\Users\Chris\VirtualBox VMs\Windows 10\Windows 7.vdi" --resize 81920
In the command above, use two dashes before resize.
Replace the file path in the preceding command with the location of the VirtualBox disk to be resized, and the number with the size to which the picture should be enlarged (in MB).
Please keep in mind that with VirtualBox 6.0+, which was released in 2019, you may need to use the following command instead:
VBoxManage modifymedium disk "C:\Users\Equinox\VirtualBox VMs\Windows 10\Windows 10.vdi" --resize 81920
This operation does not extend the partition on the virtual hard drive, so you will not have access to the additional space just yet — for more details, see the Enlarge the Virtual Machine’s Partition section below.
Expand a VMware Virtual Disk
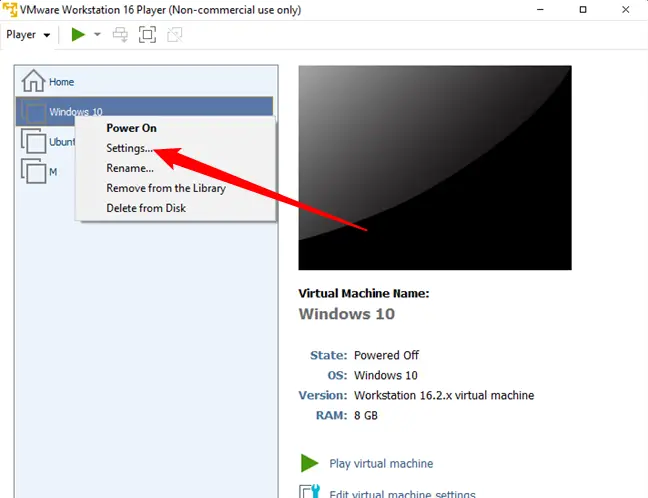
To increase the size of a virtual machine’s hard drive in VMware, turn it off, right-click it, and choose Virtual Machine Settings.
To expand the hard drive, choose the virtual hard disk device from the list, click the Utilities icon, and then click Expand.
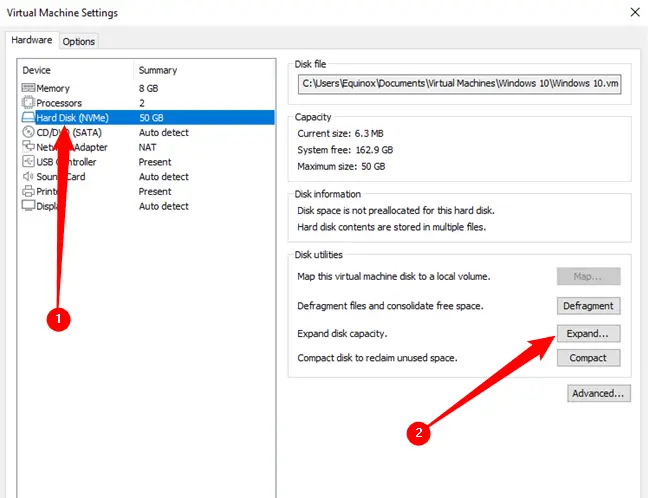
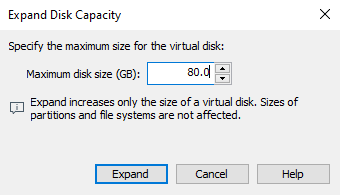
Click the Expand button after entering a bigger maximum disk size. VMware will expand the size of your virtual drive while keeping the partitions the same size – read below for more details on extending the partition.
Increase the size of the Virtual Machine’s partition
You now have more virtual hard drive space. However, since your virtual hard disk’s operating system partition is the same size, you won’t be able to use any of this space just yet.
You must now extend the guest operating system’s partition as if you were expanding a partition on a physical hard drive. You cannot expand the partition while the guest operating system is active, just as you cannot expand your C: partition while Windows is active on your machine.
You can enlarge your virtual system’s partition using a GParted live CD – just boot the GParted ISO image on your virtual machine and you’ll be directed to the GParted partition editor in a live Linux environment. GParted will be able to increase the size of the partition on the virtual hard drive.
First, get the ISO file for the GParted live CD from here.
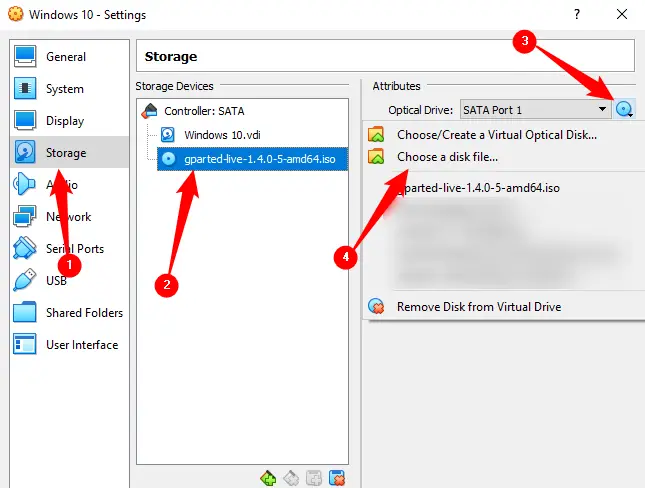
Load the ISO file into your virtual machine by navigating to the settings window of the virtual machine, choosing your virtual CD drive, and browsing to the ISO file on your computer.
After inserting the ISO image, boot (or restart) your virtual machine, and the virtual machine will boot from the ISO image. While launching, GParted’s live CD will ask you numerous questions; click Enter to skip them and return to the default choices.
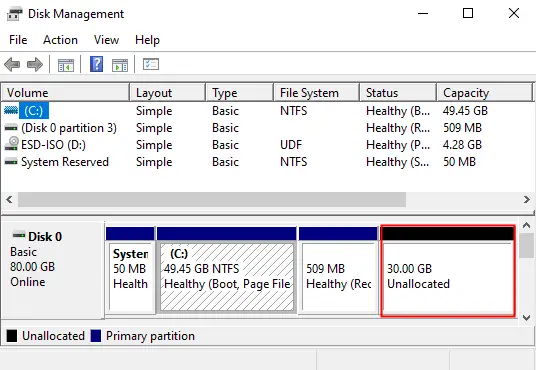
Examine how the virtual disk is partitioned after booting GParted.
Not all operating systems will result in disks partitioned in this manner, but there is a significant possibility you may see something similar. When doing this, keep an eye on the existing partitions – expanding, reformatting, or removing a partition recklessly might result in an unworkable virtual machine.
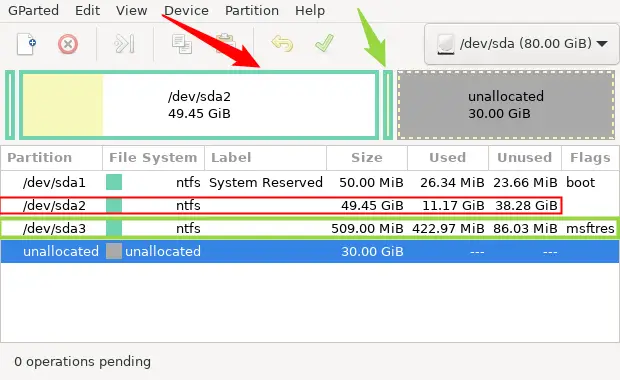
The layout of the divisions is critical. The device has three partitions and 30 GB of unallocated space.
The boot sector, or EFI System Partition, is located on the first partition, sda1. The “main partition” is the second partition, sda2. The partition we wish to extend is the one dedicated to the Windows operating system. The red arrow and red box in the image above indicate this.
Tip: In general, the size of your main partition will be near to the overall size of the initial virtual disk you established.
Keep in mind that there is a third partition, sda3, in between the partition you wish to enlarge and the previously generated unallocated space. Because of the location of sda3, we cannot simply extend sda2 into the unallocated space. The third partition is physically in the way, so we’ll have to relocate it first.
Right-click sda3 and choose “Resize/Move.”
Please keep in mind that it may not be sda3 for you. You’re just searching for any partition that exists between the main partition and unallocated space.

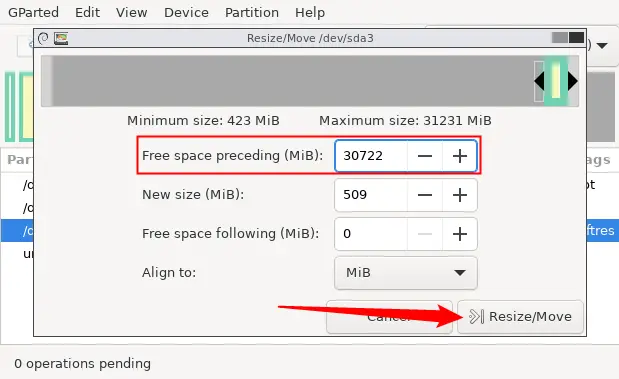
A new window will emerge, allowing you to move the partition.
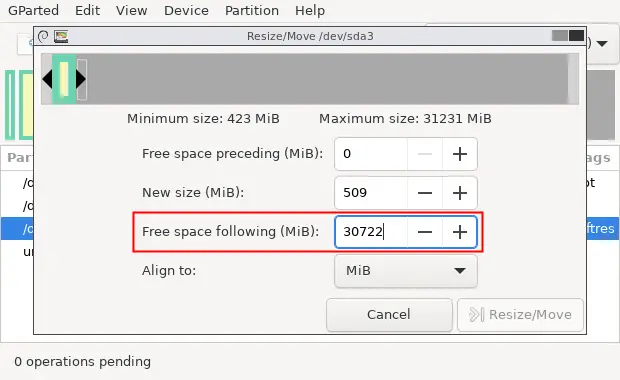
Take notice of what is shown on the screen. Following the msftres partition, there is 30,722 MB of free space. We need to shift sda3 all the way to the opposite side of the available area if you want it out of the way. Click the “Free Space Preceding” box, type “30722,” and then click “Resize/Move.” This is how it should look:
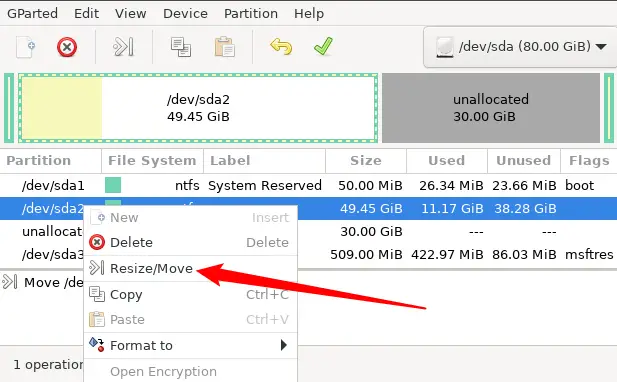
Now that sda3 is scheduled to be relocated to the end of the unallocated space, we may enlarge sda2. Right-click sda2 and choose “Resize/Move.”
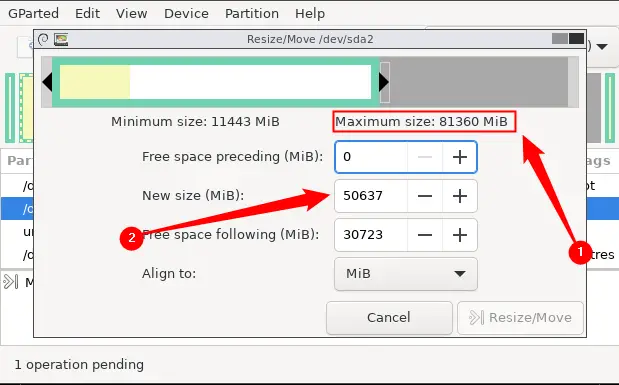
Enter the number following “Maximum Size” into the “New Size” column, or drag the slider to the right all the way.
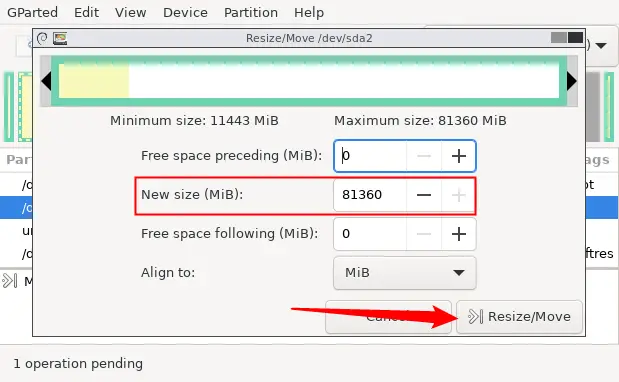
If you did everything successfully, the value for “Maximum Size” should now be in the “New Size” box. To complete the alteration, click “Resize/Move.”
To apply all of your changes, click the green check mark button towards the top. Depending on how many move or resize operations you have queued and how fast your computer is, applying the adjustments may take a few minutes. Don’t be concerned if you have to wait.

Restart your virtual system and delete the GParted ISO file after the resizing procedure is complete. Windows will inspect the file system in your virtual machine to confirm it is operational; do not stop this process.
The virtual machine’s partition will now occupy the whole virtual hard drive, giving you access to the extra space.
