Introduction
Adding additional fonts to Windows 10 is a simple and fast method to personalize your computer and documents. Your freshly loaded fonts will be accessible in Microsoft Office apps such as Word and other Windows applications such as Adobe Photoshop.
On the internet, there are dozens of different typefaces to choose from.
Google provides a significant number of free fonts, while other websites, such as fonts.com, provide both free and expensive fonts. Most fonts are sent in the form of a RAR or ZIP file containing the font files.
How to Use File Explorer to Install a Font
After you’ve downloaded a font package, you’ll need to go to your downloads folder to install it. You may either extract the fonts into a folder or double-click on them to install them straight from the package. Either option is viable.
To get the fonts out of the archive, right-click on the file and choose “Extract All.”
- Note that “Extract All” just extracts the ZIP file using File Explorer, which is the default in Windows 10. Other programs, such as 7-Zip or WinRAR, will operate in the same way.
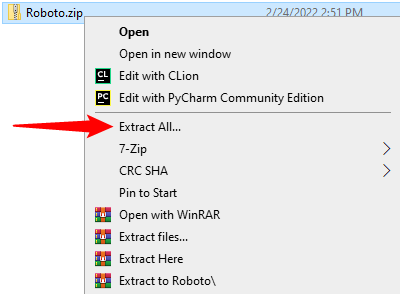
In the new window that appears, click “Extract.” You should generally ignore the path; by default, it just creates a new folder with the archive’s name.
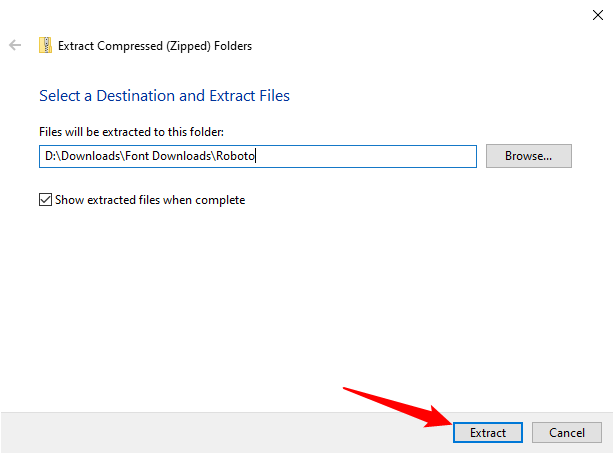
Select the fonts you wish to install and double-click them. In the pop-up box, click “Install,” then click the “X” in the top-right corner to dismiss it.
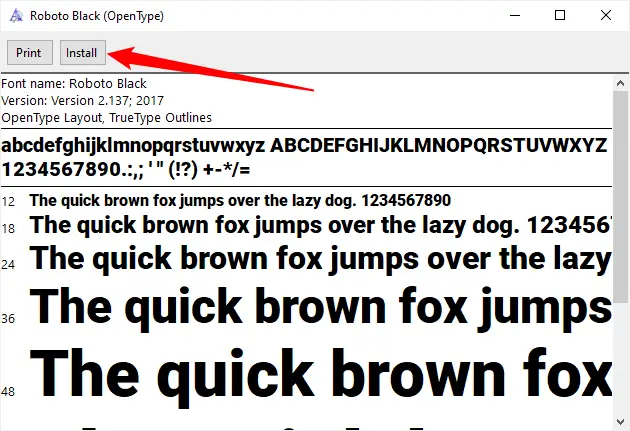
Some font packages include different variations of the font you downloaded, such as bold or italicized versions. You may double-click each one and choose “Install” from the drop-down menu.
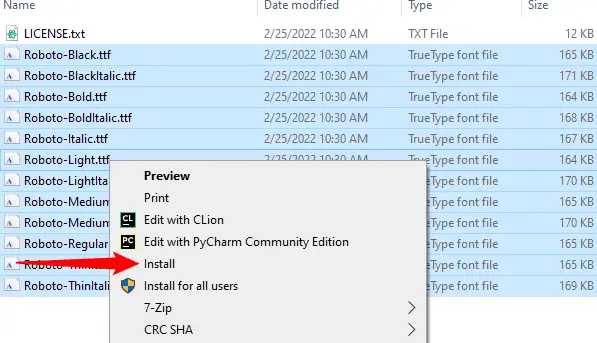
You may also install them all at once if you choose. To install them all at once, you must first choose them all. To do so, choose the first font from the list, then press and hold the “Shift” key while selecting the final font. If you like, you may also drag to choose them. It doesn’t matter how you do it as long as they’re all chosen. This is how it should look:
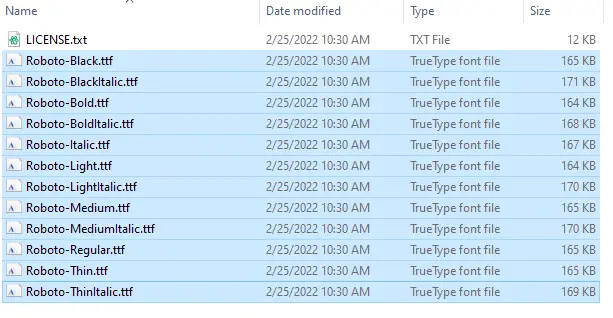
Then, right-click on any of the font files’ names. If your computer has numerous user accounts, you may wish to choose “Install for All Users.” If not, just click “Install.”
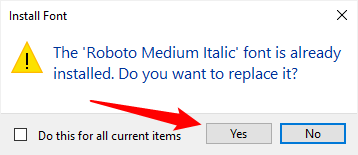
You’ll see a popup warning if you’ve already installed some of the fonts. Allow it to continue by clicking “Yes.”
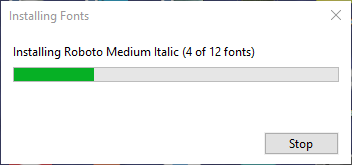
Another window will show the installation’s progress. Your fonts will be installed and ready to use after it vanishes.
How to Use the Fonts Menu to Install a Font
Click Start, put “fonts” in the search field, and then press Enter to install a font from the fonts menu. You may also go to Settings > Personalization > Fonts to get there.
Right-click the font archive file in your Downloads folder and choose “Extract All.”

In the new window, choose “Extract.” Unless you want it to go someplace particular, you should leave the extraction folder name alone. The archive file’s name will be the same as the folder’s name.

Double-click the newly formed Downloads folder. There will most likely be many font files in the folder, one for each font variation, such as bold or italics.
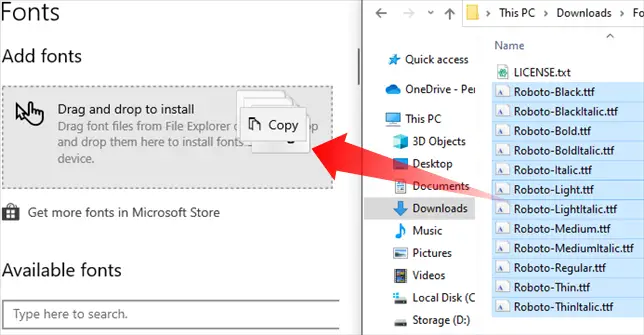
To snap the top bar of the Settings app to the left side of the screen, click and hold it and drag it to the left border of the screen. If you wish to snap the font folder to the right border of the screen, repeat the procedure. If you utilized the Snap function successfully, the Settings app should be on one side of your screen and the Font folder on the other. Although it isn’t exactly required, it does make things simpler.
By choosing the first font on the list, then holding shift and clicking the final font on the list, you may choose all of the fonts you wish to install. If you like, you may also drag to choose. Drag the fonts to the “Drag and drop to install” box by clicking, holding, and dragging them there. When the “Copy” sign appears, release your mouse.
The fonts you install on Windows 10 should be accessible to all of the apps on your PC immediately, regardless of the method you use.

