
Introduction
In default the cursor pointer is shown while typing, that’s ok. But sometimes it may distract your attention or block the view of the text, if you are suffering from this little annoyance in your computer life, it’s time to fix it. In this article, I will show you how to hide the cursor pointer while typing both in Windows 10 and Windows 11.
Methods
Things you should know before hiding cursor pointer while typing.
In general, there are two ways to do this. Using windows’ built-in option or a third-party app. The first way only works on certain apps like Notepad, Wordpad, and Microsoft Word. You may be wondering Why? The answer is simple because these apps were all developed by Microsoft Corporation themself. So, if you want this work on all apps includes those apps developed by Microsoft, Use a free app called “Windows Cursor Hider”. You just need to open this little Executable file with a simple double-click and it will run in the background without an app window or anything. You can choose the way you like, it’s all up to you.
Hide the cursor pointer while typing in windows 10 for certain apps.
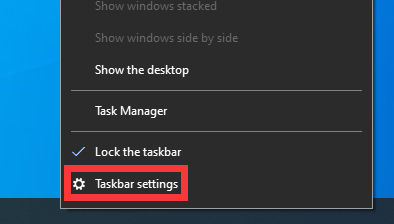
To hide the cursor pointer while typing, we need to access the “Mouse Properties” window. so there is little difference to make this in windows 10 and windows 11. For Windows 10, place the cursor pointer on the taskbar and then right-click, in the pop-up context list choose “Taskbar settings”.
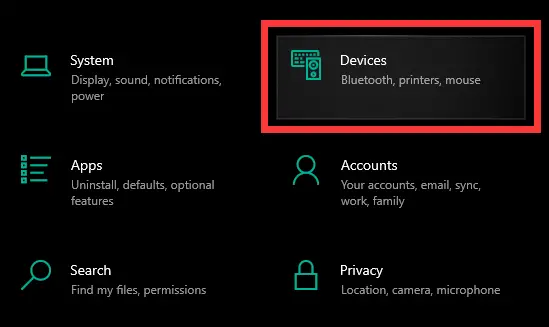
We need to locate it on the homepage of the System setting first, so click the “Home” on the left up corner, then click the “Devices” button on the homepage.
- You can access the homepage of the system setting by pressing the short key “Windows + I”.
- Right-click the start button on the left bottom corner of taskbar, then click “Settings” can also acess the system setting page.
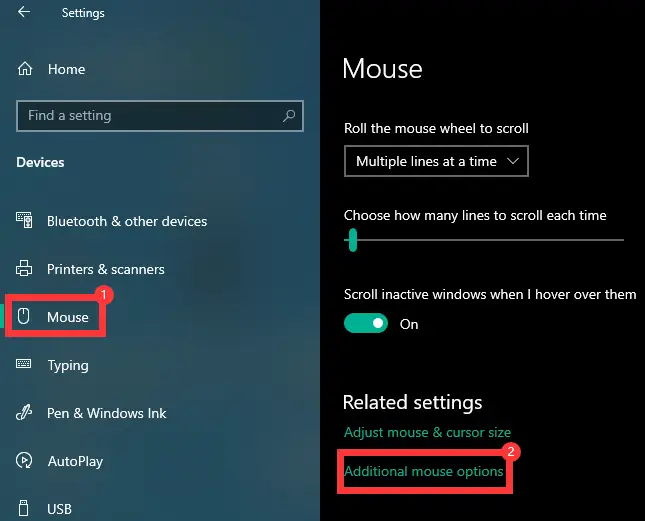
In the area to the left, click the Mouse button and then scroll down in the right area until you find “Additional mouse options” in the “Related settings” section, click it.
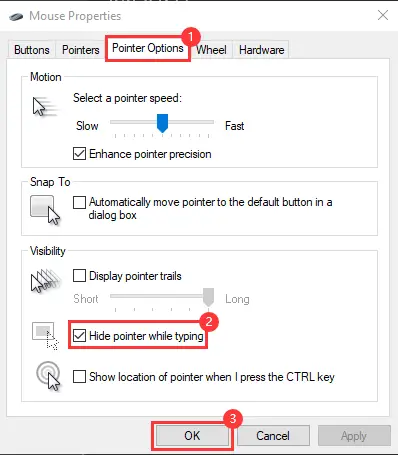
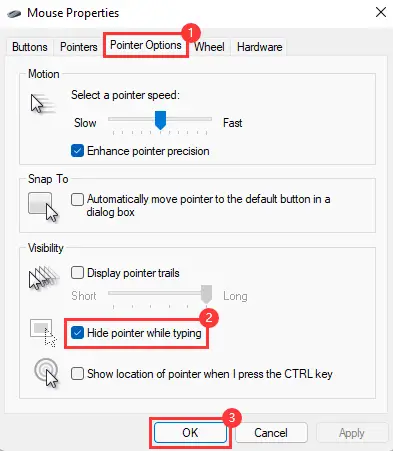
Now, finally, we access the “Mouse Properties” window, select “Pointer Options” in the tabs above, then enable the checkbox before “Hide pointer while typing” in Visibility section. Then click the “Apply” and “Ok” buttons. That’s all in Windows 10.
Hide the cursor pointer while typing in windows 11 for certain apps.
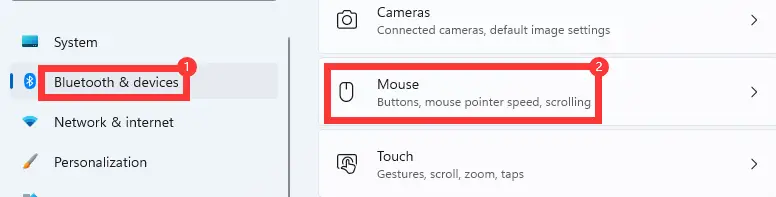
Now, in Windows 11 press the short key “Windows + I” to access the System settings fast, then in the menu to the left, click “Bluetooth & devices”, and then you will see a “Mouse” button in the right section, click it.
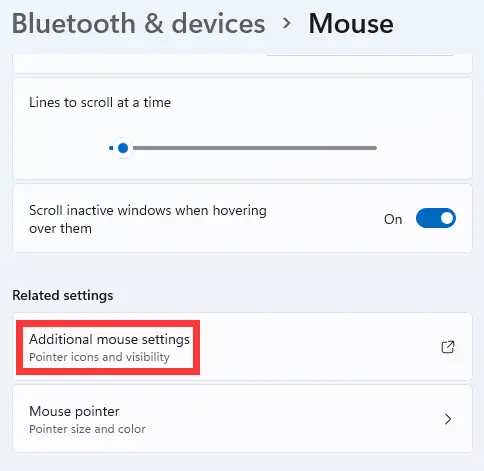
Scroll down in the right section and then click “Additional mouse settings” button in the “Related settings” section.
Now the “Mouse Properties” window was opened, select “Pointer Options” > “Enable the checkbox before “Hide pointer while typing” ” > “Apply and OK”.
Hide the cursor pointer while typing in all apps.
There is an app called “Windows Cursor Hider” in Github, which can be used to disable the cursor pointer while typing in all apps. so first download it by clicking here. When you launched this page, find the button named Code with a green background color, then at the bottom of the context list click the “Download ZIP” button, it will start downloading.

When the download is completed, you will get a zip file, unzip it, under the folder named “executable” you will get this app. Double-click it will start running without an app window.
- File path: “\Windows-Cursor-Hider-master\executable”

Now, you will find it in your computer’s system tray, to test if it works, open your browser or any other apps and type some words. Normally, the cursor pointer will hide while you typing, when you move the mouse or trackpad the cursor pointer will appear again.

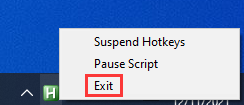
It’s simple to disable it, right-click the icon on the right bottom area of the taskbar, in the shown menu select “Exit”. That’s all, may this article be helpful, good luck.
Conclusion
So it’s simple. If these apps you use frequently were developed by Microsoft, then you can use the Windows built-in option to do this, otherwise use the third-party app.