
Introduction
Windows Update, for the most part, operates quietly in the background. It automatically gets updates, installs those it can, and stores the remainder for when you restart Windows. However, it does sometimes break and cease operating. Here’s how to troubleshoot Windows Update when it becomes stuck or frozen.
This may occur on Windows 7, 8, 10, or 11, however it is more prevalent on Windows 7. Sometimes updates fail, and other times Windows Update just remains “looking for updates” indefinitely. Here’s how to troubleshoot Windows Update.
- Warning: Windows updates are critical. No matter what problems you’re experiencing, we urge that you keep automatic updates enabled – it’s one of the greatest methods to protect yourself against ransomware and other dangers. If you disable automatic updates, you leave yourself open to new assaults.
On Windows 11, use a troubleshooter to repair Windows Update
Windows has a built-in troubleshooter that may be able to assist in the resolution of a stalled update. It’s the simplest approach to attempt, so try it first. The troubleshooter will look for issues that might cause Windows Update to fail, such as wrong security settings, missing or damaged files, or service difficulties.
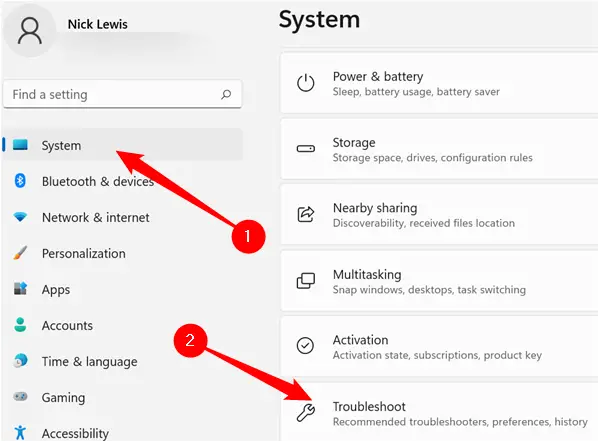
The same troubleshooter is used by all recent versions of Windows, however the mechanism for obtaining it differs significantly across Windows versions. It may be accessed in Windows 11 by going to Settings > Troubleshoot > Other Troubleshooters.
Click Start, then enter “Settings” into the search box and press Enter. Scroll down until you find “Troubleshoot,” then click on it.
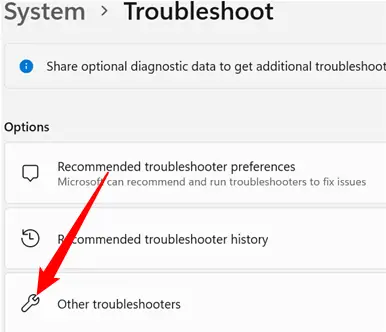
Within the “Troubleshoot” panel, choose “Other Troubleshooters.”
Other Troubleshooters combines the majority of the troubleshooters that come with Windows into a single area. We’re seeking for a “Windows Update” troubleshooter. You’ll need to scroll down a little to locate it if you’ve never used it before. Otherwise, it’s possible that it’s in your “Frequents” list. When you’ve found it, press the “Run” button.
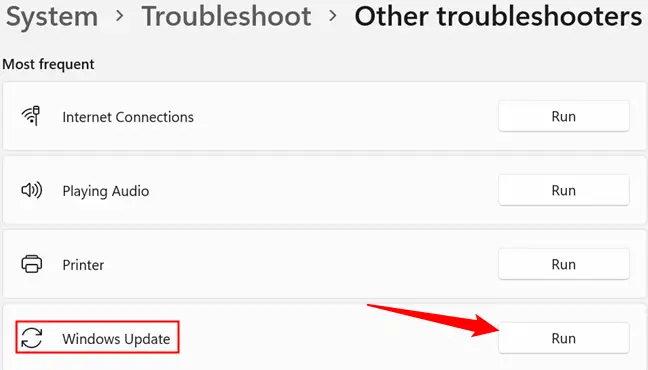
When the troubleshooter begins, follow the on-screen instructions.
On any version of Windows, use a troubleshooter to repair Windows Update
This troubleshooter is compatible with Windows 7, 8, and 10. As of March 2022, it is available through the Control Panel in all versions of Windows.
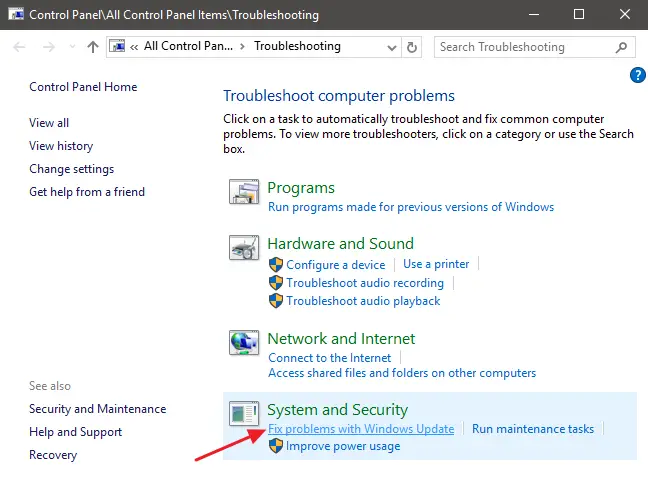
Click the Start button, search for “troubleshooting,” and then execute the “Troubleshooting” shortcut by clicking it or hitting Enter if it’s selected.
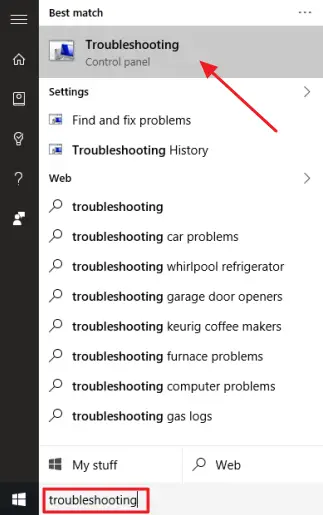
In the list of troubleshooters in the Control Panel, in the “System and Security” section, click “Fix difficulties with Windows Update.”
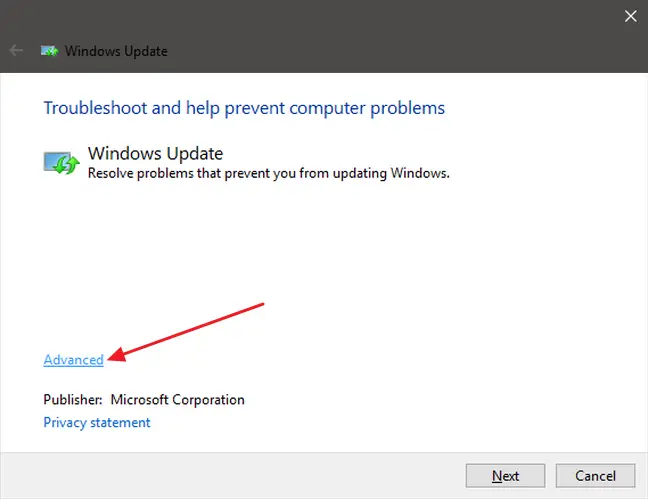
Click “Advanced” on the Windows Update troubleshooting box.
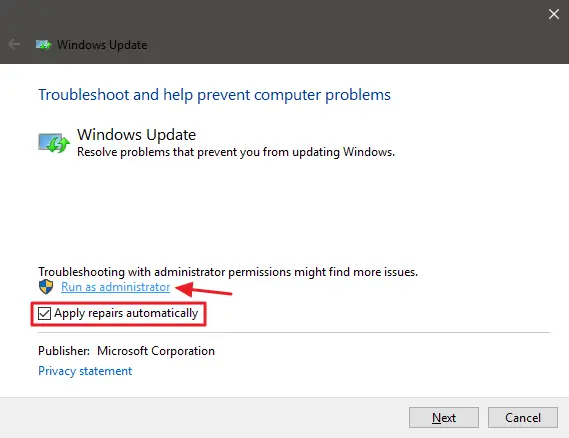
Make sure the “Apply repairs automatically” check box is enabled in the advanced options, then select “Run as administrator” and Next. Giving the program administrator capabilities allows it to erase files from the download cache.
The troubleshooter goes through its procedure and then informs you if it was able to detect and resolve the issue. The troubleshooter can usually effectively remove a stalled update from the queue. Try running Windows Update once again. Even though the troubleshooter indicates it couldn’t find the issue, it’s likely that the steps of starting and stopping the service, as well as deleting the cache, were sufficient.
Repair Windows Update by Manually Deleting Its Cache
If you’re still experiencing problems after running the troubleshooter (or if you prefer to handle things yourself), repeating the same steps manually may assist where the troubleshooter did not. We’ll also add the additional step of booting into Safe Mode first, simply to ensure that Windows can really let go of that cache of Windows Update downloads.
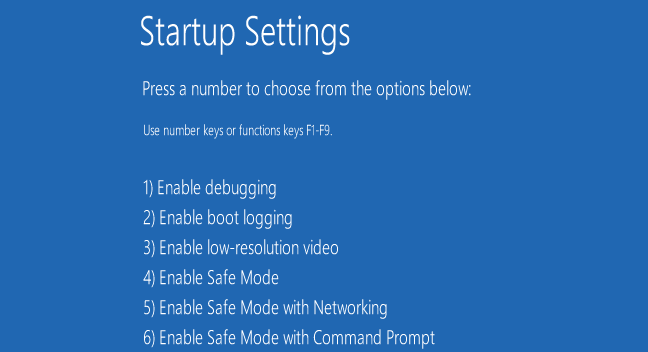
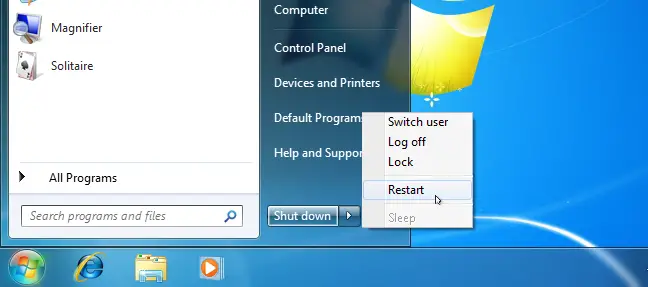
Begin by booting Windows into Safe Mode. Restart your computer and hit the “F8” key as it boots to reach the boot options menu, where you’ll see a “Safe Mode” option. Hold down the Shift key when you select the “Restart” option in Windows and travel to Troubleshoot > Advanced Options > Windows Startup Settings > Restart > Safe Mode on Windows 8, 10, and 11.
It’s a bit more difficult than it used to be on the newest versions of Windows, but it’s still rather simple. Of course, you could also take the effort to add Safe Mode to the Windows boot option to make things simpler in the future.
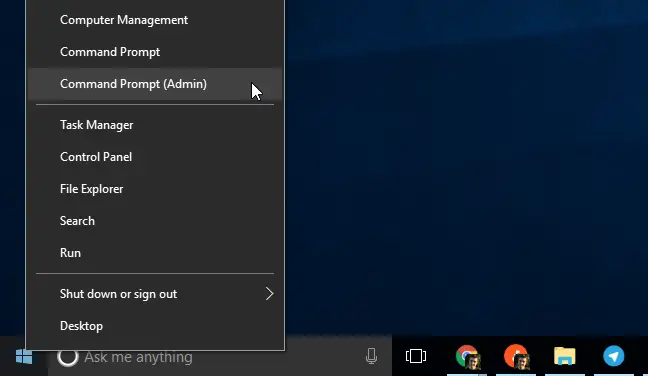
After you’ve entered Safe Mode, the next step is to stop the Windows Update service, which is simplest to perform through the Command Prompt. In Windows 7, click the Start menu, search for “Command Prompt,” and then start the Command Prompt shortcut. It’s also accessible through Start > All Programs > Accessories > Command Prompt. To enable it to run with administrator rights in Windows 8, 10, or 11, right-click the Start menu (or press Windows+X), choose “Command Prompt (Admin),” and then click Yes.
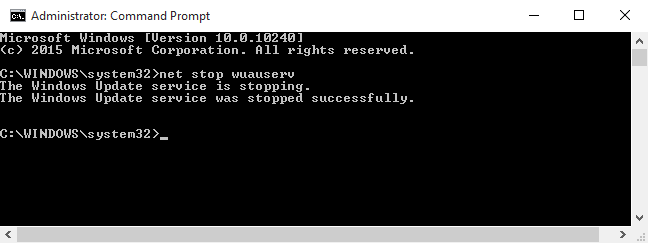
To stop the Windows Update service, run the following command into the Command Prompt and press Enter. Allow the Command Prompt window to remain open.
net stop wuauserv
Then, launch File Explorer and browse to C:WindowsSoftwareDistribution. Delete every file in the folder. Don’t be concerned. There’s nothing important here. The next time you run Windows Update, it will regenerate what it need.

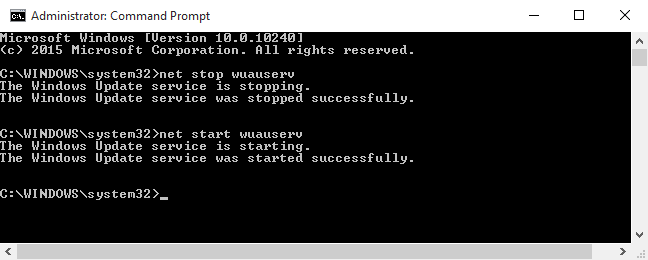
You will now restart the Windows Update service. Return to the Command Prompt window and enter the following:
net start wuauserv
After the service has been restarted, you can exit Command Prompt and restart Windows in normal mode. Give Windows Update another shot and see if your issue has been resolved.
Update the Windows Update Service on Windows 7
If you’re installing Windows 7 from scratch, you’ll discover that Windows Update takes an inordinate amount of time to scan for updates. This can also happen if you haven’t checked for updates in a while, even if your Windows 7 system was installed a long time ago. This happens even if you install Windows 7 from a CD or USB device that has Service Pack 1, which you should. SP1 is included in Microsoft’s official Windows 7 installation media files.
Microsoft has recently issued formal advice on how to resolve this issue. According to Microsoft, this issue arises because Windows Update itself requires an update, creating a bit of a catch-22 situation. If you install the most recent Windows Update updates, the operation should go more smoothly.
Here are Microsoft’s official troubleshooting guidelines.
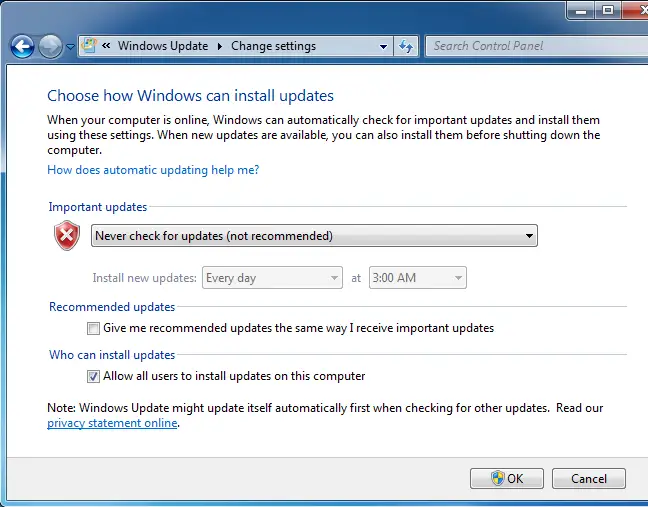
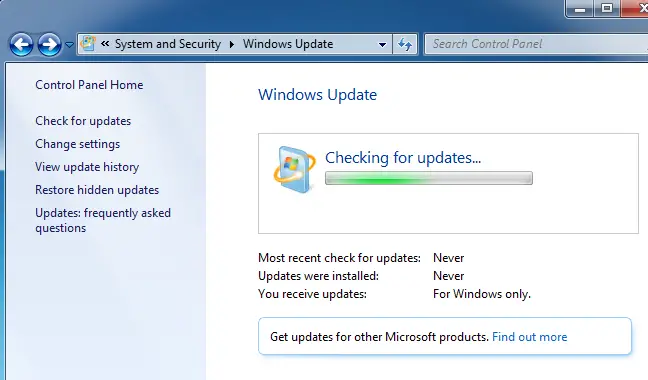
To begin, launch Windows Update. Navigate to the Control Panel > System and Security > Windows Update tab. In the sidebar, click the “Change Settings” link. In the selection box, choose “Never Check For Updates (Not Recommended)” and then click “OK.”
After changing this option, restart your computer.
After restarting the computer, you must manually download and install two Windows 7 updates. You must first determine whether you are running a 32-bit or 64-bit version of Windows and then download the necessary updates for your computer.
Download the following updates for Windows 7 64-bit editions:
- KB3020369, April 2015 servicing stack update for Windows 7 (64-bit version)
- KB3172605, July 2016 update rollup for Windows 7 SP1 (64-bit version)
Download the following updates for Windows 7 32-bit editions:
- KB3020369, April 2015 servicing stack update for Windows 7 (32-bit version)
- KB3172605, July 2016 update rollup for Windows 7 SP1 (32-bit version)

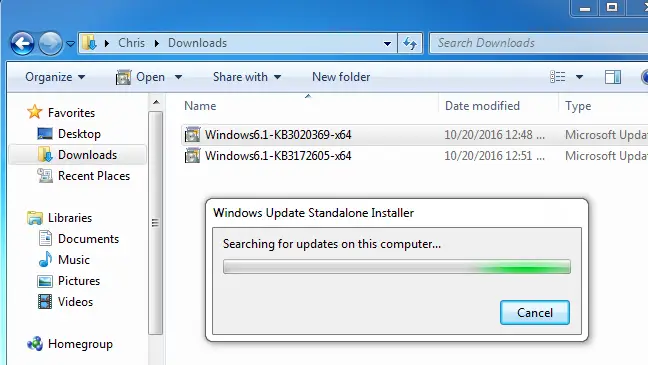
To begin, double-click the “KB3020369” update to install it.
After the first update has completed, double-click the “KB3172605” update to install it. As part of the installation procedure, you will be prompted to restart your computer. Microsoft recommends waiting ten to twelve minutes after it resumes to enable the procedure to complete.
When you’re finished (remember to wait ten to twelve minutes after resuming), return to the Windows Update window by going to Control Panel > System and Security > Windows Update. Set it back to Automatic by clicking “Change Settings” (or choose your desired setting).
To have Windows check for and install updates, click “Check for Updates.” According to Microsoft, this should have resolved your issues, and Windows Update should now function regularly and without excessive delays.
Get the Convenience Rollup for Windows 7
Microsoft has also released a Windows 7 “convenience rollup.” Except for the name, this is effectively Windows 7 Service Pack 2. It combines a big number of updates that would ordinarily take a very lengthy time to install. This bundle contains updates published from February 2011 through May 16, 2016.
Instead of waiting for Windows Update, download the convenience rollup and install it to speed up the upgrading of a new Windows 7 machine. Unfortunately, Microsoft does not provide the update rollup through Windows Update–you must go out of your way to get it. But it’s simple to install if you know it exists and that you’ll have to seek for it after installing Windows 7.
After you install this, there will be many less updates to install through Windows Update, thus the procedure should be considerably quicker. Check out our installation instructions for the Convenience Rollup here.
Manually Download Updates for Windows 7, 8, or 10 WSUS Offline Update
Update, 3/11/22: In Version 12, WSUS Offline Update no longer supports Windows 7. If you still have Windows 7, previous versions of WSUS may be downloaded. WSUS does not support Windows 11.
If none of the stated remedies worked, we have another solution that has previously worked for us. It’s a third-party application called WSUS Offline Update.
This utility will download and install available Windows Update packages from Microsoft. Run it once, let it download and apply the updates, and Windows Update should operate properly after that. This has previously worked for us when none of the other alternatives had.
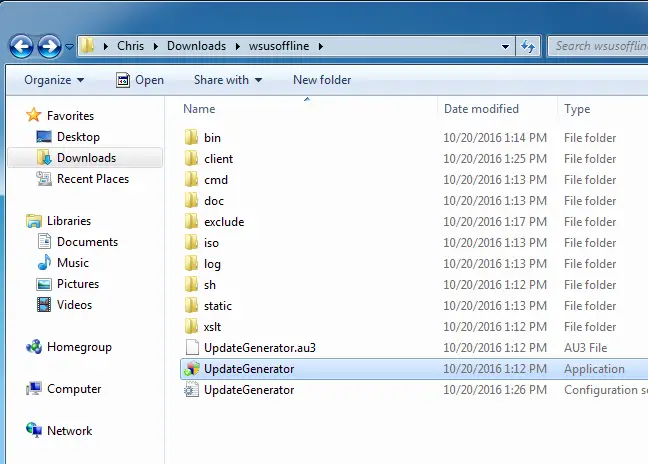
Download WSUS Offline Update, unzip it to a folder, then launch the UpdateGenerator.exe program.
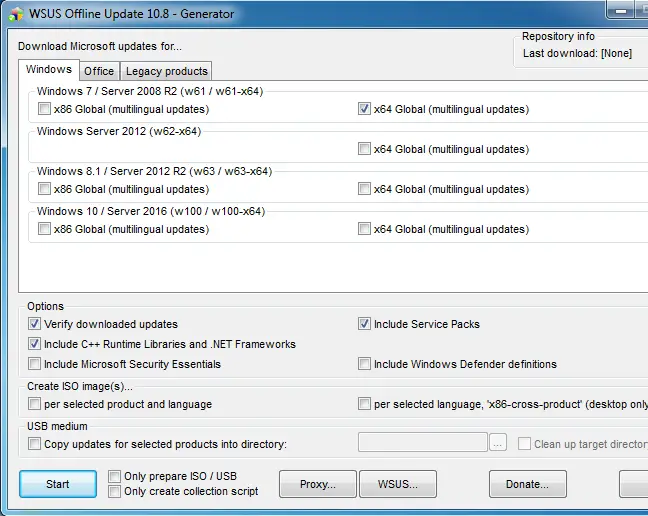
Choose your Windows version–”x64 Global” if you’re running a 64-bit edition, or “x86 Global” if you’re running a 32-bit edition. After that, select “Start” to begin downloading updates from WSUS Offline Update.
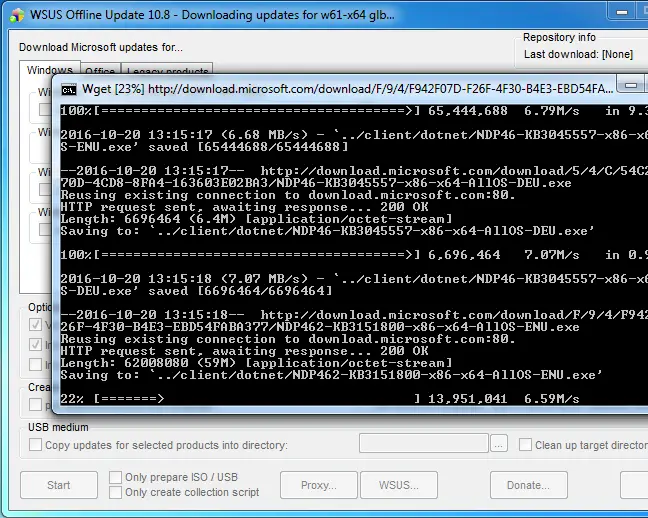
Allow time for the updates to download. If you’re installing Windows 7, there will be a lot of updates, so this might take a long. It is determined by the speed of your Internet connection and the availability of Microsoft’s download servers in your area.
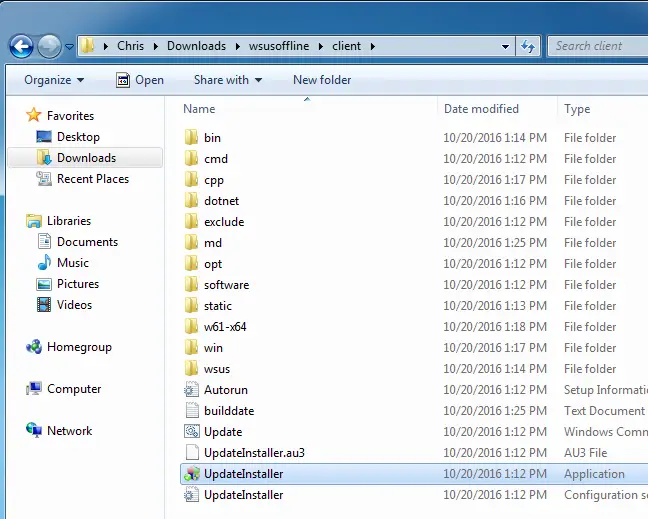
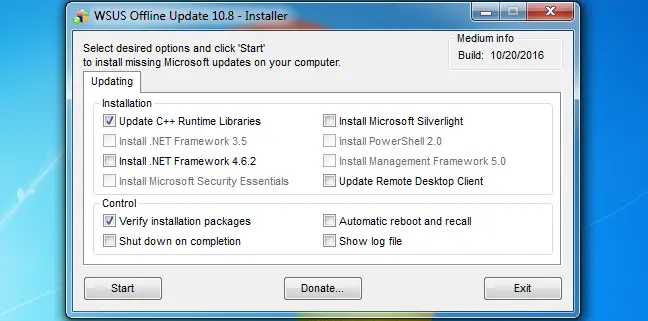
After downloading the updates, open the “client” folder in the WSUS Offline folder and execute the UpdateInstaller.exe program.
To install the downloaded updates, click “Start.” Windows Update should resume regular operation after the utility has completed applying the updates.
This should get a little simpler in the future. Microsoft revealed changes to the way Windows 7 and 8.1 are “serviced,” or updated, in October 2016. Microsoft intends to distribute fewer minor updates and more huge update packages. It will also start aggregating prior updates into a monthly update rollup. This means that fewer individual updates will need to be deployed, and upgrading freshly installed Windows 7 computers should get quicker over time.
Manually Download Microsoft Updates
If you’re running Windows 11, or if the other options don’t work for you, you can always manually download updates from Microsoft.
You must first determine which updates have been made available for your operating system. Microsoft’s support site has a complete list of updates. For example, if you’re searching for updates for Windows 11, put “Windows 11 Update History” into the search field and press Enter. The first result is most likely the one you want – it should be precisely what you searched for.
On the left side of the update history screen, you can see every update that has been released for the operating system. By selecting one, you will be able to learn more about what the update does, when it was released, and whether it has any installation requirements.
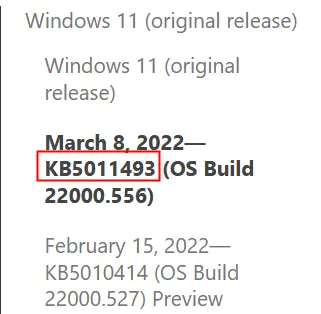
- It’s worth noting that the update name is normally KB followed by some digits, however this isn’t always the case.
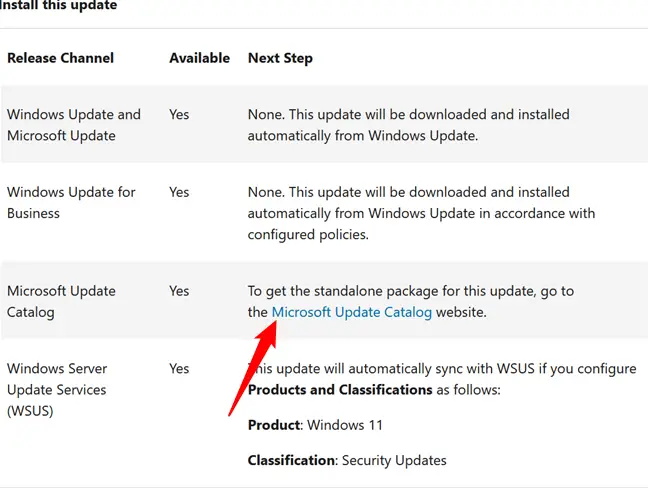
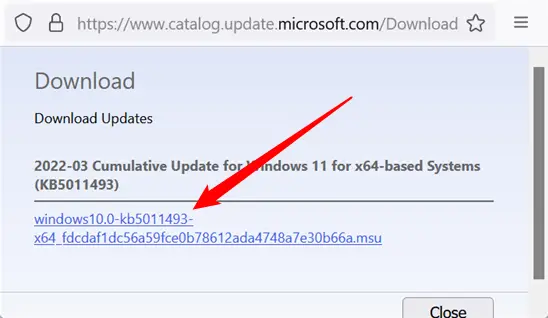
Select the update(s) you wish to download, then scroll down the page until you reach the “Install This Update” area. There will be a link to the Windows Update Catalog in this area. When you click the link, you’ll be transported to the precise update you need.
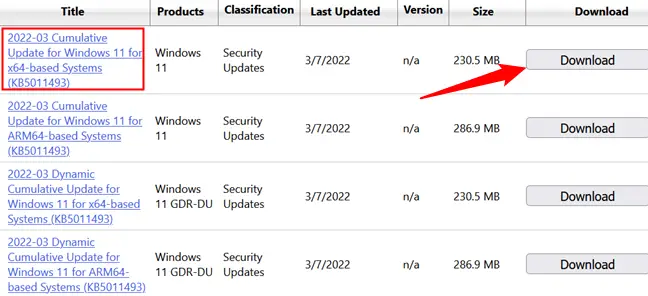
Examine the list to see which version of the update you need — if you’re using a desktop computer, you’ll need the one marked “for x64-based systems.” If you have a laptop or tablet, you should check to see what CPU it has. There are no AMD or Intel ARM-based CPUs as of March 2022, therefore if it is built by any of them, you may safely utilize the x64 upgrade. If you see Qualcomm, you will definitely need the ARM update.
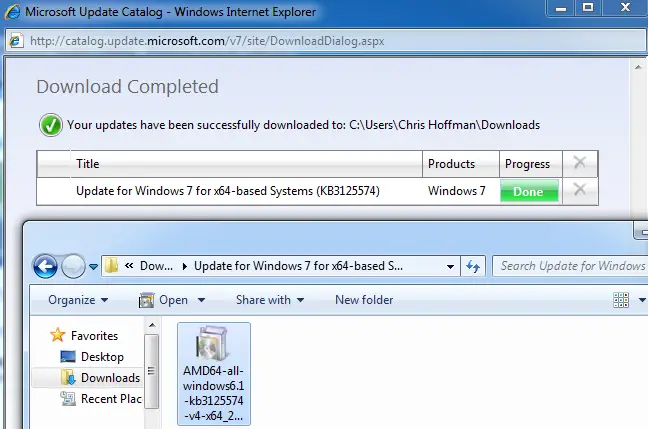
For the right update, click “Download.”
- It is important to note that downloading the incorrect update will not damage your machine. It will just refuse to install.
Click the file name in the box to begin the download, and then wait a few minutes – Windows updates are often several hundred gigabytes in size, so it may take a few minutes.
To access your downloads, use Ctrl+j, and then double-click the file you just downloaded. It will verify your system and then urge you to accept the installation; click “Yes.”
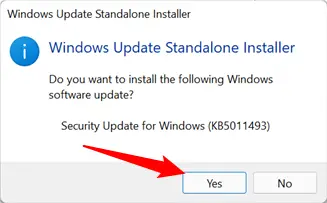
After the installation is complete, restart your computer to allow the update to take effect.
If you’re going to manually install updates, you’ll need to be very careful. Every day, new vulnerabilities are found, and keeping Windows updated is one of the greatest ways to protect yourself.