Introduction
Many websites have tight limits about the size and kind of picture file you may post. Because JPG is the most often used file format on the internet, we’ll look at how you can convert your photographs to JPG format.
What Exactly Is a JPG File?
JPG (or JPEG) is a popular image and graphics file format, particularly on the internet. The Joint Photographic Experts Group (JPEG) developed it, and it employs a compression method that divides a picture into blocks of pixels. Depending on your settings, it may compress up to a 10:1 ratio without significant damage. This is one of the primary reasons why JPG has become the de facto standard for online photos.
However, all of that compression comes at a cost.
JPGs are a “lossy” file format, which means that unnecessary blocks are permanently removed during the compression process. The more data you lose while compressing a file, the worse your final picture will seem after repeated cycles of the process.
Here’s an example of a picture that has been significantly compressed.

Nonetheless, when utilized correctly, JPG produces good-looking photos with tiny file sizes. Because of its capacity to compress images at such a rapid pace, whether you’re sending one in an email, posting a joke on Reddit, or uploading your vacation photos to Facebook, your final file is a fraction of its original size.
Converting an Image to JPG Format
You may convert a picture to JPG format on your computer by utilizing an image editing tool or one of the numerous file conversion websites accessible on the internet.
Windows Image to JPG Conversion
Most image-editing software lets you convert a picture to JPG. Unfortunately, the Photos app that comes standard with Windows 10 isn’t one of them. You may use Paint (or Paint 3D) to achieve it, or you can use a third-party picture software.
IrfanView is our go-to program for rapid picture editing. It’s free, can open practically any file, has some basic editing features, and is really quick. We’ll use it as an example here, but the procedure is similar in other applications.
Begin by launching the program in which you wish to transform the picture. All we’ll be doing is storing the app as a different file format, so you should be able to follow along regardless of the app you have.
Click the “File” menu, followed by the “Save As” instruction.
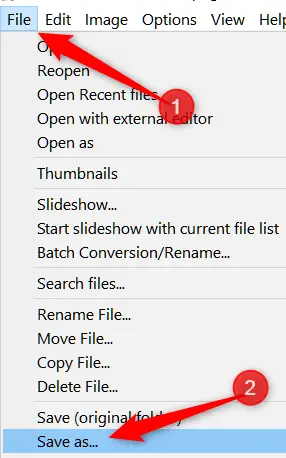
Choose JPG from the “Save As Type” drop-down selection in the Save As box, then click the “Save” button.

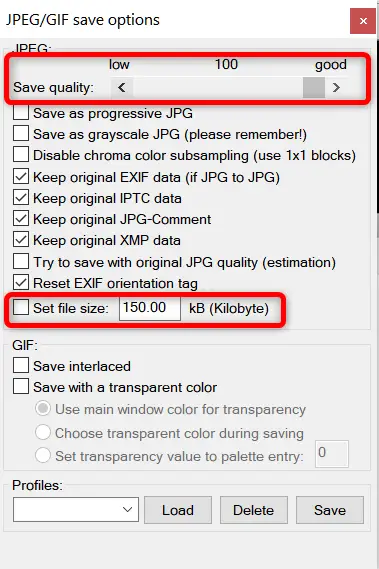
If you wish to convert straight to JPG, the default quality is great, but if you want a bit more control over the compression of your file, the Save Options box includes a number of extras to check out. The picture quality is selected in the same way as the compression rate is—the greater the quality, the less your image is compressed and the larger the file. IrfanView also has a handy function that allows you to establish a file size restriction.
MacOS Image to JPG Conversion
Preview is pre-installed on Mac and may be used for more than simply viewing picture files. It’s an excellent picture editing tool that can crop, resize, and convert images.
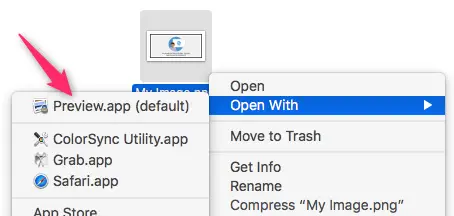
Select a picture in Finder, press the Spacebar, and then click the “Open with Preview” button to open it in Preview. You may alternatively right-click the file, choose “Open With,” and then select the “Preview” option.
Click the “File” option in the Preview window, then the “Export” command.
Select JPEG as the format and use the “Quality” slider to alter the compression used to save the picture in the window that appears. Higher compression results in a reduced file size, but it also reduces picture quality. When you’re finished, press the “Save” button.
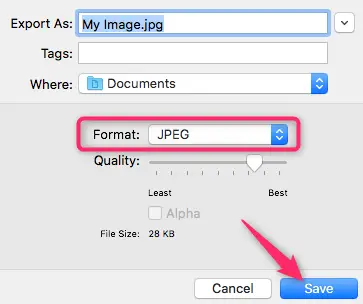
The new JPG file is saved in the same place as the original picture by Preview.
Online Image Conversion
Look no farther than Convertimage.net if you prefer an online file converting service than a desktop tool. The service is devoted to converting photographs — not only JPGs — while respecting your privacy. ConvertImage does not publish or maintain any of your files for more than 15 minutes before removing them from their servers.
First, choose the format in which you want your photograph stored.
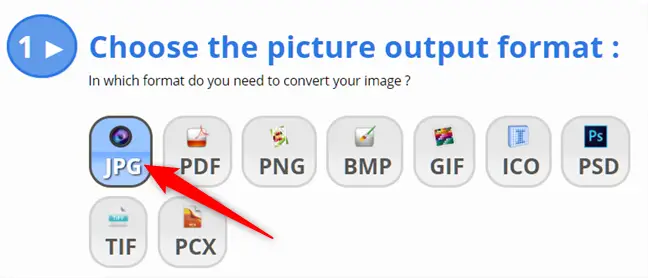
Then, click the “Select Your Image” option.

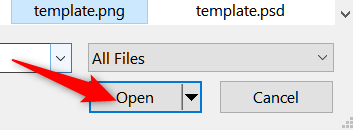
Navigate to the picture you wish to convert and press the “Open” button. It should be noted that the site allows photos up to 24.41 MB in size.
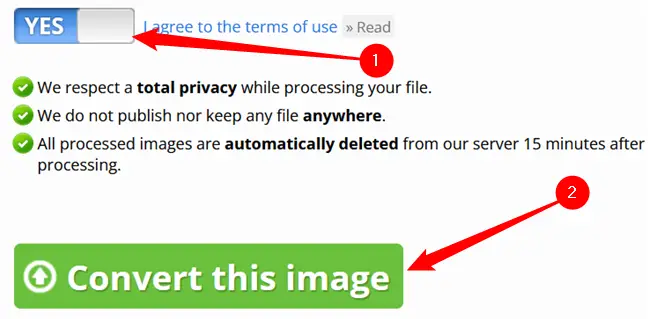
All you have to do now is accept their terms of service and click the “Convert This Image” button.
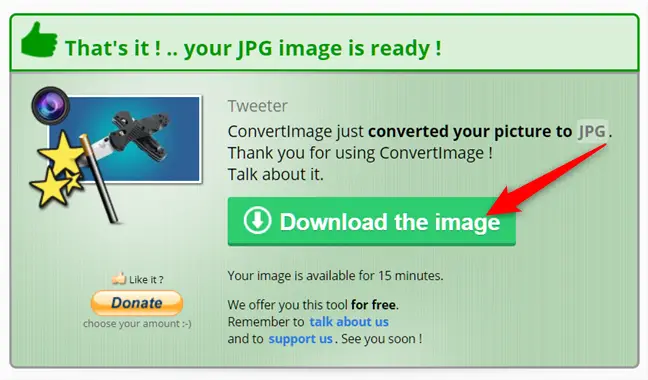
After your picture has been converted, click “Download The Image” on the following screen, and your JPG will be stored to your browser’s downloads folder.
Now that all of your photographs have been securely converted to internet-friendly format, you may take your JPGs and post them anywhere you want without worrying about the format.

