")
Introduction
The great majority of Windows programs save backups and large data folders on the main drive. Backups eat up valuable space on your Solid State Drive (SSD), which is a less-than-ideal circumstance. Continue reading to learn how to transfer backups to a data drive.
What Motivates Me to Do This?
Most individuals now use a fast Solid State Drive (SSD) as their main drive. These drives are noted for their quick reaction time rather than their large storage capacity. It makes little sense to keep large and seldom accessible data on your SSD, such as backup files for your iPhone and iPad.
Furthermore, if the main drive does not have adequate capacity, several program functionalities will fail completely. Internal storage in modern iPhones and iPads is measured in hundreds of gigabytes. A few full backups may leave a significant hole on an ordinary SSD. Even while SSDs are becoming bigger and less costly, they still cost more per gigabyte of storage than traditional hard disk drives as of August 2022, making hard disk drives particularly desirable for storage-intensive applications.
In today’s article, we’ll look at a fast and easy solution for Windows users to migrate their iTunes backup and/or data directories (or any other Windows program that doesn’t allow in-app backup/data directory changes) to a secondary drive.
What do I require?
This lesson requires very minimal equipment. The tools for changing the placement of directories in Windows are built right in.
The only thing else you’ll need is a secondary disk to save the backup data on. We’ll be relocating our backup data to the F: drive for this lesson, but any big disk that isn’t your operating system disk will suffice.
Finally, although we’ll be transferring the iTunes backup directory to our secondary disk, you can use this approach to move any big data or backup directory from your tiny main disk to a larger secondary disk – just identify the data directory on your primary drive and alter the instructions appropriately.
Symbolic Links are used to move the Backup Directory.
The symbolic connections system is the magic that powers the whole process. A symbolic link is essentially a sophisticated shortcut that is invisible to the requesting program. iTunes will never be the wiser when we relocate the iTunes backup directory (but the iTunes data will end up on the secondary disk). For additional information on symbolic links, see our Complete Guide to Symbolic Links (symlinks) on Windows or Linux. Otherwise, let’s get started.
Establish a New Backup Directory
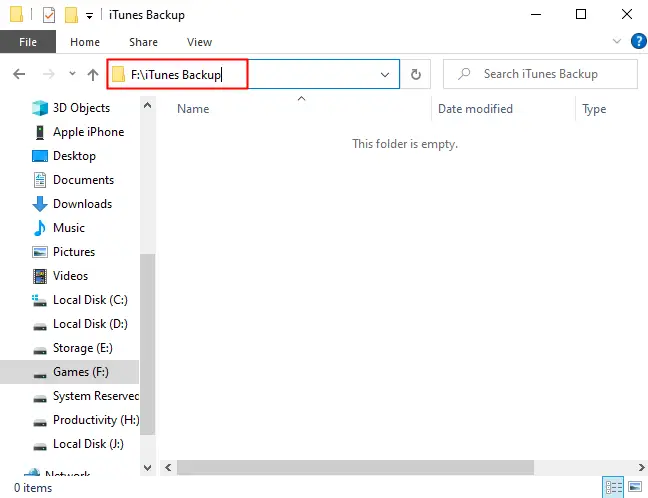
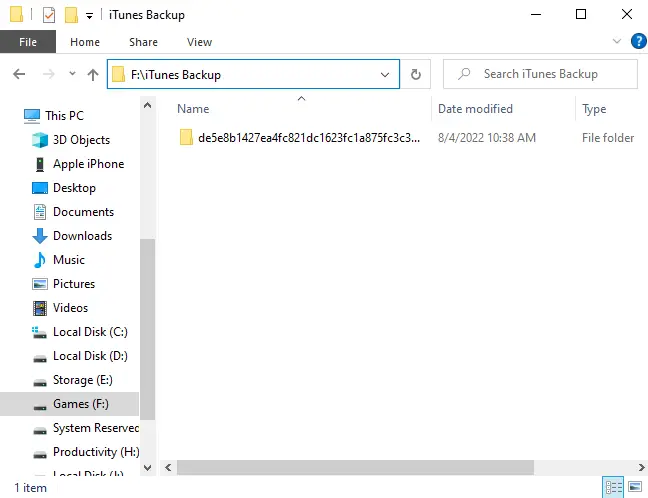
We need a new backup directory before we can refer an application to it. As previously said, we will redirect iTunes to the F: drive. In light of this, we’ve established a new folder on the F: disk called “iTunes Backup.” Make a backup folder on your secondary disk right now.
Find and rename the current backup directory.
We must identify and rename the current iTunes backup directory.
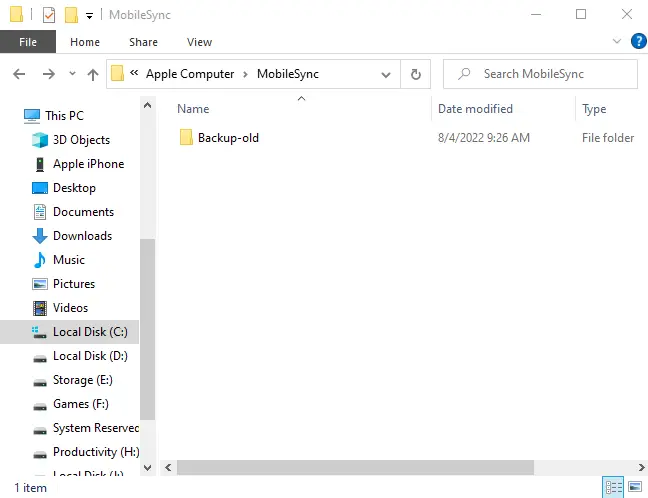
Then, click the Start button and type the following into the search box:
“%APPDATA%\Apple Computer\MobileSync”
This will take you to the iTunes backup folder. Within that folder, there is a folder simply labeled “Backup.” Rename the backup folder “Backup-Old.”
Launch a Command Prompt
Hold down the Shift key and right-click the current folder (/MobileSync/) in the File Explorer window. Choose “Launch Command Window Here” to open a Command Prompt that is already focused on the current directory. You may also put “cmd” into the File Explorer address box and press Enter.
Make the Symbolic Connection
Any file path that includes a space must be enclosed in quotation marks. C:FolderName, for example, does not need them since FolderName is a single word. If the file was called Folder Name, the path would be C:”Folder Name” or “C:Folder Name.”
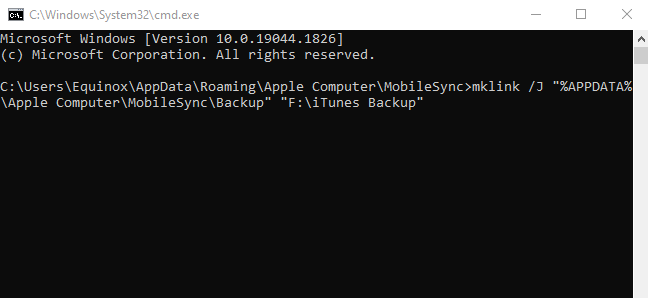
Enter the following command at the command line, assuming you’re in the MobileSync directory (change the F:iTunes Backup entry to link to your preferred backup path):
mklink /J "%APPDATA%\Apple Computer\MobileSync\Backup" "F:\iTunes Backup"
The “mklink” function generates a symbolic link in Windows, and the “/J” option produces a particular form of symbolic link known as a Directory Junction, which elegantly redirects any apps that query the original Backup directory to the iTunes Backup on the secondary drive.
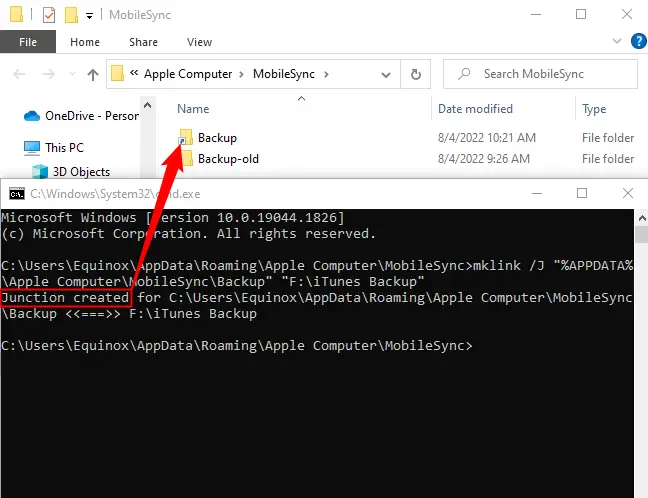
At this point, you should notice a Backup folder with a shortcut icon in the Mobile Sync folder. If you click on this folder, it will seem to open like any other folder (you will not appear to move to the secondary drive as you would with a standard shortcut), but everything you put in it will be physically saved on the secondary disk.
Check the Junction
If you can click on the link without getting an error, everything should be OK, but we’ll double-check just to be sure. While in the MobileSyncBackup directory (accessible through the newly formed symbolic link), right click and create a new text document as a temporary file holder. After you’ve created it, go to the backup directory you made on the secondary drive (in our example, F:iTunes Backup). The file should be visible in the directory. Once you’ve checked that the place holder file is in the secondary directory, delete it.
Start an iTunes backup
If you’re following along with this instructions to migrate the iTunes backup directory or another Windows program’s backup directory, the key test is whether the application performs as intended with the symbolic link in place. Let’s start it up and see what happens.
Visit the backup directory on the secondary drive after starting the backup process:
There is a completely new set of backup files made during our new backup. Success!
Make a copy of the original backup data.
We changed the Backup directory to Backup-Old at the start of the lesson. All of your previous iTunes backup files are stored in the Backup-Old directory. Now that we’ve successfully tested the symbolic link and completed a backup process, it’s time to relocate the backup data to its new location.
This transfer will take a bit longer than a conventional same disk-to-same disk transfer since Windows transfers the data across the symbolic link to the secondary drive. Once the copy is complete, you may validate that the data is secure on the secondary drive.
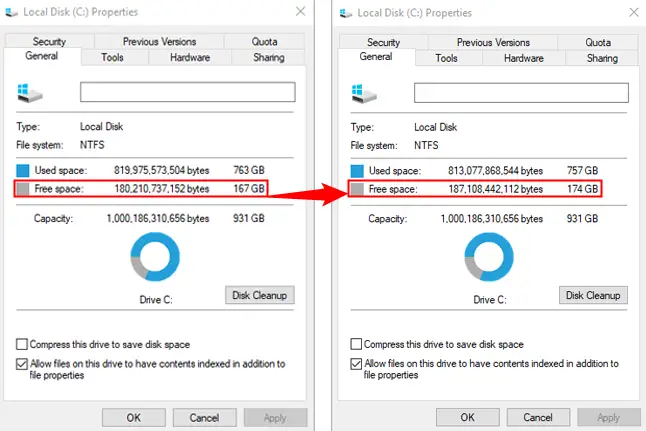
As seen in the picture above, after copying the iTunes backup directory, we saved up almost 7 GB of space on our main drive. From start to finish, the procedure took around 5 minutes, and our reward was more space on our main drive plus backup data saved on a secondary disk.