Introduction
Apple’s “Shared Albums” feature allows you to share photos with your friends and family in a unique way. Shared Albums, as the name implies, is where you host photos that you wish to share with your friends and family. Everyone may not only browse the information you share, but also add photos from their own devices to share with others.
If you use Shared Albums on your iPhone but don’t find it useful, the page below should help you disable it and explain what happens when you do.
How to Turn Off Shared Albums on iPhone
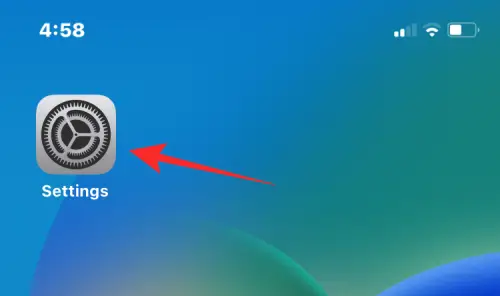
You may disable Shared Albums on your iPhone if you no longer wish to use or see them. To do so, use the Settings app on your iPhone.

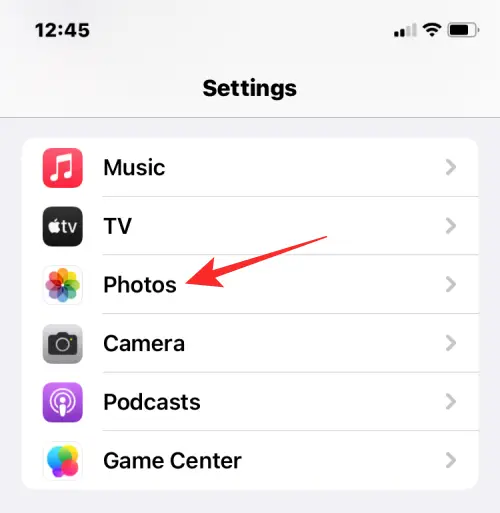
Select Photos inside Settings.

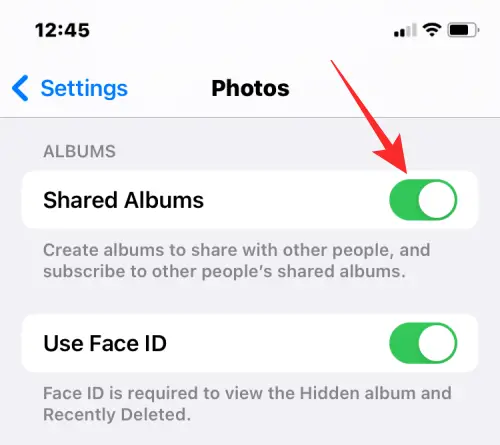
Scroll down to the “Albums” section and deactivate the Shared Albums option.

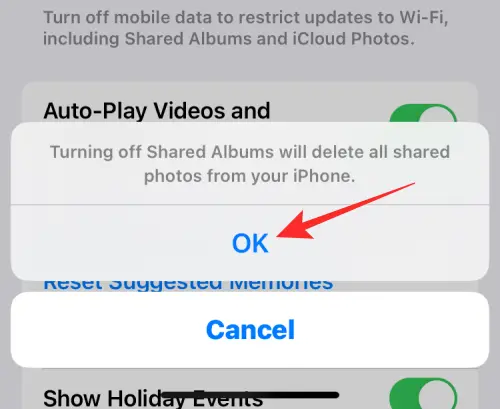
A popup will appear informing you that this action will remove all shared photographs from your iPhone. Tap OK to confirm.

Your device’s Shared Albums will now be deactivated.
What happens if you turn off Shared Albums in iOS Settings?
When you disable Shared Albums in the iOS Settings app, the Shared Albums section will be removed from the Albums tab within the Photos app. Your iPhone will no longer have access to:
- Albums that you’ve made and shared with others.
- Albums made by others and shared with you.
This will also delete all of the photographs shared within an album from this device. Because the Shared Albums toggle is device-specific, you’re effectively turning off Shared Albums on your iPhone.
All of your other Apple devices will still be able to view the albums you’ve shared or been invited to. This implies that you may enable Shared Albums on some devices that are signed into your iCloud account while disabling it on others.
Disabling Shared Albums therefore does not erase any content from these albums, but just disables the iPhone functionality when you switched off Shared Albums. If you want to cease sharing the material of a shared album with someone, you must either delete the shared album from your library or remove the person from the shared album.
When you disable your Shared Albums, can others access them?
Yes. When you disable Shared Albums, just one of your devices will see these albums. When you disable Shared Albums from the iOS Settings app, all of the content that is presently within the Shared Albums you created or are a part of will remain the same. Subscribers to your shared album or others you invited to see their album will notice no difference since Shared Albums is only deactivated on the iPhone you used to turn it off.
Photos shared in a shared album by you and others will stay for as long as the images are not deleted or the album is not deleted by the author. Disabling a Shared Album, unlike removing it, simply disables its visibility on one of the user’s devices.
iOS will only delete the Shared Album material from the device on which the feature was deactivated. You will still be able to view this content on other devices that have Shared Albums enabled, such as a Mac, an iPad, or another iPhone.
Can you get to it again if you re-enable Shared Albums?
Yes. As previously stated, your Shared Albums will remain accessible even if you disable the functionality on one of your devices. Even if you block the option on one device, you will be able to access and read any material inside albums that you shared or that were shared with you on any other Apple device that is logged in with the same iCloud account.
When you re-enable Shared Albums on the device you disabled it on, the Shared Albums section should appear immediately inside the Albums tab on Photos. Depending on the quantity of photographs transferred, it may take some time for all of the photos to reappear inside the albums, but they will finally emerge when they are fully synchronized.
That’s all there is to disable Shared Albums on an iPhone.

